A leaky faucet or clogged drain can be a real nuisance, wasting water and causing inconvenience. Imagine being able to fix these issues yourself, saving time and money. By acquiring basic plumbing DIY tips, you can tackle common household emergencies and reduce your reliance on professional services.
Learning to perform simple plumbing repairs can be empowering, allowing you to handle unexpected issues and maintain your home’s infrastructure. In this article, we will provide you with step-by-step instructions on how to fix common plumbing issues, such as leaky faucets and clogged drains. For more complex issues, you can always rely on plumbing experts for trusted repairs.
Key Takeaways
- Learn basic plumbing skills to handle household emergencies
- Fix leaky faucets and clogged drains with ease
- Understand the importance of turning off the water supply before starting repairs
- Use the right tools, such as adjustable wrenches and pipe wrenches, for DIY plumbing repairs
- Take safety precautions, including wearing protective gear, when performing plumbing repairs
Introduction to DIY Plumbing Repairs
Understanding the basics of plumbing is crucial for DIY enthusiasts looking to save money and fix issues around the house. With the right knowledge, homeowners can tackle common plumbing problems, reducing the need for professional interventions.
Importance of Understanding Basic Plumbing Skills
Having a grasp of basic plumbing skills is essential for any homeowner. It not only helps in identifying potential issues before they become major problems but also empowers individuals to perform simple repairs. Basic plumbing skills include understanding how to turn off the main water supply, using a plunger, and identifying the different types of pipes and fixtures.
By mastering these skills, homeowners can prevent minor issues from escalating into costly repairs. For instance, knowing how to fix a leaky faucet or unclog a drain can save a significant amount of money that would otherwise be spent on hiring a plumber.
Benefits of DIY Repairs
DIY plumbing repairs offer several benefits, including cost savings, the convenience of being able to fix issues at any time, and the satisfaction of having done the repair oneself. Moreover, DIY repairs can be a learning experience, helping homeowners understand their plumbing system better.
- Cost savings on labor costs
- Convenience of fixing issues at any time
- Personal satisfaction from completing the repair
- Opportunity to learn about the plumbing system
When to Call a Professional
While DIY repairs are beneficial, there are situations where it’s advisable to call a professional plumber. If the repair involves complex tasks such as replacing a water heater, dealing with gas lines, or fixing a main water line, it’s best to seek professional help.
Additionally, if a DIY repair doesn’t fix the issue, or if the problem recurs, it’s a sign that professional intervention is needed. Understanding when to call a professional is as important as knowing how to perform DIY repairs.
Essential Tools for DIY Plumbing

Embarking on DIY plumbing projects requires a well-stocked toolkit to tackle common repairs and maintenance tasks effectively. Having the right tools not only makes the job easier but also ensures that repairs are done correctly and safely.
Must-Have Tools for Common Repairs
For most DIY plumbing tasks, you’ll need a basic set of tools. These include a plunger for unclogging drains, an adjustable wrench for loosening and tightening various pipe fittings, and a pipe wrench for gripping and twisting pipes. Additionally, a drain snake (auger) is handy for more stubborn clogs, while Teflon tape is essential for creating watertight seals on threaded pipe connections.
Other essential tools include a basin wrench for reaching and adjusting faucet mounting nuts, and needle-nose pliers for gripping small objects in tight spaces. For more complex tasks, consider investing in a pipe cutter for cutting pipes cleanly, and a tubing bender for bending copper or PEX tubing without kinking it.
Safety Equipment and Precautions
Safety should always be a top priority when undertaking DIY plumbing projects. Essential safety equipment includes safety glasses to protect your eyes from debris, gloves to prevent cuts and abrasions, and a first aid kit on hand for minor injuries. It’s also a good idea to have a fire extinguisher nearby, especially when working with soldering or brazing equipment.
To ensure your safety, always turn off the water supply before starting work on a plumbing project. Familiarize yourself with the location of your home’s main shut-off valve, and know how to use it. When working in cramped or poorly ventilated spaces, consider using a respirator to avoid inhaling fumes or dust.
Tool Maintenance Tips
Proper maintenance of your plumbing tools is crucial for their longevity and effectiveness. Regularly clean your tools to prevent rust and corrosion, and store them in a dry, organized manner. For wrenches and other metal tools, apply a light coat of oil to prevent rust.
Periodically inspect your tools for signs of wear or damage. Replace any worn or damaged parts to ensure your tools continue to perform well. For example, if your pipe wrench’s jaw is worn, it may slip off pipes, causing damage or injury.
| Tool | Purpose | Maintenance Tip |
|---|---|---|
| Plunger | Unclogging drains | Clean after use, store in dry area |
| Adjustable Wrench | Loosening/Tightening pipe fittings | Apply light oil to prevent rust |
| Drain Snake | Clearing stubborn clogs | Clean and dry after use |
For more information on the best plumbing tools, you can visit Home Depot’s guide or explore resources on top plumbing tools and pipes for DIY.
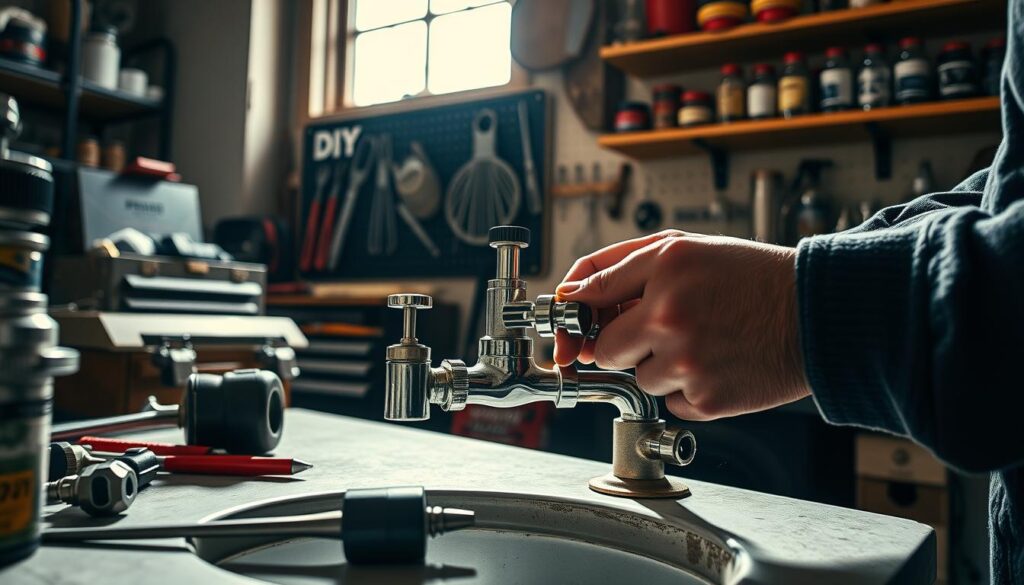
Fixing a Leaky Faucet
Leaky faucets are a common household issue that can be easily resolved with the right tools and a bit of know-how. Not only can a leaky faucet be annoying, but it can also lead to wasted water and higher utility bills.
Identifying the Source of the Leak
The first step in fixing a leaky faucet is to identify the source of the leak. Common areas where leaks occur include the faucet’s handle, spout, and drain. To diagnose the issue, turn on the faucet and observe where the water is coming from.
- Check the faucet’s handle for signs of wear or mineral buildup.
- Inspect the spout and aerator for any blockages or corrosion.
- Examine the drain and its connections for leaks.
Required Tools and Materials
Once you’ve identified the source of the leak, gather the necessary tools and materials. These may include:
- Adjustable wrench or basin wrench
- Channel-type pliers (for removing old O-rings or gaskets)
- Replacement parts (O-rings, gaskets, or valve seats)
- Teflon tape (for threaded connections)
Tip: It’s a good idea to have a container or towel handy to catch any water that may spill during the repair.
Step-by-Step Repair Instructions
With your tools and materials ready, follow these steps to fix your leaky faucet:
- Turn off the water supply to the faucet by locating the shut-off valves under the sink and turning them clockwise.
- Disassemble the faucet to access the leaky component. This may involve removing the handle or knob.
- Inspect the affected area and replace any worn-out parts. For example, if the leak is coming from the handle, you may need to replace the O-ring or gasket.
- Reassemble the faucet in the reverse order that you disassembled it.
- Turn on the water supply and check the faucet for leaks.
By following these simple steps, you can fix a leaky faucet and save water and money. Remember, if you’re not comfortable with DIY repairs or if the leak persists after your attempts to fix it, consider consulting a professional plumber.
Unclogging Drains

Clogged drains are not just a nuisance; they can lead to more serious plumbing issues if not addressed promptly. Understanding the causes of clogs and knowing how to clear them is essential for any homeowner.
Common Causes of Clogs
Clogs are often caused by the accumulation of hair, soap scum, grease, and other debris that get washed down the drain. In kitchen sinks, food particles and grease are common culprits, while in bathrooms, hair and soap residue are usually to blame. Regular maintenance can help prevent these issues, but when clogs do occur, it’s essential to address them quickly.
Tools and Methods for Unclogging
Several tools can help you unclog a drain. The most common include plungers, drain snakes (also known as augers), and chemical drain cleaners. For more stubborn clogs, a plumber’s auger can be particularly effective. It’s also worth noting that there are eco-friendly alternatives to chemical drain cleaners, such as baking soda and vinegar, which can be just as effective without the harsh chemicals.
Step-by-Step Process for Clearing a Clog
To clear a clog, start by using a plunger to create suction on the clog. If this doesn’t work, try using a drain snake to break up the blockage. For a more natural approach, pour baking soda down the drain, followed by vinegar, and let it sit before rinsing with hot water. For detailed instructions and more tips, you can visit this resource on easy ways to clear a drain clog.
By understanding the causes of clogs and having the right tools and methods at your disposal, you can tackle most drain clogs effectively. Regular plumbing DIY tips can also help prevent future issues, making your home’s plumbing system more efficient and less prone to problems.
Repairing Running Toilets
One of the most common plumbing issues homeowners face is a running toilet, which can be fixed with simple repairs. A running toilet can waste a significant amount of water, leading to higher water bills. Fortunately, diagnosing and fixing the issue is a straightforward process that can be done with basic DIY skills.
Identifying the Problem
The first step in fixing a running toilet is to identify the cause. Common issues include a worn-out or misaligned flapper, improper water level, or a faulty fill valve. To diagnose the problem, start by checking the flapper and the water level in the tank. If the flapper is not sealing properly, water will continue to flow into the toilet bowl.
Tools Needed for the Repair
Depending on the issue, you may need a few basic tools to fix your running toilet. Common tools include an adjustable wrench, a pair of needle-nose pliers, and a new flapper or fill valve if the existing ones are damaged. For more complex issues, additional tools might be required.
Step-by-Step Instructions for Fixing a Toilet
Here’s a step-by-step guide to fixing a running toilet:
- Turn off the water supply to the toilet by locating the shut-off valve behind the toilet and turning it clockwise.
- Check the flapper for any signs of wear or misalignment. If necessary, replace it with a new one.
- Adjust the water level in the tank to ensure it’s not too high, causing water to flow into the overflow tube.
- If the fill valve is faulty, consider replacing it. For detailed instructions, you can visit Home Depot’s guide on fixing a running.
By following these steps, you can fix a running toilet and save water. Regular maintenance can also help prevent future issues.
| Common Issues | Solutions |
|---|---|
| Worn-out or misaligned flapper | Replace or adjust the flapper |
| Improper water level | Adjust the water level in the tank |
| Faulty fill valve | Replace the fill valve |
Replacing Toilet Flappers

Toilet flappers are a crucial component of your toilet’s operation, and knowing how to replace them is a valuable DIY skill. A faulty flapper can lead to continuous running water, wasting water and increasing your utility bills.
Signs of a Worn Flapper
A worn-out flapper can manifest in several ways. Common signs include:
- Continuous running water into the toilet bowl
- Water leaking into the bowl even when the toilet isn’t being used
- Difficulty in flushing the toilet properly
If you notice any of these signs, it’s likely time to replace your toilet flapper. For more information on diagnosing toilet issues, you can visit Home Depot’s guide on fixing a leaky toilet.
Choosing the Right Replacement
Selecting the correct replacement flapper is crucial for a successful repair. Here are some factors to consider:
| Factor | Description |
|---|---|
| Size | Ensure the new flapper is the right size for your toilet tank. |
| Material | Choose a flapper made from durable, water-resistant materials. |
| Compatibility | Check that the flapper is compatible with your toilet model. |
Step-by-Step Replacement Guide
Replacing a toilet flapper is a straightforward process that requires minimal tools. Here’s a step-by-step guide:
- Turn off the water supply to the toilet by locating the shut-off valve behind the toilet and turning it clockwise.
- Drain the tank by flushing the toilet.
- Disconnect the chain from the flush lever.
- Remove the old flapper by sliding it off the pegs or unscrewing it, depending on the type.
- Install the new flapper, ensuring it’s properly seated and aligned.
- Reconnect the chain to the flush lever, adjusting the length as necessary.
- Turn the water supply back on and test the toilet.
By following these steps, you can successfully replace your toilet flapper, saving water and reducing your utility bills. For more DIY plumbing tips and tutorials, continue reading our guide.
Fixing Broken Pipes
Broken pipes can lead to significant issues if not addressed promptly, making it essential to understand how to repair them. Whether it’s a minor leak or a major rupture, knowing how to fix a broken pipe can save you from costly water damage and plumbing bills.
Identifying Pipe Damage
The first step in fixing a broken pipe is identifying the damage. Look for signs such as water leaks, reduced water pressure, or visible pipe corrosion. Common areas to inspect include under sinks, around toilets, and near water heaters. If you’re unsure where the damage is, you may need to conduct a more thorough inspection or use a pipe inspection camera for a detailed view.
Temporary vs. Permanent Repairs
When it comes to fixing broken pipes, you have two main options: temporary and permanent repairs. Temporary fixes are useful for emergencies, allowing you to stop the leak until a more permanent solution can be implemented. Common temporary repair methods include using pipe clamps or epoxy to seal the leak.
- Pipe clamps can be used to tighten around the damaged area, stopping the leak.
- Epoxy-based products can be applied to seal cracks and holes.
Step-by-Step Guide to Pipe Repair
For a more lasting solution, a permanent repair is necessary. Here’s a step-by-step guide:
- Turn off the main water supply to prevent further damage.
- Drain the system by opening the lowest drain valve or faucet.
- Remove the damaged section of the pipe using a pipe cutter.
- Clean the ends of the remaining pipe to ensure a good seal.
- Apply pipe glue or solder to connect the new pipe section.
- Test the repair by turning on the water supply and checking for leaks.
By following these steps and understanding when to use temporary versus permanent repairs, you can effectively fix broken pipes and prevent future plumbing issues.
Installing a New Faucet

With the right guidance, installing a new faucet can be a simple and rewarding DIY task. This process involves several key steps, from selecting the appropriate faucet to completing the installation.
Choosing the Right Faucet
Selecting the right faucet is crucial for a successful installation. Consider factors such as the sink’s configuration, your personal style preferences, and the faucet’s functionality. Ensure the faucet is compatible with your sink to avoid any installation issues.
- Consider the faucet’s finish and how it matches your other kitchen or bathroom fixtures.
- Think about the type of faucet you need: single-handle, double-handle, or touchless.
- Check the faucet’s water efficiency features, such as low-flow aerators.
Tools Needed for Installation
Having the right tools on hand is essential for a smooth installation process. Some of the key tools required include:
- Adjustable wrench or basin wrench
- Channel-type pliers (for removing old faucet)
- Needle-nose pliers
- Teflon tape
For a comprehensive list and detailed instructions, you can refer to Lowe’s guide on installing a kitchen.
Step-by-Step Installation Instructions
Follow these steps to install your new faucet:
- Shut off the water supply to the faucet.
- Disconnect the water supply lines from the old faucet.
- Remove the old faucet, taking care not to damage the sink.
- Install the new faucet according to the manufacturer’s instructions.
- Reconnect the water supply lines and turn on the water supply.
- Test the faucet for leaks.
By following these steps and choosing the right faucet, you can successfully complete this beginner-friendly plumbing project. Remember, if you’re unsure about any part of the process, it’s always a good idea to consult a professional.
Dealing with Home Water Pressure Issues
Understanding and addressing water pressure issues is crucial for a comfortable living experience. Home water pressure that is too low or too high can lead to various problems, including poor appliance performance and potential damage to plumbing systems.
Signs of Low Water Pressure
Identifying the signs of low water pressure is the first step towards resolving the issue. Common indicators include:
- Weak water flow from faucets and showerheads
- Slow-filling toilets
- Appliances taking longer than usual to complete cycles
These signs suggest that there might be an underlying issue affecting your home’s water pressure.
Potential Causes and Solutions
Several factors can contribute to low water pressure. Understanding these causes is essential for applying the correct solution.
| Cause | Solution |
|---|---|
| Clogged aerators or mineral buildup | Clean or replace aerators, descale affected areas |
| Leaks in the plumbing system | Inspect and repair leaks |
| Poor municipal water supply | Contact local water utility for assistance |
Addressing these potential causes can help restore optimal water pressure in your home.
Step-by-Step Guide to Troubleshooting Pressure
Troubleshooting water pressure issues involves a systematic approach. Here’s a step-by-step guide:
- Check for visible leaks under sinks and around appliances.
- Inspect aerators and clean or replace them if necessary.
- Test water pressure using a pressure gauge.
- Consult with a professional if the issue persists.
By following these steps, homeowners can identify and potentially resolve water pressure issues.
Dealing with home water pressure issues requires patience and a systematic approach. By understanding the signs, causes, and solutions, homeowners can take the first step towards resolving these issues and ensuring a comfortable living environment.
Simple Solutions for Water Heater Problems

Many homeowners face issues with their water heaters, but simple solutions can often resolve these problems. Water heater malfunctions can range from minor annoyances to significant issues, but understanding how to address them can save time and money.
Identifying Common Water Heater Issues
Common problems with water heaters include leaks, inadequate hot water, and strange noises. Leaks can occur due to loose connections or corroded tanks, while inadequate hot water might be due to a faulty thermostat or heating element. Strange noises often indicate sediment buildup at the bottom of the tank.
To diagnose these issues, homeowners can follow a simple checklist:
- Check the power source and thermostat settings.
- Inspect the tank and connections for signs of leaks.
- Listen for unusual noises coming from the tank.
Basic Maintenance Tips for Longevity
Regular maintenance is key to extending the life of your water heater. This includes:
- Checking the anode rod periodically and replacing it when necessary.
- Flushing the tank annually to remove sediment.
- Inspecting the temperature and pressure relief valve to ensure it’s functioning correctly.
By following these maintenance tips, homeowners can significantly reduce the likelihood of major issues arising with their water heaters.
Step-by-Step Instructions for Minor Repairs
For minor issues, such as a faulty thermostat or a leaky temperature and pressure relief valve, DIY repairs can be straightforward. Here’s a simple table outlining the steps for these repairs:
| Issue | Steps to Repair |
|---|---|
| Faulty Thermostat | 1. Turn off the power. 2. Remove the thermostat cover. 3. Check and replace the thermostat if necessary. |
| Leaky T&P Valve | 1. Turn off the power and water supply. 2. Drain some water from the tank. 3. Replace the valve if it’s leaking. |
For more complex issues or if you’re unsure about how to proceed, it’s always best to consult a professional plumber.
Repairing Leaks in Water Supply Lines
Fixing leaks in water supply lines is a straightforward process that requires the right tools and knowledge. Leaks can lead to significant water waste and potentially damage your home if not addressed promptly.
Diagnosing the Source of the Leak
The first step in repairing a leak is to identify its source. Check your water supply lines for signs of moisture or water droplets. Common areas where leaks occur include connections to appliances, valves, and fittings.
Common signs of a leak include:
- Water droplets or puddles near supply lines
- Increased water bills without a corresponding increase in usage
- Warped or damaged flooring and walls near supply lines
Tools and Materials for the Job
To repair a leak, you’ll need a few basic tools and materials. These may include:
- Adjustable wrench or basin wrench
- Teflon tape
- Pipe cutter (if replacing a section of pipe)
- Replacement fittings or valves (if necessary)
| Tool/Material | Purpose |
|---|---|
| Adjustable Wrench | Tightening or loosening fittings |
| Teflon Tape | Sealing threaded connections |
| Pipe Cutter | Cutting damaged pipes for replacement |
Step-by-Step Repair Process
Once you’ve identified the leak and gathered your tools, follow these steps:
- Turn off the main water supply to prevent further leakage.
- Drain the system by opening the lowest faucet in your home.
- Tighten any loose connections. If the leak persists, consider replacing the faulty fitting or valve.
- Apply Teflon tape to threaded connections to ensure a watertight seal.
- If a section of pipe is damaged, cut it out and replace it with a new section, securing it with appropriate fittings.
“A simple leak repair can save homeowners from costly damages and waste. It’s a DIY task that requires patience and the right tools.”
By following these steps, you can effectively repair leaks in your water supply lines, saving water and preventing potential damage to your home.
Addressing Sump Pump Issues

Understanding your sump pump’s operation and being able to address common problems can save homeowners from the headache of water damage.
Understanding Your Sump Pump
A sump pump is a critical device for homes in flood-prone areas or with basements. It works by collecting water in a sump pit and pumping it away from the house. Regular maintenance is key to ensuring it functions correctly when needed.
Key Components of a Sump Pump System:
- Sump Pit: Collects water
- Pump: Removes water from the pit
- Discharge Pipe: Directs water away from the house
- Check Valve: Prevents backflow into the pit
Common Sump Pump Problems
Sump pumps can fail due to various reasons, including power outages, clogged intake screens, or worn-out parts. Recognizing these issues early can prevent more significant problems.
| Problem | Cause | Solution |
|---|---|---|
| Pump won’t turn on | Power outage or faulty switch | Check power supply and switch |
| Pump runs but doesn’t pump water | Clogged intake or discharge pipe | Clear clogs and check for blockages |
| Frequent cycling | Float stuck or wrong size pump | Adjust or replace float; check pump size |
Step-by-Step Troubleshooting Guide
Troubleshooting your sump pump involves checking the power supply, inspecting the pump and its components, and testing the float mechanism.
- Check the power supply: Ensure the pump is receiving power.
- Inspect the pump: Look for signs of wear or damage.
- Test the float: Ensure it moves freely and activates the pump.
- Clear clogs: Check the intake screen and discharge pipe for blockages.
“A well-maintained sump pump is your first line of defense against basement flooding,” says a plumbing expert. Regular checks can identify potential issues before they become major problems.
Maintaining Plumbing Systems
Maintaining your plumbing system is vital for preventing costly repairs. Regular maintenance not only extends the lifespan of your plumbing fixtures and pipes but also ensures that your system operates efficiently.
Importance of Regular Maintenance
Regular maintenance is the cornerstone of a healthy plumbing system. It helps in identifying potential issues before they become major problems. By doing so, you can avoid the inconvenience and expense of emergency repairs. For more detailed tips, you can refer to resources like 10 Tips for Maintaining Your Plumbing.
Early detection of leaks and other issues can save you a significant amount of money. Regular checks can help you identify worn-out parts that need replacement, thus preventing further damage.
Seasonal Plumbing Checklist
Different seasons bring different challenges for your plumbing system. Here’s a basic seasonal checklist to keep your system in top condition:
- Inspect your outdoor faucets for leaks or damage.
- Check your water heater for signs of wear and tear.
- Clear your gutters to prevent water backup.
- Inspect your sump pump to ensure it’s working correctly.
Tips for Prolonging Plumbing Lifespan
In addition to regular maintenance, there are several practices you can adopt to prolong the lifespan of your plumbing system. These include being mindful of what you flush down your drains, avoiding the use of harsh chemicals, and ensuring that your water pressure is at a safe level.
Proper care of your plumbing system can significantly reduce the need for repairs. By following these simple tips, you can ensure that your plumbing system remains in good condition for years to come.
Conclusion: Reducing Plumbing Costs as a DIYer
Mastering simple plumbing repairs can significantly reduce household expenses and enhance your DIY skills. By following the step-by-step instructions outlined in this article, you can tackle common plumbing issues with confidence.
Benefits of Acquiring Plumbing Skills
Learning plumbing DIY tips and simple repairs empowers homeowners to address issues promptly, reducing the likelihood of costly damages. With the right tools and knowledge, DIYers can perform simple plumbing repairs, saving money on labor costs.
Knowing When to Seek Professional Assistance
While DIY plumbing repairs can be cost-effective, it’s essential to recognize when a problem requires professional expertise. Complex issues or those beyond your comfort level should be handled by a licensed plumber to avoid further damage or safety risks.
Empowering Homeowners through Knowledge
By understanding simple plumbing repairs for diyers with step-by-step instructions, homeowners can take control of their plumbing systems. This knowledge enables DIYers to maintain their plumbing systems effectively, reducing the need for costly professional interventions.