Imagine being able to fix a leaky faucet or unclog a drain without calling a professional, saving you money and giving you a sense of accomplishment. DIY plumbing projects are not only cost-effective but also a great way to gain hands-on experience.
Learning basic plumbing tips can help you tackle common household issues. With simple tools and skills, you can make a significant difference in your home’s maintenance.
Key Takeaways
- Save money by doing DIY plumbing repairs
- Gain hands-on experience with basic plumbing tools
- Learn to fix common household plumbing issues
- Improve your home’s maintenance with simple fixes
- Enhance your DIY skills with beginner plumbing tips
Understanding Basic Plumbing Concepts
Homeownership comes with its challenges, and plumbing issues are among the most common problems you’ll face. Being a homeowner has a lot of responsibilities, and there can be a lot of little things that go wrong. Plumbing issues are a very common thing to experience in homeownership.
To tackle these issues effectively, it’s essential to start with the basics. Understanding the fundamentals of plumbing can make a significant difference in how you handle repairs and maintenance.
What is Plumbing?
Plumbing refers to the system of pipes, fixtures, and appliances that are installed in a home for the distribution of water and gas, and for the removal of waste. It’s a complex network that requires regular maintenance to function properly. For those new to plumbing, it’s helpful to know that the system is designed to supply clean water and remove waste efficiently.
Key Components of a Plumbing System
A typical plumbing system consists of several key components. These include:
- Pipes: These are the channels through which water and gas flow. Pipes can be made from various materials, including copper, PVC, and PEX.
- Fixtures: Sinks, toilets, and faucets are examples of fixtures that are connected to the plumbing system.
- Appliances: Water heaters and garbage disposals are considered appliances that are part of the plumbing system.
- Valves: These control the flow of water and gas throughout the system.
For plumbing experts and trusted repairs, it’s crucial to understand these components and how they work together. By grasping these basic concepts, homeowners can perform simple repairs and maintenance tasks, potentially saving money and reducing the need for professional interventions.
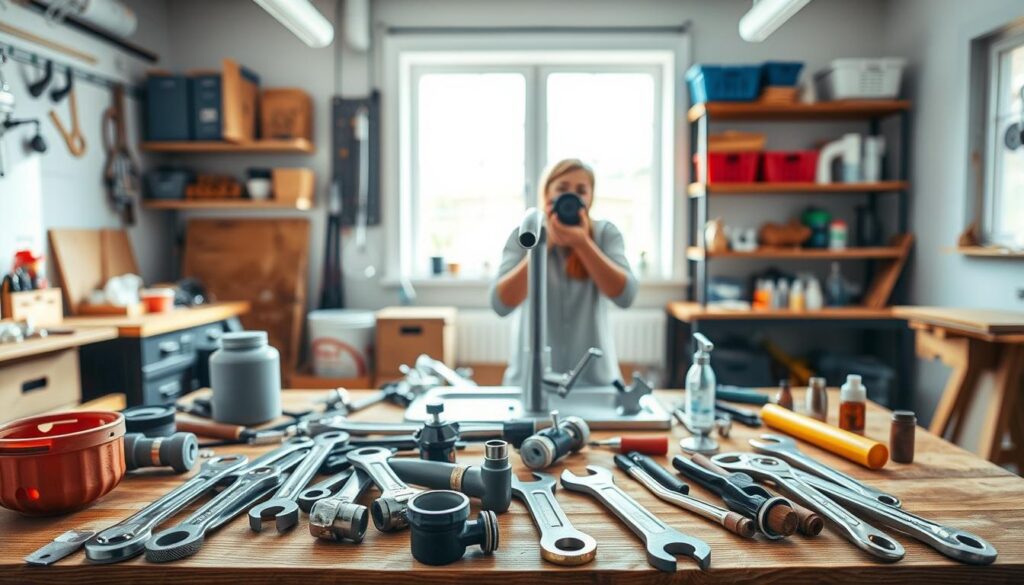
Essential Tools for Simple Repairs

For those new to do-it-yourself plumbing, understanding the basic tools required is the first step towards making beginner-friendly plumbing fixes. Having the right equipment not only makes the job easier but also ensures that repairs are done correctly and safely.
Basic Hand Tools Every Beginner Needs
Before diving into any DIY plumbing project, it’s crucial to have a set of basic hand tools. These include:
- Pliers and wrenches for gripping and twisting pipes and fittings.
- Teflon tape for creating watertight seals on threaded pipe connections.
- A pipe cutter for cutting through pipes cleanly.
- A plunger for unclogging drains.
Additionally, wearing protective gear such as gloves and safety glasses is highly recommended to protect against potential hazards.
Plumbing-Specific Tools to Consider
As you become more comfortable with DIY plumbing projects, you may find it useful to invest in some plumbing-specific tools. These can include:
- A plumber’s snake (auger) for clearing clogs deeper in the drain system.
- A pipe wrench for gripping and twisting pipes, especially useful for older or corroded pipes.
- A faucet repair kit for fixing leaky faucets.
For more information on the best tools for plumbing jobs, you can visit ServiceTitan’s blog on the best plumbing or World Civil Society’s guide to top plumbing tools and pipes for DIY. These resources can provide valuable insights into selecting the right tools for your DIY plumbing projects.
Common Plumbing Issues You Can Fix
Understanding how to fix common plumbing issues is a valuable skill for any homeowner. Many common problems, such as dripping faucets, running toilets, and clogged drains, can be resolved with simple DIY fixes.
Dripping Faucets
A dripping faucet is not only annoying, but it can also waste a significant amount of water. The most common cause is a worn-out or damaged O-ring or cartridge. Replacing these parts is a relatively simple task that can be done with basic tools.
Running Toilets
A running toilet can be a significant source of water waste. The issue is often due to a faulty flapper or an improperly adjusted float. Adjusting or replacing these components can usually resolve the problem. For more information on fixing a running toilet, you can visit https://www.architecturaldigest.com/story/plumbing-problems for additional tips.
Clogged Drains
Clogged drains are a common issue that can be caused by hair, soap, and other debris. Using a plunger or a drain snake can often clear the blockage. For more stubborn clogs, a chemical-free solution like baking soda and vinegar can be effective.
| Issue | Common Cause | Simple Fix |
|---|---|---|
| Dripping Faucet | Worn-out O-ring or cartridge | Replace O-ring or cartridge |
| Running Toilet | Faulty flapper or float issue | Adjust or replace flapper or float |
| Clogged Drain | Hair, soap, and debris buildup | Use plunger, drain snake, or baking soda and vinegar |
By addressing these common plumbing issues, homeowners can save water, reduce their utility bills, and prevent more significant problems from arising. With these simple plumbing repairs for beginners, you can tackle many common issues with confidence.
How to Fix a Dripping Faucet

Learning how to fix a dripping faucet is a valuable skill for any homeowner looking to tackle basic plumbing repairs. A dripping faucet can waste a significant amount of water, leading to higher utility bills and unnecessary stress on your plumbing system. Fortunately, with the right tools and a bit of knowledge, you can fix a dripping faucet yourself.
Identifying the Source of the Leak
The first step in fixing a dripping faucet is to identify the source of the leak. Typically, the issue lies within the faucet’s handle or the spout. To diagnose the problem, you’ll need to disassemble the faucet. Start by turning off the water supply to the faucet. You can usually find the shut-off valves under the sink. Once the water supply is off, you can begin to take apart the faucet.
Check the rubber washers and O-rings for signs of wear or damage. These components are common culprits when it comes to leaks. If you find any damaged parts, you’ll need to replace them. For more complex faucet designs, you might need to consult the manufacturer’s instructions or seek additional guidance.
Step-by-Step Repair Instructions
For a standard faucet, the repair process involves several key steps. First, remove the handle to access the cartridge or stem inside. This usually involves unscrewing a small screw or clip. Once you have access to the internal components, inspect them for damage or mineral buildup.
- Remove any mineral deposits using a vinegar solution or a descaling product.
- Replace worn-out O-rings or washers with new ones.
- Reassemble the faucet in the reverse order that you disassembled it.
For detailed instructions and specific guidance tailored to your faucet model, you can visit Home Depot’s guide on fixing a leaky. This resource provides comprehensive advice and can help you troubleshoot common issues.
As “A stitch in time saves nine,” addressing a dripping faucet promptly can prevent more significant problems down the line. By following these steps, you can save water, reduce your utility bills, and gain a sense of accomplishment from completing a DIY plumbing project.
Dealing with a Running Toilet
If your toilet keeps running, it’s likely due to a simple issue that can be fixed with basic plumbing knowledge. A running toilet not only wastes water but also increases your utility bills. Fortunately, resolving this issue is often a straightforward process.
Diagnosing the Problem
The first step in fixing a running toilet is to identify the cause. Common issues include a faulty flapper, an improperly adjusted float, or a clogged overflow tube. To diagnose the problem, start by removing the tank lid and inspecting the internal mechanisms.
Common Causes:
- A worn-out or misaligned flapper that doesn’t seal properly
- A float that’s set too high, causing water to continuously flow into the overflow tube
- Debris or mineral buildup on the flapper or valve seat
Simple Fixes for a Running Toilet
Once you’ve identified the cause, you can proceed with the necessary repairs. Here are some simple fixes:
- Adjusting the Float: If the float is set too high, lower it to the correct water level.
- Replacing the Flapper: If the flapper is damaged or not sealing correctly, replace it with a new one.
- Cleaning the Overflow Tube: Clear any debris or mineral buildup from the overflow tube.
For more complex issues or if you’re not comfortable with DIY repairs, consider consulting a professional plumber. Here’s a summary of the common fixes and their effectiveness:
| Fix | Effectiveness | Complexity |
|---|---|---|
| Adjusting the Float | High | Low |
| Replacing the Flapper | High | Medium |
| Cleaning the Overflow Tube | Medium | Low |
By following these steps, you can resolve the issue of a running toilet and save water. For beginner-friendly plumbing fixes, it’s essential to be patient and methodical in your approach.
Clearing Clogged Drains

Clearing clogged drains is a task that can be accomplished with the right tools and a bit of know-how, making it a simple plumbing repair for beginners. Clogged drains can be a nuisance, but understanding how to address them can save time and money.
Tools and Techniques for Unclogging
To unclog a drain, one of the first methods to try is pouring boiling water down the drain to loosen any debris. If this doesn’t work, using a plumber’s snake can be an effective way to clear the blockage. For more stubborn clogs, a plunger or a chemical drain cleaner might be necessary.
- Boiling water: Effective for minor clogs and grease buildup.
- Plumber’s snake: Useful for navigating and clearing blockages deep within the pipes.
- Plunger: Creates suction to dislodge clogs.
- Chemical drain cleaners: Can dissolve tough blockages but should be used with caution.
Preventative Measures to Avoid Clogs
Preventing clogs is as important as knowing how to clear them. Regular maintenance can significantly reduce the occurrence of clogged drains. For emergency plumbing services, it’s beneficial to have a professional on hand.
- Regularly clean your drains with boiling water or a natural cleaner.
- Avoid pouring grease or oil down the drain.
- Use a drain screen to catch hair and other particles.
By adopting these easy plumbing fixes and being mindful of what goes down your drains, you can minimize the risk of clogs and ensure your plumbing system runs smoothly. For more complex issues or if you’re unsure about how to proceed, consider seeking quick plumbing solutions from a professional.
Fixing Leaky Pipes
Understanding how to fix leaky pipes is an essential part of basic plumbing repairs. Leaky pipes can lead to water damage, mold growth, and increased water bills. As a beginner, it’s crucial to know how to identify and fix leaks effectively.
Before diving into repairs, it’s essential to understand the type of pipes you’re dealing with. Different materials have different repair methods.
Understanding Pipe Materials
Pipes in your home can be made from various materials, including copper, PVC, PEX, and galvanized steel. Each material has its characteristics and repair requirements. For instance, copper pipes are durable and can be soldered, while PVC pipes are easier to cut and glue.
When fixing leaky pipes, identifying the pipe material is crucial. As “a good plumber knows their tools and materials” (John Doe, Master Plumber). Knowing whether your pipes are copper, PVC, or another material will guide your repair approach.
Temporary vs. Permanent Solutions
When dealing with a leaky pipe, you have the option of applying a temporary fix or going for a permanent solution. Temporary fixes, such as using epoxy or pipe clamps, can stop the leak immediately but may not last long. On the other hand, permanent solutions involve replacing the damaged section of the pipe or soldering it, providing a long-term fix.
For example, fixing a leak from a temperature and pressure relief valve or a water heater drain valve involves checking the temperature settings and looking for mineral deposits. Adjusting the temperature or cleaning out mineral buildup can often resolve the issue.
As a beginner, starting with temporary fixes can be a good way to manage emergencies. However, it’s always best to follow up with a permanent solution to avoid future problems.
“The key to successful DIY plumbing projects is understanding when to apply temporary fixes and when to opt for permanent repairs.”
By understanding the materials and choosing the right repair method, you can successfully fix leaky pipes and enhance your DIY plumbing projects skills.
Replacing a Faucet

With the right tools and a bit of patience, replacing a faucet can be a rewarding DIY endeavor for plumbing novices. Before starting, it’s essential to understand the basics of faucet replacement to ensure a smooth process.
Choosing the Right Replacement Faucet
Selecting the correct faucet is crucial for a successful replacement. Consider the type of sink you have, the number of holes it has, and the style that suits your kitchen or bathroom decor. For a comprehensive guide on faucet repair and rebuilds, visit our beginner’s guide to learn more about the different types of faucets and their maintenance.
- Identify the faucet type: single-handle, double-handle, or touchless.
- Measure the sink holes to ensure the new faucet fits.
- Consider the finish and style to match your existing decor.
Installation Steps for Beginners
Once you’ve chosen the right faucet, follow these steps for a successful installation:
- Turn off the water supply: Locate the shut-off valves under the sink and turn them clockwise.
- Disconnect the old faucet: Use a basin wrench to loosen any corroded or stuck parts.
- Clean the area: Remove any mineral deposits or debris from the sink.
- Install the new faucet: Follow the manufacturer’s instructions for mounting and securing the faucet.
- Test the faucet: Turn on the water supply and check for leaks.
Replacing a faucet is a do-it-yourself plumbing project that can significantly enhance your home’s functionality and aesthetic appeal. By choosing the right replacement and following the installation steps, beginners can achieve professional-looking results.
Simple Toilet Repairs
Understanding how to perform basic toilet repairs is essential for every homeowner. Toilets are prone to various issues, but many problems can be resolved with simple fixes. In this section, we’ll explore how to replace a toilet flapper and adjust the float mechanism, two common repairs that can get your toilet functioning properly again.
How to Replace a Toilet Flapper
The toilet flapper is a crucial component that controls the flow of water into the toilet bowl. Over time, it can become worn or damaged, leading to leaks and continuous running water. Replacing the flapper is a straightforward process that requires a few simple tools.
- Turn off the water supply to the toilet by locating the shut-off valve behind the toilet and turning it clockwise.
- Drain the tank by flushing the toilet.
- Disconnect the chain from the flush lever and remove the old flapper.
- Install the new flapper, ensuring it’s properly seated and connected to the chain.
- Turn the water supply back on and test the toilet.
Replacing the flapper can resolve issues like a running toilet, saving water and reducing your utility bills. It’s an easy plumbing fix that beginners can accomplish with minimal tools.
Adjusting the Float Mechanism
The float mechanism is responsible for controlling the water level in the toilet tank. If the water level is too high or too low, it can cause problems. Adjusting the float is a simple process that can resolve issues like continuous running or incomplete flushing.
- Check the water level in the tank and adjust the float arm to ensure it’s at the recommended level, usually about halfway up the tank.
- If your toilet uses a float cup, adjust the screw or clip that holds the cup in place to change the water level.
- Test the toilet after making adjustments to ensure it’s functioning correctly.
By mastering these quick plumbing solutions, you can avoid calling a professional for minor issues, saving time and money.
| Repair | Description | Tools Needed |
|---|---|---|
| Replacing Toilet Flapper | Fixes leaks and continuous running water | New flapper, pliers |
| Adjusting Float Mechanism | Resolves water level issues | Screwdriver, float adjustment tool |
These simple plumbing repairs for beginners can significantly improve your toilet’s performance. By following these steps, you can ensure your toilet operates efficiently, saving water and reducing potential damage to your plumbing system.
Maintaining Your Plumbing System

Maintaining your plumbing system can seem daunting, but it’s simpler than you think. Regular maintenance not only prevents major problems but also extends the lifespan of your plumbing fixtures and pipes.
Regular Inspections and Maintenance Tips
Regular inspections are the cornerstone of a well-maintained plumbing system. By checking your pipes, fixtures, and appliances regularly, you can identify potential issues before they become major problems. Here are some maintenance tips to get you started:
- Check for leaks under sinks, around toilets, and near appliances.
- Inspect pipes for signs of corrosion or damage.
- Clean drains regularly to prevent clogs.
- Check the water pressure to ensure it’s within a safe range.
For more detailed maintenance tips, you can refer to resources like Simply Green Plumbing, which offers expert advice on maintaining your plumbing system.
Seasonal Plumbing Considerations
Different seasons bring different challenges for your plumbing system. In the winter, freezing temperatures can cause pipes to burst, while summer heat can lead to increased water usage and strain on your plumbing fixtures. Here are some seasonal considerations to keep in mind:
| Season | Plumbing Considerations |
|---|---|
| Winter | Insulate exposed pipes, let cold water drip from faucets served by exposed pipes, and consider opening cabinet doors to allow warm air to circulate. |
| Summer | Check for leaks, inspect outdoor faucets, and consider installing a rainwater harvesting system to reduce water usage. |
| Spring/Fall | Inspect gutters, downspouts, and drainage systems to ensure they’re functioning properly. |
By following these tips and being mindful of the seasonal demands on your plumbing system, you can prevent many common plumbing issues and ensure your system runs smoothly all year round.
“A well-maintained plumbing system is not just about fixing leaks; it’s about preventing them from happening in the first place.” – Plumbing Expert
When to Call a Professional
While DIY plumbing can be cost-effective and empowering, there are times when it’s crucial to seek the help of a professional plumber. As a beginner, it’s vital to understand your limitations and recognize when a problem is beyond your expertise.
Identifying Serious Plumbing Issues
Some plumbing issues are more severe than they initially appear. Signs that you need professional help include persistent leaks, significant water damage, or complex issues like burst pipes or sewage backups. If you’re unsure about the severity of the problem, it’s always best to err on the side of caution.
For instance, a dripping faucet might seem like a simple fix, but if it’s a symptom of a larger issue, such as high water pressure or corroded pipes, you’ll need a professional to diagnose and fix the root cause. Similarly, if you’re experiencing recurring clogs or slow drains, it could indicate a blockage deep within your plumbing system that requires specialized equipment to resolve.
Cost Considerations for Hiring Help
The cost of hiring a professional plumber can vary widely depending on factors like location, the complexity of the job, and the plumber’s level of experience. On average, homeowners can expect to pay between $100 to $200 for a basic plumbing service call, with additional costs for parts and labor.
| Service | Average Cost | Factors Affecting Cost |
|---|---|---|
| Basic Service Call | $100-$200 | Location, Time of Day |
| Leak Repair | $200-$500 | Complexity of Leak, Parts Needed |
| Drain Cleaning | $100-$500 | Method Used, Severity of Clog |
While hiring a professional may seem like an added expense, it can save you money in the long run by preventing further damage and ensuring that the job is done correctly. Always get multiple quotes and check the plumber’s credentials before making a decision.
Safety Tips for Plumbing Repairs

Ensuring safety during DIY plumbing projects is crucial for preventing accidents and injuries. Plumbing repairs, even when they seem simple, can expose you to various hazards, including sharp edges, toxic substances, and electrical components.
Personal Protective Equipment (PPE)
One of the most effective ways to safeguard yourself during plumbing repairs is by wearing appropriate Personal Protective Equipment (PPE). This includes gloves to protect your hands from cuts and abrasions, safety glasses to shield your eyes from debris, and a face mask to prevent inhalation of dust and harmful particles.
For more detailed information on safety guidelines, you can visit safety guidelines for construction sites, which provides comprehensive insights into maintaining a safe working environment.
Best Practices to Ensure Safety
Adopting best practices is equally important as wearing PPE. Always turn off the main water supply and power to the area you’re working on. Use the right tools for the job to avoid accidents and ensure efficient repairs. For instance, using a pipe wrench that’s too small can lead to stripping the pipe, causing more harm than good.
- Ensure good lighting in your workspace to spot potential hazards.
- Keep your workspace clean and organized to avoid tripping hazards.
- Be aware of your surroundings and the potential for water damage.
For additional safety tips specific to plumbing repairs, you can refer to resources like 5 plumbing and safety tips for plumbing, which offers valuable advice on maintaining safety during DIY plumbing projects.
Resources for Further Learning
To further enhance your plumbing skills, explore online tutorials and videos that offer step-by-step guides on plumbing basics, including beginner plumbing tips and quick plumbing solutions. These resources can provide valuable insights into beginner-friendly plumbing fixes and help you tackle more complex projects.
Online Tutorials and Videos
Websites like YouTube and home improvement blogs offer a wealth of information on plumbing repairs and maintenance. You can find tutorials on fixing leaky faucets, unclogging drains, and other common plumbing issues.
Community Workshops and Classes
Local community centers, hardware stores, and plumbing supply stores often host workshops and classes on plumbing repairs and maintenance. These hands-on sessions can provide valuable experience and help you gain confidence in your plumbing skills.