Imagine being able to fix a leaky faucet or unclog a drain without calling a professional plumber. Not only can it be a huge cost-saver, but it also gives you a sense of accomplishment and self-sufficiency.
Simple DIY plumbing repairs can be done with basic tools and skills, and they can make a big difference in your household expenses.
By learning a few handy plumbing tips, you can avoid costly plumbing bills and take care of your home’s plumbing system on your own.
Key Takeaways
- Learn simple DIY plumbing fixes to save money
- Understand the basics of plumbing repairs
- Discover how to unclog drains and fix leaky faucets
- Save on costly plumbing bills
- Gain confidence in your DIY plumbing skills
Understanding Common Plumbing Issues
Understanding the most frequent plumbing issues is crucial for homeowners to maintain their homes effectively. Plumbing problems can range from minor annoyances to major emergencies, and being able to identify and address them early can save time, money, and stress.
Identifying Leaks in Your Home
Leaks are a common issue in many homes and can lead to significant water damage if not addressed promptly. To identify leaks, look for signs such as water spots on ceilings or walls, warped flooring, or an unexpected increase in your water bill. Checking your home’s water meter is also a good practice; if it continues to run when all water-using appliances are turned off, you might have a hidden leak. For more information on dealing with leaks, you can refer to A Homeowner’s Guide to Common Plumbing.
Steps to Find Sneaky Leaks:
- Monitor your water meter regularly.
- Inspect your home for water damage signs.
- Check your water bill for unexpected increases.
Recognizing Clogged Drains
Clogged drains are another frequent plumbing issue that can cause inconvenience and damage. Signs of a clogged drain include slow draining water, gurgling sounds from the drain, or water backing up. To unclog a bathtub drain without using chemicals, you can try using a plunger or a drain snake. For more stubborn clogs, a mixture of baking soda and vinegar followed by hot water can be effective.
Tips for Unclogging Drains:
- Use a plunger to create suction.
- Try a drain snake for deeper clogs.
- Use baking soda and vinegar for a natural cleaning solution.
Understanding Running Toilets
A running toilet can waste a significant amount of water and increase your water bill. The most common cause is a faulty flapper or an improperly adjusted float. To stop a running toilet, first, check the flapper for any signs of wear or misalignment. Adjusting or replacing the flapper and ensuring the float is set correctly can resolve the issue. For more complex issues or if you’re unsure, consulting a professional plumber might be necessary, as suggested by experts at Plumbing Experts.
Key Steps to Stop a Running Toilet:
- Inspect the flapper for damage or misalignment.
- Adjust the float to the correct level.
- Consider replacing worn-out parts.
Essential Tools for DIY Plumbing Repairs

Having the right plumbing tools is vital for successful DIY repairs and maintenance. Before tackling any plumbing issue, it’s essential to be equipped with the necessary tools to ensure the job is done efficiently and safely.
A List of Must-Have Tools
To perform DIY plumbing repairs effectively, you’ll need a variety of tools. Some of the must-haves include:
- Adjustable wrenches for tightening and loosening various pipe fittings
- Pipe cutters for cutting through pipes
- Teflon tape for creating watertight seals on threaded pipe connections
- Plunger for clearing clogs in drains and toilets
- Plumber’s snake (auger) for more stubborn clogs
For a comprehensive list of tools and more detailed information, you can visit top plumbing tools and pipes for DIY. This resource provides an extensive guide on the tools needed for various plumbing tasks.
How to Use Basic Plumbing Tools
Understanding how to use these tools is just as important as having them. For instance, when using a plunger, ensure the area is filled with enough water to cover the plunger’s cup. For more complex tools like a plumber’s snake, follow the manufacturer’s instructions to avoid damaging your pipes.
As emphasized by experts, “Before tackling anything: Turn off the water to that area first.” This simple step can prevent a lot of damage and ensure your safety while working on plumbing repairs.
“The first step in any plumbing repair is to turn off the water supply to the affected area. This simple precaution can save you from a lot of trouble and potential water damage.”
Safety Gear for Plumbing Repairs
Safety should always be a top priority when performing DIY plumbing repairs. Essential safety gear includes:
- Gloves to protect your hands from sharp edges and cold temperatures
- Safety goggles to protect your eyes from debris and chemical splashes
- A first aid kit for immediate treatment of minor injuries
By having the right tools and safety gear, you’ll be well-prepared to tackle common plumbing issues. Remember, safety and preparedness are key to successful DIY plumbing repairs.
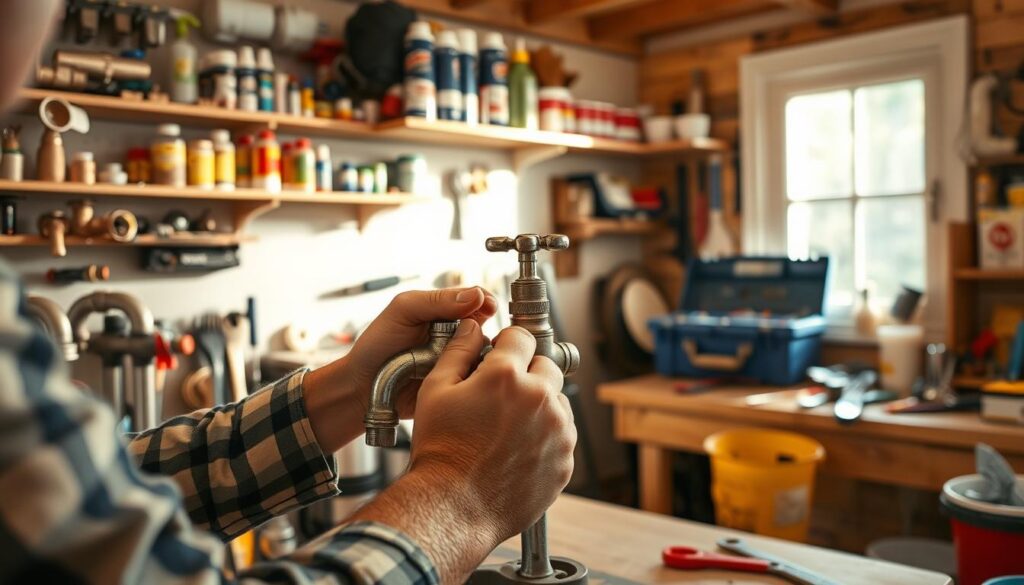
Fixing Leaky Faucets
One of the most common plumbing issues homeowners face is the leaky faucet. Not only is it annoying, but it also wastes water and increases your utility bills. Fortunately, fixing a leaky faucet is a simple plumbing fix that can be done with a few basic tools and some DIY know-how.
Step-by-Step Repair Guide
To start, you’ll need to identify the source of the leak. Common areas include the faucet’s handle, spout, or drain. Once you’ve located the leak, follow these steps:
- Turn off the water supply to the faucet.
- Disassemble the faucet to access the faulty part.
- Inspect and replace the worn-out or damaged component.
- Reassemble the faucet and turn on the water supply.
For a more detailed guide, you can visit Home Depot’s leaky faucet repair guide, which provides comprehensive instructions and tips.
Common Faucet Types and Parts
Understanding the type of faucet you have is crucial for effective repair. Common types include:
| Faucet Type | Common Parts | Repair Tips |
|---|---|---|
| Compression Faucet | O-rings, washers | Replace worn-out washers and O-rings. |
| Cartridge Faucet | Cartridge, O-rings | Inspect and replace the cartridge if necessary. |
| Ball-and-Socket Faucet | Seals, springs, ball | Clean or replace the ball and seals. |
When to Call a Professional
While many leaky faucet repairs can be done DIY, there are times when it’s best to call a professional. If you’re unsure about the type of faucet you have or the repair required, it’s best to seek help. Additionally, if you notice other issues such as low water pressure or persistent leaks after attempting a repair, consider consulting a plumber for a quick plumbing solution.
Dealing with Clogged Drains

Clogged drains are a typical plumbing issue that can be tackled with the right tools and techniques. Whether it’s a kitchen sink, bathroom drain, or bathtub, clogs can cause significant inconvenience. Fortunately, there are several methods to clear clogs without necessarily calling a professional plumber.
Natural Remedies for Clogs
Before reaching for chemical drain cleaners, consider trying natural remedies. One effective method is using baking soda and vinegar. Pouring 1/2 cup of baking soda down the drain, followed by 1/2 cup of vinegar, can help break down the clog. Let the mixture sit for a few hours or overnight before rinsing with hot water.
Another natural remedy is using hot water. For minor clogs, pouring a kettle of boiling water down the drain can help dissolve the blockage. However, be cautious not to use boiling water on PVC pipes as it can cause damage.
How to Use a Plumber’s Snake
A plumber’s snake, also known as an auger, is a handy tool for clearing clogs. To use it, feed the cable into the drain until you feel resistance, indicating you’ve reached the clog. Then, rotate the handle to break up the blockage. Once you’ve cleared the clog, retract the cable and rinse the drain with hot water.
For more stubborn clogs, you may need to repeat the process a few times. It’s also essential to clean the snake after use to prevent any debris from causing future clogs.
When to Seek Professional Help
While many clogs can be cleared with DIY methods, some situations require professional assistance. If you’ve tried multiple remedies without success, or if you suspect a more significant issue like a sewer line blockage, it’s time to call a plumber.
Additionally, if you notice signs like slow draining across multiple fixtures, it could indicate a more complex problem that requires professional diagnosis and repair.
By understanding how to deal with clogged drains, homeowners can save time and money on plumbing repairs. Regular maintenance and knowing when to seek help are key components of easy home plumbing repairs. With these homeowner plumbing tips, you’ll be better equipped to handle clogs and keep your plumbing system running smoothly.
Toilet Troubles: Quick Fixes
Many toilet troubles can be easily fixed with a few simple adjustments and repairs. Toilets are one of the most used fixtures in our homes, and when they malfunction, it can be quite inconvenient.
Adjusting a Toilet Float
A running toilet can waste a significant amount of water. Often, the issue lies with the toilet float. Adjusting it is a straightforward process. First, turn off the water supply to the toilet. Then, adjust the float arm so that it shuts off the water flow when the tank is not full. For more information on common toilet problems and their fixes, visit Lowe’s guide.
Clearing a Clogged Toilet
A clogged toilet is another common issue. To clear it, you can use a plunger or a plumber’s snake. For tougher clogs, consider using a toilet auger. If the clog persists, it might be time to call a professional. In cases of severe clogs or if you’re not comfortable with DIY repairs, consider hiring an emergency contractor.
Repairing Toilet Flapper Issues
The toilet flapper is a crucial component that controls the flow of water into the bowl. If it’s damaged or not sealing properly, water will continue to flow into the bowl, causing the toilet to run continuously. Inspect the flapper for any signs of wear or damage. If necessary, replace it with a new one.
| Issue | Quick Fix |
|---|---|
| Running Toilet | Adjust the toilet float or replace the flapper |
| Clogged Toilet | Use a plunger, plumber’s snake, or toilet auger |
| Toilet Flapper Issues | Inspect and replace the flapper if damaged |
By addressing these common toilet troubles, you can save water, reduce your utility bills, and avoid the hassle of dealing with a malfunctioning toilet.
Managing Water Pressure Problems

Effective management of water pressure is essential for preventing leaks, reducing waste, and ensuring your plumbing system operates efficiently. Water pressure that is too high or too low can lead to a range of problems, from minor annoyances to significant damage.
Diagnosing Low Water Pressure
Low water pressure can be caused by a variety of factors, including clogged aerators, faulty pressure regulators, or leaks in the plumbing system. To diagnose the issue, start by checking the aerators on your faucets; if they’re clogged with mineral buildup, cleaning or replacing them may resolve the problem.
Steps to Diagnose Low Water Pressure:
- Check aerators for mineral buildup.
- Inspect the pressure regulator.
- Look for leaks in the plumbing system.
Quick Fixes for High Water Pressure
High water pressure can be just as problematic as low pressure, potentially leading to leaks, burst pipes, and appliance damage. One quick fix is to install a pressure-reducing valve (PRV) if your home doesn’t already have one.
| Pressure Level | Potential Issues | Recommended Action |
|---|---|---|
| Above 80 PSI | Leaks, appliance damage | Install a PRV |
| Between 40-80 PSI | Generally safe | Monitor pressure regularly |
| Below 40 PSI | Poor water supply | Check for clogs or leaks |
When to Consult a Plumber
If you’re unsure about how to diagnose or fix water pressure issues, or if the problems persist after trying the above solutions, it’s time to consult a professional plumber. They can provide a thorough assessment and recommend the necessary repairs or installations.
By following these handy tips for plumbing repairs and considering DIY plumbing repairs, you can effectively manage water pressure problems and maintain a healthy plumbing system.
Emergency Plumbing Repairs
Understanding how to handle emergency plumbing repairs is crucial for minimizing damage and stress. Plumbing emergencies can range from burst pipes to overflowing toilets, and knowing how to react can save you from costly repairs.
What to Do in a Plumbing Emergency
In the event of a plumbing emergency, the first step is to stop the water supply to prevent further damage. Locate the main shut-off valve and turn it clockwise to shut off the water supply to your home. For simple plumbing fixes, having the right tools on hand can make a big difference.
Next, assess the situation to determine the best course of action. If you’re dealing with a burst pipe or a major leak, it’s essential to act quickly. For more information on dealing with construction repairs, you can visit https://worldcivilsociety.com/24-7-construction-repair/ for professional guidance.
Temporary Fixes for Major Leaks
For major leaks, a temporary fix can help mitigate the damage until a professional plumber can arrive. One plumbing repair hack is to use pipe clamps or epoxy putty to seal the leak temporarily. However, these fixes are not permanent solutions and should be followed up with professional repairs as soon as possible.
Knowing When to Call for Help
It’s crucial to know when to call a professional plumber. If you’re unsure about how to handle the situation or if the problem is beyond your DIY skills, it’s time to seek help. Emergency plumbing situations often require immediate attention, and having a reliable plumber on speed dial can be a lifesaver.
By being prepared and knowing the basics of emergency plumbing repairs, you can reduce the risk of significant damage to your home. Remember, while simple plumbing fixes can be handled on your own, complex issues are best left to the professionals.
The Importance of DIY Plumbing Maintenance

Regular DIY plumbing maintenance is crucial for preventing costly repairs and ensuring the longevity of your plumbing system. By taking proactive steps, homeowners can identify potential issues before they become major problems.
Routine Checks to Prevent Issues
Conducting routine checks is a vital part of DIY plumbing maintenance. This includes inspecting visible pipes for signs of leaks, corrosion, or damage. Homeowners should also check their water meter regularly to detect hidden leaks.
- Inspect visible pipes for leaks or damage.
- Check your water meter to detect hidden leaks.
- Look for signs of water damage or corrosion.
How Often to Inspect Plumbing Systems
The frequency of inspecting your plumbing system depends on several factors, including the age of your home and its plumbing infrastructure. Generally, it’s recommended to inspect your plumbing system at least once a year.
| Inspection Frequency | Home Age | Recommended Actions |
|---|---|---|
| Annually | 0-10 years | Check for leaks, inspect water heater. |
| Every 6 months | 11-20 years | Inspect pipes, check water pressure. |
| Every 3 months | 21+ years | Check for corrosion, inspect drain lines. |
Seasonal Maintenance Tips
Seasonal maintenance is also crucial for preventing plumbing issues. For example, during winter, it’s essential to insulate exposed pipes to prevent freezing. In the spring, checking your irrigation system can help identify leaks or damage.
By following these seasonal tips and maintaining a regular inspection schedule, homeowners can ensure their plumbing system remains in good condition.
Fixing Broken Pipes
Fixing broken pipes is a crucial skill for homeowners to master, as it can prevent extensive water damage. Broken pipes can lead to significant issues, including water leakage, structural damage, and potential health hazards due to mold growth.
Identifying the Cause of Pipe Damage
The first step in fixing a broken pipe is to identify the cause of the damage. Common causes include freezing temperatures, corrosion, and physical damage. Understanding the root cause can help in taking preventive measures for the future.
For instance, in areas prone to freezing temperatures, insulating exposed pipes can prevent them from freezing and bursting. Regular inspections can also help identify potential issues before they become major problems.
Temporary Pipe Fixes
In some cases, a temporary fix may be necessary to mitigate damage until a permanent repair can be made. One common method is using pipe repair clamps or epoxy to seal leaks. For a more detailed guide on temporary fixes, homeowners can refer to resources like Balkan Plumbing’s DIY Pipe Leak Repair.
It’s essential to note that while temporary fixes can provide relief, they are not a substitute for proper repairs. Homeowners should plan for a permanent fix as soon as possible.
| Temporary Fix Method | Description | Effectiveness |
|---|---|---|
| Pipe Repair Clamps | Clamps that fit around the pipe to seal leaks | High |
| Epoxy Sealants | Adhesives applied to the damaged area | Medium to High |
| Pipe Tape | Tape wrapped around the pipe to temporarily seal leaks | Low to Medium |
When to Replace Pipes
While repairs can fix immediate issues, there are times when replacing pipes is the more cost-effective and efficient solution in the long run. Factors to consider include the age of the pipes, the extent of the damage, and the frequency of leaks.
“Replacing old or corroded pipes can significantly reduce the risk of future leaks and damage, potentially saving homeowners from costly repairs down the line.” – Plumbing Expert
Homeowners should consult with a professional plumber to determine the best course of action based on their specific situation.
Water Heater Troubleshooting

Troubleshooting your water heater can seem daunting, but with the right guidance, you can identify and fix common issues. A well-functioning water heater is crucial for daily comfort, and understanding how to maintain it can save you from unexpected breakdowns.
Diagnosing Common Water Heater Issues
Before diving into repairs, it’s essential to diagnose the problem accurately. Common issues include a lack of hot water, inadequate hot water supply, and strange noises coming from the water heater. Checking the temperature settings and inspecting for mineral deposits are initial steps in diagnosing the problem.
For instance, if you’re not getting enough hot water, it might be due to a faulty thermostat or a malfunctioning heating element. Learn more about common water heater and how to address them.
Quick Fixes for Hot Water Problems
Some hot water problems can be resolved with simple fixes. For example, if your water heater is not producing hot water, check the circuit breaker or fuse associated with the water heater. Sometimes, the issue might be as straightforward as a tripped circuit or a blown fuse.
Another common issue is water leaking from the heater. This could be due to loose connections or a faulty temperature and pressure relief valve. Tightening the connections or replacing the valve can often resolve the leak.
Maintenance Tips for Longevity
Regular maintenance is key to extending the life of your water heater. This includes checking the anode rod for corrosion, flushing the tank to remove sediment, and inspecting the temperature and pressure relief valve. These tasks can help prevent major issues and ensure your water heater operates efficiently.
| Maintenance Task | Frequency | Benefit |
|---|---|---|
| Check Anode Rod | Every 6 months | Prevents tank corrosion |
| Flush the Tank | Annually | Removes sediment, improving efficiency |
| Inspect T&P Valve | Every 6 months | Ensures safety by releasing excess pressure |
By following these troubleshooting tips and maintenance recommendations, you can ensure your water heater operates reliably and efficiently, providing you with a steady supply of hot water.
Signs You Need a Plumbing Inspection
Recognizing the signs that indicate the need for a plumbing inspection can prevent minor issues from becoming major problems. Homeowners often neglect their plumbing system until a significant issue arises, leading to costly repairs and potential water damage.
Key Indicators of Plumbing Problems
Several signs can indicate that your plumbing system needs an inspection. These include:
- Unusual noises from pipes or faucets
- Low water pressure or inconsistent water temperature
- Visible leaks or water damage
- Clogged drains or toilets
- Increased water bills without a corresponding increase in usage
Addressing these issues promptly can help prevent more severe problems. For instance, a plumbing maintenance check can identify potential issues before they become major repairs.
Benefits of Regular Inspections
Regular plumbing inspections offer numerous benefits, including:
- Early detection of potential issues, reducing the risk of emergency repairs
- Improved water efficiency and lower utility bills
- Extended lifespan of plumbing fixtures and appliances
- Enhanced safety by identifying potential hazards such as leaks or faulty water heaters
As noted by plumbing experts, “Regular maintenance is key to avoiding costly repairs and ensuring the longevity of your plumbing system.”
How to Choose a Good Plumber
When selecting a plumber for your inspection or repairs, consider the following:
- Licensure and certification
- Experience with similar jobs
- Customer reviews and ratings
- Clear estimates and transparent pricing
Choosing a reliable plumber can make a significant difference in the quality of service and the longevity of your plumbing system.
Tips for Preventing Future Plumbing Issues

Preventing plumbing issues is crucial for homeowners to avoid costly repairs and water damage. By being proactive, homeowners can ensure their plumbing system operates efficiently and effectively.
Best Practices for Homeowners
Homeowners can adopt several best practices to maintain their plumbing systems. Regularly inspecting pipes and fixtures for signs of wear and tear can help identify potential issues early. It’s also essential to be mindful of what goes down the drains, avoiding the disposal of grease, food scraps, and other debris that can cause clogs.
Using a drain screen or filter can catch hair and other particles before they go down the drain, reducing the risk of clogs. Additionally, being aware of the water pressure in your home and taking steps to manage it can prevent damage to pipes and fixtures.
Importance of Water Conservation
Water conservation is not only good for the environment, but it also plays a significant role in maintaining a healthy plumbing system. By reducing water usage, homeowners can lower the strain on their plumbing system, reducing the risk of leaks and other issues.
Simple measures such as fixing leaky faucets, installing low-flow fixtures, and being mindful of water usage during daily activities can make a significant difference. These simple plumbing fixes can lead to quick plumbing solutions by reducing the demand on the plumbing system.
| Water Conservation Method | Benefits |
|---|---|
| Fixing Leaky Faucets | Saves water, reduces water bills |
| Installing Low-Flow Fixtures | Reduces water usage, lowers water pressure |
| Mindful Water Usage | Encourages water-saving habits, reduces waste |
Keeping Drains Clear
Keeping drains clear is essential for preventing clogs and ensuring the smooth operation of the plumbing system. One effective method is to proactively use baking soda and vinegar to help prevent drains from clogging. This natural remedy can be used regularly to maintain clear drains.
For more stubborn clogs, using a plumber’s snake or auger can help clear blockages. Regular maintenance, such as checking for and removing any buildup in drains, can also help prevent issues. By adopting these practices, homeowners can enjoy a trouble-free plumbing system and avoid the need for emergency repairs.
Upgrading Plumbing Fixtures
Replacing outdated plumbing fixtures with modern alternatives can greatly benefit homeowners looking for easy home plumbing repairs. Upgrading your plumbing fixtures not only enhances the functionality of your plumbing system but also contributes to water conservation and can increase your home’s value.
Choosing the Right Fixture for Your Home
When selecting new plumbing fixtures, it’s essential to consider both style and functionality. Modern fixtures come in a variety of styles and finishes, allowing homeowners to choose options that complement their home’s décor. For instance, when swapping out a showerhead, you can choose from a range of styles that offer different spray patterns and water-saving features.
For tasks like replacing a sink sprayer, consider the type of sink you have and the sprayer’s compatibility with your existing plumbing setup. Ensuring that the new fixture is compatible with your current system will simplify the installation process.
Benefits of Modern Plumbing Fixtures
Modern plumbing fixtures offer several benefits, including improved water efficiency and enhanced performance. Many contemporary fixtures are designed with water-saving technologies that reduce consumption without sacrificing pressure or performance.
Some key benefits of modern fixtures include:
- Reduced water consumption
- Lower utility bills
- Enhanced durability
- Improved functionality
Installation Tips for New Fixtures
Installing new plumbing fixtures can be a straightforward DIY project if you have the right tools and follow the manufacturer’s instructions. Here are some general tips to keep in mind:
| Fixture | Tools Needed | Tips |
|---|---|---|
| Showerhead | Adjustable wrench, Teflon tape | Ensure the new showerhead is compatible with your existing shower arm. |
| Sink Sprayer | Basin wrench, channel-type pliers | Turn off the water supply before starting the replacement. |
By upgrading your plumbing fixtures and following proper installation techniques, you can enjoy a more efficient and functional plumbing system. For more complex tasks or if you’re unsure about any aspect of the process, consider consulting a professional plumber for assistance.
Understanding Plumbing Codes and Regulations

Understanding plumbing codes and regulations is crucial for homeowners to ensure compliance and safety in their DIY plumbing repairs. Plumbing codes are in place to safeguard public health and safety by dictating the standards for plumbing installations and repairs.
These codes vary by jurisdiction, making it essential for homeowners to familiarize themselves with local regulations. For more detailed information on basic plumbing codes, homeowners can refer to resources like https://kayplumbing.com/basic-plumbing-codes/.
Importance of Following Local Codes
Following local plumbing codes is not just a matter of legal compliance; it’s also about ensuring the safety and integrity of your plumbing system. Local codes are designed to address specific regional issues, such as water conservation or earthquake-resistant installations.
By adhering to these codes, homeowners can prevent potential hazards, such as water damage or gas leaks, which can be costly and dangerous. Moreover, compliance with local codes can enhance the value of your property and ensure that any future inspections or renovations are not hindered by non-compliant previous work.
Common Plumbing Permits Needed
Most plumbing work requires a permit, especially if it involves significant repairs or installations, such as replacing a water heater or reconfiguring pipe layouts. The permit process ensures that the work is inspected and approved by local authorities, verifying that it meets code requirements.
Homeowners should check with their local building department to determine the specific permits needed for their project. Common permits include those for plumbing installations, repairs, and alterations. Failing to obtain the necessary permits can result in fines and complications when selling the property.
How Codes Affect DIY Repairs
Understanding how plumbing codes affect DIY repairs is crucial for homeowners who wish to undertake plumbing work themselves. Codes dictate not only the materials and methods that can be used but also the inspection and approval process.
For DIY repairs, this means that homeowners must ensure their work complies with local codes to avoid having to redo the work or face penalties. It’s also important to document the work done, as this can be essential for future reference or when selling the property.
By staying informed about plumbing codes and regulations, homeowners can ensure their DIY plumbing repairs are done correctly, safely, and in compliance with local laws, thereby protecting their investment and ensuring peace of mind.
Eco-Friendly Plumbing Solutions
Eco-friendly plumbing solutions offer a practical way to conserve water and reduce waste. By incorporating sustainable practices and using water-saving devices, homeowners can significantly reduce their environmental footprint.
Sustainable Plumbing Practices
Adopting sustainable plumbing practices is essential for reducing water consumption and promoting environmental sustainability. This includes installing low-flow fixtures and greywater recycling systems. For more information on sustainable building materials, visit sustainable building materials.
Some handy tips for plumbing repairs that support sustainability include regularly inspecting your plumbing system for leaks and using eco-friendly materials for repairs.
Water-Saving Devices for Your Home
Water-saving devices are a crucial component of eco-friendly plumbing. Devices such as low-flow showerheads, toilets, and faucets can significantly reduce water usage. Additionally, installing rainwater harvesting systems can provide a sustainable source of water for non-potable uses.
For DIY plumbing repairs, consider using devices that are designed to save water while maintaining performance. This not only helps the environment but also reduces your water bill.
Recycling and Conserving Water
Recycling and conserving water are critical aspects of eco-friendly plumbing. Greywater recycling systems allow you to reuse water from sinks, showers, and washing machines for irrigation and flushing toilets.
| Water Conservation Method | Description | Water Savings |
|---|---|---|
| Low-Flow Fixtures | Installing faucets and showerheads that use less water | Up to 20% |
| Rainwater Harvesting | Collecting and storing rainwater for non-potable uses | Up to 50% |
| Greywater Recycling | Reusing water from sinks, showers, and washing machines | Up to 30% |
By implementing these eco-friendly plumbing solutions, homeowners can contribute to a more sustainable future while also enjoying the benefits of reduced water bills and increased property value.
Resources for Homeowners
Homeowners can benefit from various resources when tackling plumbing issues. With the knowledge gained from previous sections on DIY plumbing repairs and maintenance, you can now explore additional tools and guides to enhance your skills.
Online Guides and Tutorials
Websites like The Family Handyman and This Old House offer comprehensive guides and tutorials on plumbing repair hacks and simple plumbing fixes. These resources provide step-by-step instructions and videos to help you navigate complex plumbing tasks.
Tools and Apps for Plumbing Help
Several apps, such as HomeZada and iHomeRenovations, can assist with plumbing maintenance and repairs. These tools help you track your plumbing system’s condition, identify potential issues, and provide access to professional plumbers.
Finding Local Plumbing Workshops
Local hardware stores and community centers often host plumbing workshops, where you can learn hands-on skills and gain experience. These workshops are an excellent way to stay updated on the latest plumbing techniques and network with professionals.