Imagine being able to fix that leaky faucet or unclog your drain without calling a professional plumber. With some basic tools and a bit of knowledge, you can save money and feel accomplished by tackling simple DIY plumbing solutions on your own.
Many common plumbing issues, such as leaky faucets and clogged drains, can be resolved with beginner-friendly plumbing projects. By learning how to address these problems, you can prevent more significant issues from arising and reduce your reliance on professional plumbing services. For more complex issues, consider consulting experts from trusted plumbing repair services.
Key Takeaways
- Learn basic DIY plumbing solutions to save money.
- Understand how to address common plumbing issues like leaky faucets and clogged drains.
- Discover beginner-friendly plumbing projects to enhance your home.
- Know when to consult professional plumbing services for complex issues.
- Prevent major plumbing problems with regular maintenance.
Understanding Common Plumbing Issues
As a homeowner, you’re likely to face common plumbing issues that can be resolved with the right knowledge and tools. Minor problems can quickly escalate if not addressed, leading to more significant repairs and potential water damage.
Leaky Faucets and Their Causes
A leaky faucet is not just annoying; it can also waste a significant amount of water over time. The most common causes include worn-out O-rings, loose parts, or mineral buildup due to hard water. Identifying the source of the leak is crucial to applying the correct fix.
Low Water Pressure Troubles
Low water pressure can make everyday tasks like showering or washing dishes frustrating. Potential causes include clogged aerators, mineral buildup in pipes, or issues with the municipal water supply. Understanding the root cause is essential to restoring normal water pressure.
Clogged Drains: Signs and Solutions
Clogged drains are a common issue that can lead to backups and potential health hazards. Signs include slow draining, gurgling sounds, or water backing up. Solutions range from using a plunger or drain snake to applying chemical drain cleaners or natural alternatives like baking soda and vinegar.
| Issue | Common Cause | Simple Solution |
|---|---|---|
| Leaky Faucet | Worn-out O-rings or loose parts | Replace O-rings or tighten loose parts |
| Low Water Pressure | Clogged aerators or mineral buildup | Clean or replace aerators, descale pipes |
| Clogged Drains | Hair, grease, or debris buildup | Use a plunger, drain snake, or chemical/natural cleaners |
By understanding these common plumbing issues and their solutions, homeowners can take proactive steps to prevent more significant problems from arising. Regular maintenance and being equipped with the right tools and knowledge can save time and money.
Essential Tools Every Beginner Should Have

The foundation of any successful plumbing repair is having the right tools at your disposal. As a beginner, it’s crucial to understand the essentials that will help you tackle common plumbing issues effectively.
Must-Have Tools for Basic Plumbing Tasks
To get started with DIY plumbing solutions, you’ll need a few basic tools. These include a pipe wrench for gripping and twisting pipes, a basin wrench for reaching and loosening faucet mounting nuts, and a drain snake for clearing clogs. Investing in quality tools will make your plumbing tasks easier and more efficient.
Additionally, having an adjustable wrench, needle-nose pliers, and Teflon tape on hand can be very useful. These tools will help you with a variety of tasks, from tightening loose fittings to creating a watertight seal on threaded pipes. For more information on the best plumbing tools, you can visit ServiceTitan’s guide on the best plumbing.
Safety Gear: Don’t Overlook This
Safety should always be your top priority when working on plumbing projects. Essential safety gear includes gloves to protect your hands from sharp edges and chemicals, safety goggles to shield your eyes from debris, and a first-aid kit. Being prepared can prevent minor accidents from becoming major issues.
“The key to successful plumbing is not just about fixing leaks but doing so safely and efficiently.” – Plumbing Expert
Where to Buy Quality Plumbing Tools
When it comes to purchasing plumbing tools, you have several options. Hardware stores like Home Depot and Lowe’s offer a wide range of plumbing supplies. Online retailers such as Amazon provide convenience and often competitive pricing. For professionals, specialized plumbing supply stores can offer high-quality tools and expert advice. Regardless of where you choose to buy, ensure you’re purchasing from reputable sources to guarantee the quality of your tools.
By equipping yourself with the right tools and safety gear, you’ll be well on your way to successfully completing DIY plumbing fixes and easy plumbing maintenance tasks. Remember, the key to do-it-yourself plumbing fixes is being prepared and knowing where to find the right resources.
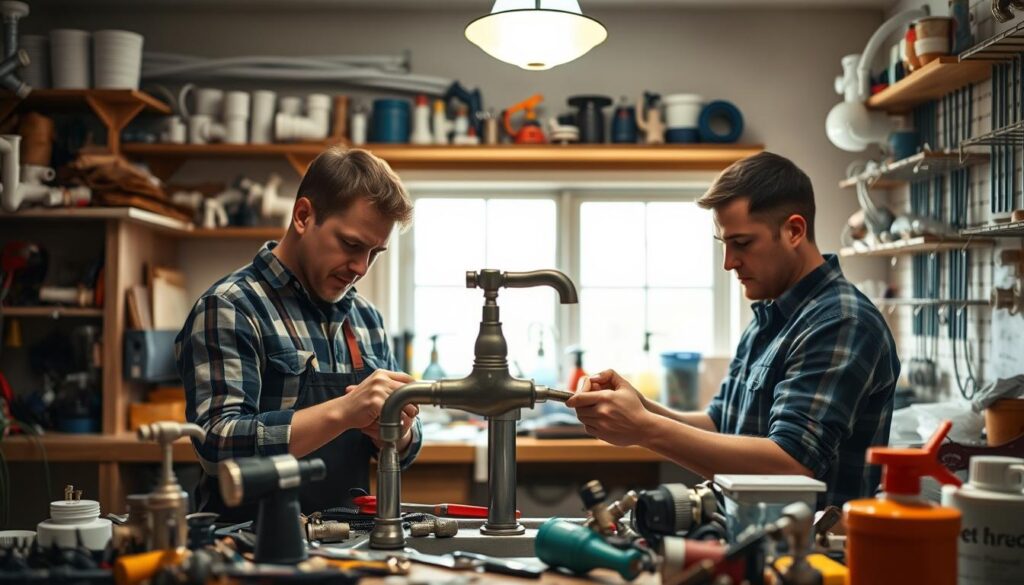
Fixing Leaky Faucets: A Step-by-Step Guide
With the right tools and a bit of know-how, you can easily fix that annoying leaky faucet. Leaky faucets are a common issue in many households, leading to wasted water and higher utility bills. By following this guide, you’ll be able to identify the source of the leak, gather the necessary parts, and apply simple repair techniques.
Identifying the Source of the Leak
The first step in fixing a leaky faucet is to determine where the leak is coming from. Common sources include the faucet’s handle, the spout, or the drain. To identify the source, turn on the faucet and observe where the water is coming from. You can also dry the faucet completely and then turn it on again to see where the water starts leaking from.
For a more detailed guide on diagnosing faucet issues, you can visit Home Depot’s guide on fixing leaky, which provides comprehensive instructions and tips.
Parts You’ll Need for Repair
Once you’ve identified the source of the leak, you’ll need to gather the necessary parts for the repair. Common parts required include O-rings, gaskets, or valve seats, depending on the faucet type. For single-lever kitchen faucets, you might need to replace the cartridge or the entire faucet if it’s old and worn out.
- O-rings or gaskets for worn-out seals
- Valve seats for corroded or damaged seats
- Cartridges for single-lever faucets
For a list of essential plumbing tools and parts, check out World Civil Society’s top plumbing tools and pipes for DIY, which can be very helpful for beginners.
Simple Repair Techniques for Leaks
Repairing a leaky faucet can be straightforward if you have the right tools and follow the correct steps. For most leaks, you’ll need to disassemble the faucet to access the faulty part. For instance, if the leak is from the handle, you might need to replace the O-ring or gasket. If it’s from the spout, the issue could be with the valve seat or the cartridge.
- Turn off the water supply before starting the repair.
- Disassemble the faucet to access the faulty part.
- Replace the worn-out or damaged parts.
- Reassemble the faucet and turn on the water supply to test.
As a beginner, it’s essential to be patient and follow each step carefully. With practice, you’ll become more comfortable with plumbing repairs, and tasks like fixing a leaky faucet will become simple plumbing hacks you can apply in no time.
How to Unclog Drains Quickly

Don’t let clogged drains get you down; there are effective home remedies and professional solutions available. Clogged drains are a common issue in many households, causing inconvenience and potential water damage. Understanding how to tackle these clogs quickly can save you time and money.
Home Remedies for Minor Clogs
For minor clogs, home remedies can be a quick and cost-effective solution. One popular method involves using baking soda and vinegar. Pouring 1/2 cup of baking soda down the drain, followed by 1/2 cup of vinegar, can help break down the blockage. Let the mixture sit for a few hours or overnight before rinsing with hot water. This method is not only eco-friendly but also gentle on your pipes.
Another effective home remedy is using boiling water. Carefully pouring boiling water down the drain can help dissolve grease and other substances causing the clog. However, be cautious with this method, especially with plastic pipes, as boiling water can cause damage.
Using a Plunger Effectively
A plunger is a simple yet effective tool for unclogging drains. To use a plunger correctly, ensure the drain is filled with enough water to cover the plunger’s cup. Create a tight seal over the drain and push down slowly and steadily until you feel resistance. Then, pull up sharply to create suction. Repeat this process several times to help dislodge the clog.
For sink drains, you may need to plug the overflow drain with a wet cloth to ensure effective suction. For tougher clogs, consider using a plunger with an extension handle for extra force.
When to Call the Professionals
While DIY methods can resolve many drain clogs, some situations require professional assistance. If you’ve tried multiple home remedies and plunging without success, it may be time to call a plumber. Additionally, if you suspect a more serious issue, such as a clog deep within your plumbing system or tree root intrusion, professional help is essential.
Professional plumbers have the tools and expertise to diagnose and fix complex problems. They can also provide guidance on preventive measures to avoid future clogs.
Toilet Troubles: Quick Fixes for Common Problems
Understanding how to troubleshoot and fix common toilet issues can save time and money. Toilets are one of the most essential fixtures in any home, and when they malfunction, it can be both inconvenient and costly if not addressed promptly.
Running Toilets and How to Fix Them
A running toilet is not only annoying, but it also wastes a significant amount of water. The most common cause is a faulty flapper or an improperly adjusted float. To fix this, you can start by checking the flapper for any signs of wear or misalignment. If necessary, replace it with a new one. Adjusting the float to ensure it shuts off correctly when the tank is full can also resolve the issue.
Simple four-step strategy to stop a running toilet:
- Turn off the water supply to the toilet.
- Inspect the flapper and float for any issues.
- Adjust or replace the flapper as needed.
- Test the toilet to ensure the problem is resolved.
Clogged Toilets: Easy Solutions
Clogged toilets are another common issue that can often be resolved with simple plumbing hacks. The first step is to use a plunger to try and dislodge the blockage. For more stubborn clogs, a toilet auger can be used to remove the obstruction. It’s also helpful to know what not to flush down the toilet to prevent future clogs.
Prevention is key: Being mindful of what you flush can save you from the hassle of dealing with clogs. Avoid flushing sanitary products, wet wipes, and other non-biodegradable items.
Replacing Toilet Flappers: A DIY Guide
Replacing a toilet flapper is a straightforward DIY task that can fix a running toilet. First, turn off the water supply to the toilet. Then, drain the tank and remove the old flapper. Clean the area where the flapper sits to ensure a good seal, and then install the new flapper. Finally, turn the water supply back on and test the toilet.
By following these easy plumbing maintenance tips, you can keep your toilet in good working order and avoid more significant problems down the line. Regular checks and simple repairs can make a big difference in the longevity and efficiency of your toilet.
Dealing with Low Water Pressure

Low water pressure is not just an inconvenience; it’s a signal that something is amiss in your plumbing system. Addressing this issue requires understanding its causes and implementing effective solutions.
Potential Causes of Low Water Pressure
Low water pressure can stem from various factors, including clogged pipes, faulty pressure regulators, or leaks in the system. It’s essential to identify the root cause to apply the correct fix.
Some common causes include:
- Mineral buildup or sediment in pipes
- Leaks or cracks in the water supply lines
- Malfunctioning pressure regulators
- Clogged aerators or showerheads
Simple Tests to Diagnose the Issue
To diagnose low water pressure, start by checking if the issue is isolated to one fixture or affects the entire house. This simple test can help narrow down the cause.
Other diagnostic steps include:
- Inspecting aerators and showerheads for clogs
- Checking for visible leaks under sinks and around toilets
- Testing the pressure regulator, if your system has one
For a more detailed analysis, consider the following table that outlines common symptoms and potential causes:
| Symptom | Possible Cause |
|---|---|
| Low pressure in one fixture | Clogged aerator or mineral buildup |
| Low pressure throughout the house | Faulty pressure regulator or main line issue |
| Intermittent low pressure | Leaks in the system or municipal supply issues |
Tips to Improve Water Flow
Once the cause is identified, several DIY plumbing solutions can be applied to improve water flow. These include cleaning or replacing clogged aerators, fixing leaks, and potentially replacing the pressure regulator.
For more complex issues, or if you’re unsure about how to proceed, it’s advisable to seek professional plumbing repair tips to ensure the problem is resolved effectively.
By understanding the causes and applying the right DIY plumbing solutions, homeowners can improve water pressure and enjoy a more comfortable living environment.
Fixing Running Toilets: Simple Steps
One of the most common plumbing issues homeowners face is a running toilet, which can be fixed with simple steps. A running toilet wastes water and increases your utility bills, making it essential to address the issue promptly.
Understanding the Mechanism of a Toilet
A toilet’s operation is based on a simple mechanism involving the flapper, fill valve, and overflow tube. When you press the flush handle, the flapper opens, allowing water to flow from the tank into the bowl. As the water level drops, the flapper closes, and the fill valve opens to refill the tank. If the flapper doesn’t close properly or the fill valve gets stuck, water continues to flow into the overflow tube, causing the toilet to run continuously.
Tools Needed for the Repair
To fix a running toilet, you’ll need a few basic tools:
- Adjustable wrench
- Channel-type pliers
- New flapper or fill valve (if necessary)
For more complex issues, additional tools like a plumber’s snake or Teflon tape might be required.
| Tool | Purpose |
|---|---|
| Adjustable wrench | Tightening or loosening nuts and bolts |
| Channel-type pliers | Gripping small objects like the flapper chain |
Detailed Repair Process Explained
To start the repair, turn off the water supply to the toilet by locating the shut-off valve behind the toilet and turning it clockwise. Then, drain the tank by flushing the toilet.
- Inspect the flapper for any signs of wear or misalignment. If it’s damaged, replace it with a new one.
- Check the fill valve for proper operation. If it’s faulty, consider replacing it.
- Adjust the float arm to ensure it’s not stuck or misaligned.
- For more detailed guidance, you can visit Home Depot’s guide on fixing running.
“A simple adjustment or replacement of the toilet’s internal parts can often resolve the issue of a running toilet, saving water and reducing your utility bills.”
By following these steps, you can fix a running toilet and contribute to water conservation efforts. Regular maintenance can also help prevent future plumbing issues.
Repairing or Replacing Showerheads

Showerheads are a crucial part of our daily routine, and knowing how to repair or replace them is a valuable skill. A well-functioning showerhead can make a significant difference in our daily shower experience, providing a refreshing start to the day.
Step-by-Step Guide to Remove Old Showerheads
Removing an old showerhead is the first step towards replacing it with a new one. To do this, you’ll need to follow a few simple steps:
- Turn off the water supply to the shower by locating the shut-off valves and turning them clockwise.
- Use a wrench to loosen the showerhead by gripping it firmly and turning it counterclockwise.
- Once loose, you should be able to remove the showerhead by hand.
If the showerhead is stuck, you can use a cloth or rubber grip to get a better grasp. Be careful not to scratch the shower arm.
Choosing the Right Replacement Showerhead
With so many types of showerheads available, choosing the right one can be overwhelming. Here are a few factors to consider:
| Type | Features | Benefits |
|---|---|---|
| Standard | Simple design, various spray patterns | Easy to install, affordable |
| Low Flow | Water-saving technology | Reduces water consumption, eco-friendly |
| Rain Shower | Large head, rainfall simulation | Luxurious experience, relaxing |
Consider your needs and preferences when selecting a replacement showerhead. If you’re looking to save water, a low-flow showerhead might be the best choice.
Tips for Ensuring a Tight Seal
To prevent leaks, it’s essential to ensure a tight seal when installing a new showerhead. Here are some tips:
- Use Teflon tape on the threads of the shower arm to create a watertight seal.
- Tighten the showerhead firmly by hand, then use a wrench for an additional half turn.
- Check for leaks by turning on the water supply and inspecting the showerhead.
By following these steps and tips, you can successfully repair or replace your showerhead, ensuring a leak-free and enjoyable shower experience.
Water Heater Issues: Quick Fixes for Beginners
Beginners can tackle common water heater issues with confidence by following straightforward repair tips. Water heater problems can range from minor leaks to significant malfunctions, but understanding how to address them can save time and money.
Identifying Common Water Heater Problems
Common issues with water heaters include leaks, inadequate hot water, and strange noises. Leaks can often be traced back to the temperature and pressure relief valve or the drain valve. Checking the temperature settings and inspecting for mineral deposits can help identify the source of the problem.
- Check for leaks around the temperature and pressure relief valve.
- Inspect the drain valve for signs of leakage.
- Ensure the water heater’s temperature setting isn’t too high.
Simple Maintenance Tips for Longevity
Regular maintenance is key to extending the life of your water heater. Simple tasks such as flushing the tank annually can remove sediment buildup, improving efficiency and reducing the risk of damage.
- Flush the water heater tank annually.
- Check the anode rod periodically and replace it if necessary.
- Inspect the heater for signs of corrosion.
By performing these DIY plumbing solutions, beginners can ensure their water heater operates effectively for years to come.
When to Seek Professional Help
While many water heater issues can be resolved with do-it-yourself plumbing fixes, some problems require professional attention. If you notice significant leaks, rust-colored water, or if your water heater is old and inefficient, it may be time to consult a professional plumber.
Recognizing the limits of your beginner plumbing projects is crucial. Don’t hesitate to seek help when faced with complex issues beyond your expertise.
Essential Plumbing Maintenance Tips

To keep your home’s plumbing in top condition, regular maintenance is essential. This involves a combination of routine checks, seasonal tasks, and knowing when to call a professional.
Routine Checks to Prevent Major Issues
Making routine checks a part of your household maintenance can help identify potential issues before they become major problems. For instance, checking for leaks under sinks and around toilets can save you from water damage and high utility bills. It’s estimated that a single dripping faucet can waste up to 20 gallons of water per day. Regularly inspecting your plumbing system can help you catch such issues early.
Another crucial routine check is to monitor your water pressure. Low water pressure can be a sign of a hidden leak or blockage in your pipes. You can check your water pressure using a pressure gauge, which can be purchased at most hardware stores.
Seasonal Maintenance You Can Do Yourself
Seasonal maintenance is another critical aspect of keeping your plumbing system in good condition. For example, before winter, you should insulate exposed pipes in unheated areas like the garage, basement, or crawlspace to prevent them from freezing. During the spring, check your outdoor faucets for any damage or leaks that may have occurred during the winter.
Additionally, cleaning your drains regularly can prevent clogs. You can use a mixture of baking soda and vinegar to clean your drains. Pouring 1/2 cup of baking soda down the drain, followed by 1/2 cup of vinegar, and then waiting a few hours before rinsing with hot water can help keep your drains clear.
Recognizing When to Call a Plumber
While many plumbing maintenance tasks can be done yourself, there are times when it’s necessary to call a professional. If you’re experiencing persistent leaks, low water pressure, or if you’re not sure how to perform a particular task, it’s best to seek help. For more information on essential plumbing maintenance tips, you can visit Lime911’s blog on the topic.
Recognizing the signs that indicate the need for professional help can save you from more significant problems down the line. For instance, if you notice any signs of water damage or if your water heater is not functioning correctly, it’s time to call a plumber.
Understanding Pipe Leaks and How to Fix Them
Identifying and fixing pipe leaks early can save homeowners from dealing with more extensive damage down the line. Pipe leaks can occur due to various reasons, including corrosion, freezing temperatures, and high water pressure.
Types of Pipes and Their Common Issues
There are several types of pipes used in homes, each with its own set of common issues. Understanding these can help in diagnosing and fixing leaks.
- Copper Pipes: Prone to corrosion and freezing.
- PVC Pipes: Can become brittle over time and prone to cracking.
- PEX Pipes: Flexible but can be damaged by rodents or sharp objects.
Temporary Fixes for Leaky Pipes
For minor leaks, temporary fixes can be applied to stop or reduce the leak until a more permanent solution can be implemented.
- Using epoxy putty to seal small leaks.
- Wrapping the pipe with rubber and clamps.
Long-term Solutions: Epoxy Putty vs. Pipe Caps
When it comes to long-term solutions, homeowners have several options, including epoxy putty and pipe caps. Here’s a comparison:
| Solution | Durability | Ease of Application | Cost |
|---|---|---|---|
| Epoxy Putty | High | Moderate | Low-Moderate |
| Pipe Caps | Very High | Easy | Moderate-High |
Drilling into walls to hang items can sometimes lead to accidental punctures of pipes, causing significant water damage. Being cautious and knowing the location of your pipes can help avoid such issues.
Preventive Measures for Future Plumbing Issues

Taking proactive steps can significantly reduce the likelihood of plumbing issues. By understanding the importance of regular inspections, protecting your plumbing during harsh weather conditions, and maintaining your appliances, you can avoid many common plumbing problems.
Regular Inspections: Your First Line of Defense
Regular inspections are crucial for identifying potential issues before they become major problems. Checking your plumbing system periodically can help you detect leaks, corrosion, and other forms of damage early on. It’s recommended to inspect your plumbing at least once a year, paying particular attention to visible pipes, fixtures, and appliances.
A great plumbing tip is to know where the shut-off valves are in your home. This knowledge can be invaluable in case you need to shut off the water supply quickly to prevent damage.
Key Areas to Inspect:
- Visible pipes for signs of leaks or corrosion
- Water heaters for proper function and leakage
- Drainage systems for clogs or slow draining
- Toilet flappers and fill valves for proper operation
Protecting Your Plumbing in Winter
Winter can be harsh on plumbing systems, especially in colder climates. Freezing temperatures can cause pipes to burst, leading to costly repairs. To protect your plumbing, consider the following tips:
“Insulating exposed pipes in unheated areas like the garage, basement, or crawlspace can help prevent them from freezing.”
Additionally, letting cold water drip from faucets served by exposed pipes and opening cabinet doors under sinks can help keep water moving and reduce the risk of freezing.
| Winter Protection Tip | Description |
|---|---|
| Insulate Exposed Pipes | Use foam pipe insulation or heat tape to keep pipes warm. |
| Let Faucets Drip | Allow cold water to drip from faucets served by exposed pipes. |
| Open Cabinet Doors | Open doors under sinks to let warm air circulate around pipes. |
Best Practices for Appliance Maintenance
Maintaining your plumbing appliances is essential for their longevity and efficiency. Regularly check and replace worn-out parts, clean filters, and ensure that appliances are properly installed and configured.
For instance, water heaters should be checked annually for signs of wear and tear. Flushing the tank to remove sediment can improve efficiency and prolong its lifespan.
By following these preventive measures, you can significantly reduce the risk of plumbing issues and ensure that your system operates smoothly and efficiently.
Final Thoughts: Empowering Yourself as a DIY Plumber
Mastering DIY plumbing solutions can save you money and reduce stress. By understanding common plumbing issues and learning basic repair techniques, you can tackle beginner plumbing projects with confidence. Regular maintenance and plumbing troubleshooting for beginners can help prevent costly repairs down the line.
Ongoing Learning and Skills Development
To further develop your skills, explore online resources, such as the A-Team Plumbing blog, which offers valuable tips and tricks for homeowners. You can also consider joining local plumbing workshops or classes to gain hands-on experience.
Knowing Your Limits
While DIY plumbing solutions can be cost-effective, it’s essential to recognize when to call a professional. Emergency situations, such as burst pipes or sewage backups, require immediate attention from a qualified plumber. For expert assistance, don’t hesitate to contact a trusted plumbing service, like emergency plumbing services, or call a reputable plumber at 1-Tom-Plumber (1-866-758-6237).