Fixing a leaky faucet or unclogging a drain can be a daunting task for many homeowners. However, with basic tools and skills, these common plumbing issues can be resolved with ease. By learning simple DIY repairs, homeowners can save money and prevent major problems from arising.
According to experts, many plumbing repairs can be done with basic tools and skills, making them accessible to beginners. For instance, fixing a drippy single-lever kitchen faucet can take about an hour, and 95 percent of toilet flush problems can be solved with a simple four-step strategy.
Key Takeaways
- Simple DIY plumbing repairs can save homeowners money.
- Basic tools and skills are required for most plumbing fixes.
- Fixing common issues like leaky faucets and clogged drains can be done with ease.
- Many plumbing repairs can be completed in under an hour.
- Learning beginner-friendly plumbing advice can prevent major problems.
Understanding Common Plumbing Issues
Understanding the basics of plumbing issues can empower homeowners to tackle problems effectively. Plumbing issues can range from simple leaks to complex problems like burst pipes. Knowing how to identify and address these issues is crucial for maintaining a safe and functional home.
Identifying Leaks
Leaks are a common plumbing issue that can occur around bathtubs, showers, sinks, and toilets. Identifying leaks early can prevent water damage and save on water bills. Look for signs like water spots, warped flooring, or running water sounds when faucets are off. For more complex issues or if you’re unsure about how to proceed, consider consulting plumbing experts for trusted repairs.
Clogged Drains
Clogged drains are another frequent plumbing problem. They can occur due to hair accumulation, grease buildup, or other debris. Using a plunger or a drain snake can often resolve the issue. For more stubborn clogs, chemical drain cleaners might be necessary, but use them with caution.
Running Toilets
A running toilet can waste a significant amount of water and increase your utility bills. Common causes include a faulty flapper or an improperly adjusted float. Checking and adjusting these components can usually fix the issue. If problems persist, it may be worth inspecting the fill valve.
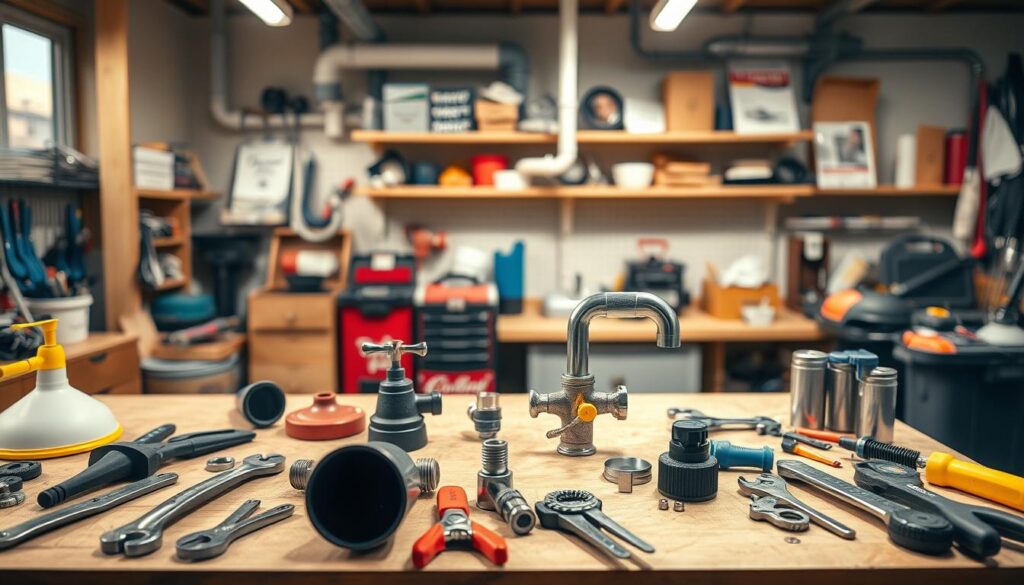
Essential Plumbing Tools for Beginners

For anyone diving into beginner plumbing projects, having the right tools is crucial. Understanding the must-have tools and safety gear can make a significant difference in the success of your do-it-yourself plumbing tips.
Must-Have Tools
To tackle basic plumbing fixes, you’ll need a variety of tools. Here are some essentials:
- Pliers and Wrenches: These are fundamental for gripping and twisting objects. Needle-nose pliers are particularly useful for reaching into tight spaces.
- Pipe Cutters: Essential for cutting pipes cleanly and efficiently. There are different types, including manual and ratcheting cutters.
- Teflon Tape: Used to create a watertight seal on threaded pipe connections.
- Plunger: A must-have for clearing clogs in sinks, toilets, and drains.
- Drain Snake: Useful for more stubborn clogs that a plunger can’t clear. Check out the best plumbing tools for more information.
Safety Gear
Safety should always be a top priority when working on plumbing projects. Here are some essential safety items:
- Gloves: Protect your hands from sharp edges and rough surfaces.
- Safety Glasses: Shield your eyes from debris and chemical splashes.
- Work Light: Ensure you have adequate lighting to see what you’re doing, reducing the risk of accidents.
For more advanced DIY projects, consider visiting top plumbing tools and pipes for DIY to expand your toolkit.
How to Fix a Leaky Faucet
With a few basic tools and some simple steps, you can fix a leaky faucet in no time. Fixing a leaky faucet is not only a DIY plumbing solution that saves you money, but it’s also an easy plumbing hack that helps conserve water.
Step-by-Step Guide
To start, you’ll need to turn off the water supply to the faucet. This is usually done by locating the shut-off valves under the sink and turning them clockwise. Once the water is off, you can disassemble the faucet to identify the source of the leak.
Most leaky faucets are caused by worn-out O-rings or gaskets. To fix the issue, you’ll need to replace these parts. Here’s a simple step-by-step process:
- Disassemble the faucet to access the faulty parts.
- Remove the old O-rings or gaskets.
- Install new O-rings or gaskets.
- Reassemble the faucet.
- Turn on the water supply and check for leaks.
Necessary Supplies
Before you start, make sure you have the necessary supplies. These typically include:
| Tool | Description |
|---|---|
| Adjustable wrench | For tightening and loosening various parts of the faucet. |
| Channel-type pliers | For gripping and removing old O-rings or gaskets. |
| Replacement O-rings or gaskets | To replace the worn-out parts causing the leak. |
By following these simple plumbing repairs, you can fix a leaky faucet efficiently and effectively, saving water and reducing your utility bills.
Dealing with a Clogged Sink

Clogged sinks are a common issue in many households, but fortunately, there are several simple techniques to resolve this problem. A clogged sink can be frustrating, but understanding the cause and knowing how to address it can save time and effort.
Simple Techniques
One of the first steps in dealing with a clogged sink is to try and remove any visible blockages. Checking the sink drain for hair or debris and clearing it can often resolve the issue. For more stubborn clogs, using a plunger can be effective. Ensure the plunger is properly seated over the drain and push down slowly and steadily to create suction.
Another effective tool for clearing clogs is a drain snake. This flexible rod can be inserted into the drain to break up or retrieve the clog. For more complex clogs, a drain snake with a drill attachment can provide extra power to clear the blockage.
When to Call a Professional
While many clogged sinks can be resolved with DIY techniques, there are times when it’s necessary to call a professional plumber. If you’ve tried using a plunger and drain snake without success, or if you suspect a more serious issue like a sewer line blockage, it’s time to seek help. Additionally, if you’re not comfortable with DIY plumbing repairs, it’s better to consult a professional to avoid causing further damage.
For more information on how to unclog a bathroom sink, you can visit Home Depot’s guide on the topic. This resource provides detailed instructions and tips for tackling the issue.
Toilet Troubles: Common Problems and Fixes
Toilet troubles can be a real headache, but fortunately, many common issues can be resolved with simple DIY plumbing solutions. A running toilet, for instance, is not only annoying but also wastes a significant amount of water.
For more information on common toilet problems and their fixes, you can visit Lowe’s guide on the topic.
Fixing a Running Toilet
A running toilet is often caused by an issue with the flapper or the float level. To fix this, you’ll first need to understand how these components work together. The flapper is a rubber valve that covers the hole at the bottom of the tank, and the float is a buoyant device that rises and falls with the water level.
- Check the flapper for any signs of wear or misalignment.
- Adjust the float level to ensure it’s not too high, causing water to spill into the overflow tube.
- If the flapper is damaged, replace it with a new one.
Adjusting Float Levels
Adjusting the float level is a straightforward process that can help resolve the issue of a running toilet. To do this:
- Locate the float arm and adjust it to change the water level.
- Turn off the water supply to the toilet before making any adjustments.
- Test the toilet by flushing it several times to ensure the water level is at the correct height.
By following these easy plumbing hacks, you can save water and reduce your utility bills. Remember, do-it-yourself plumbing tips can be very helpful, but if you’re unsure about any aspect of the repair, it’s always best to consult a professional plumber.
Fixing a Dripping Shower Head

Fixing a leaky shower head is a simple yet effective way to conserve water and reduce your utility bills. A dripping shower head not only wastes water but can also lead to increased water pressure, potentially causing more significant plumbing issues down the line.
Replacing Washers
One of the most common causes of a dripping shower head is a worn-out or damaged washer. Replacing the washer is a straightforward process that requires minimal tools. First, you’ll need to disassemble the shower head to access the worn-out washer. Typically, this involves unscrewing the shower head from the shower arm. Once you have access to the washer, you can replace it with a new one of the same size and type.
For a successful replacement, ensure you purchase a washer that matches the specifications of the original. It’s also crucial to turn off the water supply before starting the repair to avoid any mess or water damage.
Checking for Corrosion
Corrosion within the shower head or its connecting pipe can also cause leaks. To check for corrosion, inspect the shower head and its connections for any signs of rust or mineral buildup. If you find corrosion, you may need to replace the affected parts entirely.
Regular maintenance, such as cleaning the shower head and checking for mineral deposits, can help prevent corrosion. Using a water filter can also reduce the risk of corrosion by minimizing the minerals that can cause buildup.
| Cause | Solution | Prevention Tips |
|---|---|---|
| Worn-out Washer | Replace the washer with a new one | Regularly inspect washers for wear |
| Corrosion | Replace corroded parts | Use a water filter, clean shower heads regularly |
For more detailed guidance on fixing a dripping shower head, you can refer to this comprehensive guide. By addressing the issue promptly, you can avoid wasting water and potentially prevent more costly repairs in the future.
Basics of Pipe Maintenance
Proper pipe maintenance is crucial for preventing costly repairs and ensuring the longevity of your plumbing system. By taking proactive steps, homeowners can avoid many common plumbing issues that arise from neglected pipes.
Preventing Freeze Damage
In colder climates, one of the most significant risks to pipes is freezing temperatures. When water inside pipes freezes, it expands, potentially causing pipes to burst. To prevent this, insulating exposed pipes in unheated areas like the garage, basement, or crawlspace is essential. You can use foam pipe insulation or heat tape to keep pipes warm. Additionally, letting cold water drip from faucets served by exposed pipes can help prevent freezing.
Regular Inspection Tips
Regular inspections are vital for identifying potential issues before they become major problems. Homeowners should check for signs of leaks, corrosion, or damage around pipes. It’s also a good idea to inspect pipes under sinks, around toilets, and near water heaters. Look for water droplets, rust, or mineral deposits, which can indicate a problem. Early detection can save you from costly repairs down the line.
- Check for leaks around faucets and toilets.
- Inspect pipes for signs of corrosion or wear.
- Ensure that all pipes are properly insulated, especially in colder areas.
By following these pipe maintenance basics, you can help ensure your plumbing system remains in good condition, reducing the risk of unexpected issues and costly repairs.
How to Change a Faucet

Learning how to change a faucet is a valuable skill that can save homeowners time and money on plumbing repairs. It’s a task that, while seemingly complex, can be broken down into manageable steps, making it a great beginner plumbing project.
Selecting the Right Faucet
Before you start, it’s crucial to select the right faucet for your needs. Consider factors such as the type of sink you have, the number of holes available for faucet installation, and your personal preferences regarding style and functionality. This is where do-it-yourself plumbing tips can be particularly helpful.
- Identify the type of faucet you need (e.g., single-handle, double-handle, touchless).
- Measure your sink to ensure compatibility.
- Consider the finish and style to match your existing decor.
DIY Installation Steps
Once you’ve selected your new faucet, the next step is installation. Here are the basic steps to follow for a successful basic plumbing fix:
- Shut off the water supply to your faucet. You’ll typically find shut-off valves under the sink.
- Disconnect the old faucet, taking care not to damage the surrounding area.
- Remove any old adhesive or debris from the sink area where the new faucet will be installed.
- Install the new faucet according to the manufacturer’s instructions.
- Turn on the water supply and check for leaks.
By following these steps and taking your time, you can successfully change your faucet and enjoy the benefits of a new, functional plumbing fixture.
Understanding Garbage Disposals
Understanding how garbage disposals work is essential for troubleshooting common issues. Garbage disposals are a crucial part of kitchen plumbing, simplifying the process of managing food waste. However, like any appliance, they require maintenance and can sometimes malfunction.
Troubleshooting Basics
When a garbage disposal isn’t working correctly, it’s often due to a simple issue that can be resolved with basic troubleshooting. Here are some common problems and their solutions:
- Not Turning On: Check if the disposal is properly plugged in and if the circuit breaker hasn’t tripped.
- Clogged: Use a hex key to manually turn the disposal’s flywheel and clear any blockages.
- Leaking: Inspect the disposal’s seals and connections for signs of wear or damage.
For more detailed troubleshooting guides, you can refer to resources like Young Plumbing’s 2025 Guide to Garbage, which offers comprehensive advice on maintaining and repairing your garbage disposal.
Safe Cleaning Tips
Cleaning your garbage disposal regularly is crucial for its longevity and performance. Here are some safe and effective cleaning tips:
- Freeze Lemon Peels: Freezing lemon peels and then running them through the disposal can help clean and deodorize it.
- Baking Soda and Vinegar: Pouring baking soda followed by vinegar down the drain and letting it sit before rinsing can help remove grease and debris.
- Ice Cubes: Running ice cubes through the disposal can help sharpen the blades and remove any stuck-on food particles.
| Cleaning Method | Benefits |
|---|---|
| Freezing Lemon Peels | Deodorizes and cleans the disposal |
| Baking Soda and Vinegar | Removes grease and debris, natural and non-corrosive |
| Ice Cubes | Sharpens blades, removes stuck-on food |
By following these troubleshooting basics and safe cleaning tips, you can keep your garbage disposal in good working condition, ensuring it continues to be a valuable asset in your kitchen. Regular maintenance not only extends the life of the appliance but also helps prevent more significant plumbing issues down the line.
Cleaning Out a Drain Trap

Simple plumbing repairs, like cleaning out a drain trap, can save you money and hassle in the long run. A drain trap, also known as a P-trap, is a curved pipe under your sink that traps a small amount of water, preventing sewer gases from entering your home. Over time, it can accumulate debris, leading to clogs and unpleasant odors.
Tools Needed
Before you start, gather the necessary tools to make the process smoother. You’ll need:
- A bucket to catch any water that spills out
- Slip-joint pliers or a pipe wrench to loosen the slip nuts
- A plumber’s snake or a drain auger to remove any clogs
Having the right tools on hand is crucial for a successful DIY plumbing repair.
Step-by-Step Removal Process
To clean out the drain trap, follow these steps:
- Place the bucket under the drain trap to catch any water.
- Loosen the slip nuts that hold the trap in place using your pliers or wrench.
- Carefully remove the trap and clean out any debris.
- Use a plumber’s snake if you encounter any clogs in the pipe.
- Reassemble the trap, making sure the slip nuts are tightened securely.
Remember, regular maintenance can prevent many common plumbing issues.
By following these beginner-friendly plumbing advice tips, you can keep your plumbing system running smoothly and avoid more complex problems down the line.
Water Heater Maintenance
Keeping your water heater in good condition requires regular checks and maintenance tasks. Proper maintenance not only extends the lifespan of your water heater but also ensures it operates efficiently, saving you money on energy bills.
Flushing Your Water Heater
One of the crucial DIY plumbing solutions is flushing your water heater. Over time, sediment builds up at the bottom of the tank, reducing its efficiency and potentially causing damage. Flushing the tank removes this sediment.
- Turn off the power or gas supply to your water heater.
- Connect a hose to the drain valve and place the other end in a suitable drainage area.
- Open the drain valve and allow the tank to empty.
- Once the tank is empty, close the drain valve and remove the hose.
- Turn on the cold water supply to fill the tank, and repeat the draining process until the water runs clear.
Checking Temperature Settings
Another important plumbing tip for beginners is checking and adjusting the temperature settings on your water heater. The ideal temperature is around 120°F (49°C), which is hot enough for most household needs while minimizing the risk of scalding.
- Locate the thermostat on your water heater.
- Check the current temperature setting.
- Adjust the thermostat to 120°F (49°C) if necessary.
By following these easy plumbing hacks, you can ensure your water heater operates safely and efficiently. Regular maintenance checks can help prevent costly repairs and prolong the life of your water heater.
Fixing a Leaking Toilet Tank

Fixing a leaking toilet tank is a straightforward DIY task that can save you money on your water bill. A leaking toilet tank can waste a significant amount of water, leading to increased utility bills and potential water damage. Fortunately, with a few simple steps, you can identify and fix the issue.
Replacing Tank Parts
One of the most common causes of a leaking toilet tank is worn-out or damaged parts. To fix this, you’ll need to replace the faulty components. Start by turning off the water supply to the toilet by locating the shut-off valve behind the tank and turning it clockwise. Once the water supply is off, you can begin disassembling the tank to access the parts that need replacement.
Common parts that may need replacement include the flapper, fill valve, and tank-to-bowl gasket. For a comprehensive guide on replacing these parts, you can refer to detailed resources like Home Depot’s guide on fixing a toilet.
| Part | Description | Common Issues |
|---|---|---|
| Flapper | Rubber valve that covers the hole at the bottom of the tank | Wears out, becomes misaligned |
| Fill Valve | Mechanism that refills the tank with water | Malfunctions, causing continuous running |
| Tank-to-Bowl Gasket | Seal between the tank and the toilet bowl | Deteriorates, causing leaks |
Checking Flapper Valve
The flapper valve is a critical component that can cause leaks if not properly maintained. To check the flapper, inspect it for any signs of wear or misalignment. If the flapper is damaged, replace it with a new one that matches the specifications of your toilet model.
Tips for Checking the Flapper:
- Ensure the flapper is properly aligned with the flush valve.
- Check for any mineral buildup or debris that might affect the seal.
- Adjust or replace the flapper as necessary to prevent leaks.
By following these steps and replacing worn-out parts or adjusting the flapper valve, you can effectively fix a leaking toilet tank. This not only helps in conserving water but also reduces your utility bills. For more complex issues or if you’re unsure about any part of the process, consider consulting a professional plumber.
DIY Pipe Insulation Techniques
One of the easiest plumbing hacks is insulating your pipes to avoid freeze damage. Insulating pipes is a beginner-friendly plumbing advice that can make a significant difference in maintaining your home’s plumbing system. By taking this simple step, you can prevent pipes from freezing during cold weather, reduce the risk of bursts, and lower your energy bills.
Materials to Use
When it comes to insulating pipes, there are several materials you can use, each with its own benefits. Some of the most common materials include:
- Foam pipe insulation: Easy to install and effective for most pipe types.
- Fiberglass: Provides good insulation but may require additional wrapping.
- Rubber foam: Flexible and suitable for pipes in tight spaces.
- Heat tape or thermostatically controlled heat cables: Ideal for pipes prone to freezing.
Benefits of Insulation
Insulating your pipes offers several benefits, making it a basic plumbing fix worth considering. Some of the key advantages include:
- Prevents pipes from freezing and bursting during cold weather.
- Reduces noise from pipes.
- Lowers energy costs by keeping water warmer as it travels through pipes.
- Protects pipes from corrosion.
By insulating your pipes, you can enjoy a more efficient and less troublesome plumbing system. It’s a simple, cost-effective measure that aligns with easy plumbing hacks and beginner-friendly plumbing advice, making it an ideal DIY project for homeowners.
When to Call a Professional Plumber
While DIY plumbing solutions can be effective for minor issues, knowing when to seek professional help is crucial for more complex problems. Persistent leaks, complex clogs, or water damage are signs that it’s time to call a professional plumber.
Recognizing the Signs
If you’re experiencing recurring plumbing issues despite attempting DIY fixes, it’s likely a sign of a deeper problem that requires expert attention. Additionally, if you’re unsure about how to proceed with a repair or feel uncomfortable with the process, seeking professional help can prevent further damage.
Choosing the Right Plumber
When selecting a professional plumber, look for licensed and insured individuals with good reputations. Check online reviews, ask for referrals, and compare prices to find the best fit for your needs. By following these plumbing tips for beginners and knowing when to seek help, you can ensure your plumbing system remains in good condition.
Effective DIY plumbing solutions and do-it-yourself plumbing tips can go a long way in maintaining your home’s plumbing. However, don’t hesitate to seek professional help when needed to avoid costly repairs.