As a homeowner, having basic plumbing skills can be a lifesaver when faced with minor emergencies or common household issues. While complex projects require professional attention, many tasks can be tackled independently with the right tools and knowledge.
Understanding your home’s plumbing system, including the main water supply, pipes, fixtures, and drainage, is crucial. By familiarizing yourself with DIY plumbing tips, you can handle tasks like fixing leaky faucets, unclogging drains, and performing basic pipe repairs.
Key Takeaways
- Understanding the main components of your home’s plumbing system.
- Familiarizing yourself with essential plumbing tools.
- Learning to fix common issues like leaky faucets and clogged drains.
- Performing basic pipe repairs and replacements.
- Managing plumbing emergencies effectively.
Understanding Basic Plumbing Terminology
To get started with DIY plumbing, it’s crucial to understand the fundamental terms and concepts used in the trade. Having a grasp of basic plumbing terminology will not only make it easier to tackle projects but also help in identifying and potentially solving common plumbing problems.
Common Plumbing Terms Explained
Plumbing involves a variety of terms that are essential to understand for effective DIY projects. Terms like “fixture,” referring to devices that use water, such as sinks and toilets, and “pipe fittings,” which connect pipes together, are fundamental. Understanding these terms can simplify the process of learning basic plumbing techniques.
Other key terms include “valves,” which control water flow, and “drainage system,” which refers to the pipes that carry wastewater away from fixtures. Familiarizing yourself with these terms will enhance your ability to diagnose and fix common plumbing issues.
“Understanding the language of plumbing is the first step towards becoming proficient in handling plumbing tasks.” – Plumbing Expert
Key Components of a Plumbing System
A typical residential plumbing system consists of several key components. The main water supply line brings water into the home, while the distribution lines carry water to various fixtures. The drainage system, as mentioned, is responsible for removing wastewater.
| Component | Description |
|---|---|
| Main Water Supply | Brings water into the home |
| Distribution Lines | Carries water to fixtures |
| Drainage System | Removes wastewater |
Understanding these components and how they work together is crucial for identifying potential issues and performing basic plumbing techniques. For instance, knowing how to shut off the main water supply can prevent significant water damage during repairs.
By grasping the basics of plumbing terminology and understanding the key components of a plumbing system, homeowners can better tackle DIY plumbing projects and address common plumbing problems more effectively.
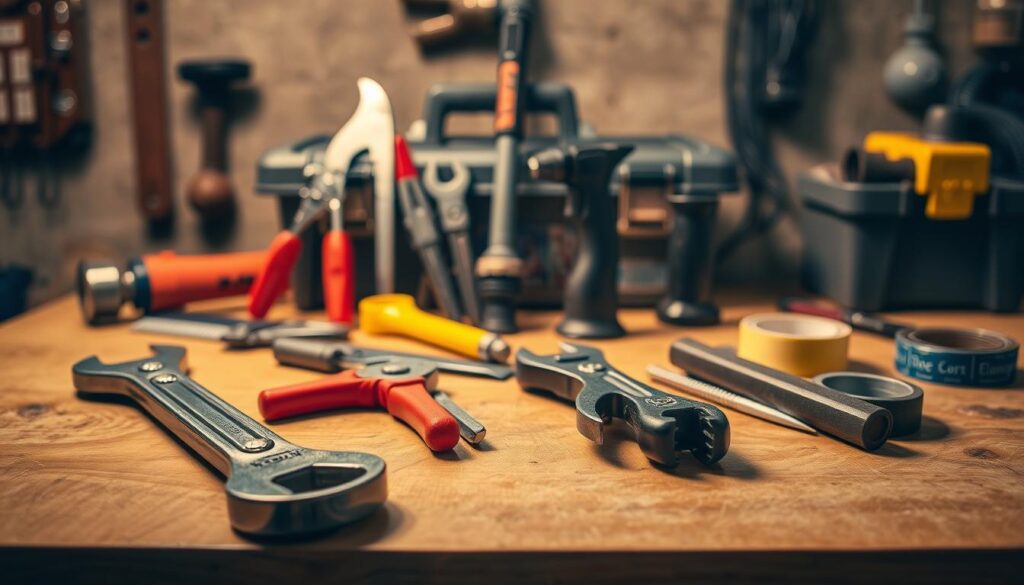
Essential Tools for DIY Plumbing

The success of DIY plumbing projects hinges on the tools you use. Having the right equipment not only makes the job easier but also ensures that repairs are done correctly and safely.
Must-Have Hand Tools
Hand tools are the backbone of any DIY plumbing project. Some of the essentials include:
- Adjustable wrenches for tightening and loosening fittings
- Pliers for gripping and bending objects
- Pipe cutters for cutting through pipes cleanly
- Plungers for unclogging drains
- Teflon tape for creating watertight seals
These hand tools are essential for beginners and experienced DIY plumbers alike, providing the necessary functionality for most plumbing tasks.
Power Tools for Plumbing Jobs
While hand tools are sufficient for many tasks, power tools can significantly ease the workload for more complex projects. Some key power tools include:
- Pipe threaders for threading pipe ends
- Drills for making holes in walls or pipes
- Reciprocating saws for cutting through pipes or other materials
Using the right power tools can save time and effort, making plumbing repair tips more accessible to DIY enthusiasts.
Safety Equipment and Gear
Safety should always be a top priority when working on plumbing projects. Essential safety equipment includes:
- Gloves for protecting hands from cuts and abrasions
- Goggles for shielding eyes from debris
- Work lights for illuminating dark spaces
By combining the right tools with proper safety gear, DIY plumbers can ensure a safe and successful project outcome.
Diagnosing Common Plumbing Problems
Understanding the signs of common plumbing problems is the first step towards resolving them effectively. Plumbing issues can range from leaky faucets and clogged drains to water pressure problems, all of which can significantly impact your daily life.
Identifying Leaks in Pipes
Leaks in pipes can lead to wasted water, increased utility bills, and potential water damage. To identify leaks, look for signs such as water spots on walls or ceilings, warped flooring, or running water sounds when all faucets are turned off. You can also check your water meter to detect hidden leaks. For more information on the tools needed for DIY plumbing projects, including leak detection, visit our guide on top plumbing tools and pipes for DIY.
Signs of Clogged Drains
Clogged drains are another common plumbing issue that can cause inconvenience and health hazards. Signs of a clogged drain include slow draining water, gurgling sounds from the drain, and unpleasant odors emanating from the sink or toilet. Regular maintenance, such as using a drain screen and being mindful of what you flush, can help prevent clogs.
Understanding Water Pressure Issues
Water pressure problems can manifest as either low or high pressure. Low water pressure might result from clogged aerators, mineral buildup, or issues with the municipal water supply. High water pressure, on the other hand, can strain your pipes and lead to leaks. Checking your water pressure regularly and installing a pressure regulator if necessary can help mitigate these issues.
By understanding how to diagnose these common plumbing problems, you can take the first steps towards fixing them and maintaining a healthy plumbing system in your home.
How to Fix Leaky Faucets

With a few simple tools and some basic plumbing knowledge, you can fix a leaky faucet and reduce your water consumption. Leaky faucets are a common issue that not only wastes water but also increases your utility bills. Fortunately, fixing them is often a straightforward DIY task.
Tools Needed for the Repair
Before you start, it’s essential to have the right tools. For most leaky faucet repairs, you’ll need:
- An adjustable wrench
- A screwdriver (flathead or Phillips, depending on the faucet)
- Replacement parts (e.g., O-rings, gaskets, or valve seats)
- Plumber’s tape
Having these tools on hand will make the repair process smoother and more efficient.
Step-by-Step Repair Process
The exact steps to fix a leaky faucet can vary depending on the type of faucet you have. However, the general process involves:
- Turning off the water supply to the faucet.
- Disassembling the faucet to identify the source of the leak.
- Replacing the worn-out or damaged parts.
- Reassembling the faucet and turning on the water supply.
For cartridge faucets, you may need to remove the cartridge and replace it if it’s damaged. For compression faucets, check the O-rings or gaskets for signs of wear.
Preventative Maintenance Tips
To prevent future leaks and maintain your faucets, consider the following plumbing maintenance strategies:
- Regularly check your faucets for signs of leaks or wear.
- Clean the aerator to prevent mineral buildup.
- Replace worn-out parts before they cause significant leaks.
By following these plumbing repair tips, you can extend the life of your faucets and avoid costly repairs down the line.
Unclogging Drains Effectively
Understanding how to unclog drains effectively is an essential skill for any homeowner. Clogged drains can lead to a range of issues, from minor inconveniences to significant plumbing problems. In this section, we will explore the most effective methods for clearing clogged drains.
Using a Plunger
A plunger is one of the most basic and effective tools for unclogging drains. To use a plunger correctly, ensure the drain is covered by the plunger’s rubber edge, then push down slowly and steadily until you feel resistance, and pull back up. Repeat this process several times to create suction that can dislodge the clog.
When to Use a Drain Snake
If plunging doesn’t work, the next step is often to use a drain snake. A drain snake is a long, flexible rod that can be inserted into the drain to break up or retrieve the clog. It’s particularly useful for clogs that are further down the pipe. For more complex clogs, consider seeking assistance from plumbing experts who can provide trusted repairs.
Chemical Drain Cleaners: Do’s and Don’ts
Chemical drain cleaners can be effective, but they should be used with caution. Always follow the manufacturer’s instructions, and be aware that these chemicals can damage pipes or cause injury if not handled properly. Here are some key points to consider:
- Use chemical drain cleaners as a last resort, after trying other methods like plunging or using a drain snake.
- Never mix different chemical drain cleaners, as this can cause dangerous reactions.
- Wear protective gear, including gloves and eye protection, when using chemical drain cleaners.
By understanding when and how to use these different methods, homeowners can effectively clear clogged drains and prevent future issues, making it a valuable part of any do it yourself plumbing guide.
Basic Pipe Repairs for DIYers

Mastering basic pipe repairs can significantly reduce the risk of water damage in your home. Minor pipe repairs can save you from potential water damage and costly repairs down the line.
Patch vs. Replace: When to Choose
Deciding whether to patch or replace a pipe depends on the extent of the damage. For small leaks or cracks, a patch job might be sufficient. However, if the pipe is extensively damaged or corroded, replacement is often the better option.
| Condition | Recommended Action |
|---|---|
| Small leak or crack | Patch the pipe |
| Extensive damage or corrosion | Replace the pipe |
Techniques for Patching Pipes
Patching pipes can be done using various methods, including epoxy-based compounds or pipe clamps. For a successful repair, it’s crucial to clean the area around the leak and apply the patch according to the manufacturer’s instructions.
“A successful pipe repair is not just about fixing the leak; it’s about ensuring the longevity of the fix.”
For more complex repairs or if you’re unsure about the best approach, consider consulting a professional. You can find emergency plumbing services at https://worldcivilsociety.com/emergency-contractor-services/.
Safety Tips for Working with Pipes
Safety is paramount when working with pipes. Always turn off the main water supply before starting repairs. Wear protective gear, including gloves and safety glasses, to protect yourself from sharp edges and potential chemical exposure.
By following these guidelines and tips, DIYers can effectively manage basic pipe repairs, ensuring their home remains safe and secure.
Installing Bathroom Fixtures
DIY enthusiasts can successfully install bathroom fixtures by following a step-by-step guide and using the appropriate plumbing tools for beginners. This comprehensive do it yourself plumbing guide will walk you through the process, ensuring a professional-looking result.
Preparing for Installation
Before starting the installation, it’s crucial to prepare the bathroom area. This involves turning off the water supply, clearing the space around the fixture, and ensuring all necessary tools and materials are within reach.
- Turn off the main water supply to avoid any accidents or water damage.
- Clear the area around the fixture to have unobstructed access.
- Gather all necessary tools and materials as per the manufacturer’s instructions.
Step-by-Step Guide for Sinks
Installing a bathroom sink requires careful planning and execution. Here’s a simplified step-by-step guide:
- Position the sink in the desired location and mark the mounting holes.
- Drill the marked holes and secure the sink with the provided mounting hardware.
- Connect the water supply lines to the faucet, ensuring tight and leak-free connections.
- Test the sink by running water through it to check for leaks.
Tips for Installing a Toilet
Installing a toilet requires precision to ensure a proper fit and function. Here are some key tips:
- Carefully measure the rough-in distance to choose the correct toilet model.
- Use a wax ring to create a seal between the toilet and the flange, preventing leaks.
- Tighten the toilet bolts securely but avoid over-tightening, which can damage the porcelain.
- Test the toilet by flushing it several times to check for any leaks or issues.
By following these guidelines and using the right plumbing tools for beginners, you can successfully install bathroom fixtures, enhancing the functionality and aesthetic of your bathroom.
Working with Water Supply Lines

Effective plumbing maintenance strategies start with a solid grasp of water supply lines. Understanding how to work with these lines is crucial for any DIY plumbing project.
Understanding Water Supply Systems
A water supply system is a network of pipes, fixtures, and appliances that distribute water throughout a building. It’s essential to understand the components of this system to perform repairs and maintenance effectively. The system includes the main shut-off valve, water meter, and various pipes that supply water to different parts of the building.
For those looking to manage complex projects, understanding the broader context of project management can be helpful. For instance, learning how to manage a civil engineering can provide valuable insights into organizing and executing large-scale plumbing projects.
Connecting Flexible Hose vs. Rigid Pipes
When it comes to connecting water supply lines, you have two primary options: flexible hoses and rigid pipes. Flexible hoses are easier to install and maneuver, making them ideal for DIY projects. They can absorb vibrations and are less likely to leak at the connections.
Rigid pipes, on the other hand, offer durability and a more permanent solution. They are less prone to kinking and can withstand higher water pressures. However, they require more skill to install and may need additional fittings.
Choosing between flexible hoses and rigid pipes depends on the specific requirements of your project, including water pressure, space constraints, and personal preference.
Basics of Shower and Tub Installation
Understanding the basics of shower and tub installation can save you time and money. Installing showers and tubs requires careful planning and preparation to ensure a successful DIY project.
Preparing the Space
Before starting the installation, it’s crucial to prepare the space. This involves checking the bathroom’s plumbing and electrical systems to ensure they can support the new fixtures. Clear the area around the installation site and protect the floor and surrounding surfaces with drop cloths or plastic sheets.
Measure the space carefully to ensure the new shower or tub fits perfectly. Consider factors like drainage, water supply lines, and the location of any electrical outlets.
Choosing the Right Fixtures
Selecting the right fixtures is vital for a successful installation. Consider the style, material, and functionality you need. For beginners, it’s essential to choose fixtures that are easy to install and compatible with your existing plumbing system.
When choosing a shower or tub, think about the water pressure and flow rate. Some fixtures require higher water pressure, so it’s crucial to check your home’s water supply system.
Ensuring Proper Drainage
Proper drainage is critical to prevent water damage and ensure a safe and functional bathroom. Check that the drain is correctly sized and aligned with the shower or tub.
Use a level to ensure the shower or tub is installed perfectly level, which is crucial for proper drainage. Consider using a drain assembly with a built-in trap to prevent sewer gases from entering your home.
For a do-it-yourself plumbing guide, it’s recommended to consult online resources or plumbing experts to ensure you’re following the best practices for shower and tub installation.
Understanding Sewer Systems

Knowing the ins and outs of your home’s sewer system can help you troubleshoot common problems and maintain your plumbing effectively. A well-functioning sewer system is vital for the overall health of your household plumbing.
The Basics of Household Sewers
A household sewer system is a network of pipes that carry wastewater from your home to the municipal sewer main or a septic tank. Understanding how this system works is essential for identifying potential issues before they become major problems.
The sewer system typically starts with the drains in your home, which are connected to a network of pipes under your house and yard. These pipes slope downward to allow gravity to carry wastewater away from your home.
Common Problems and Solutions
Some common issues with sewer systems include clogs, backups, and cracks in the pipes. Clogs can occur due to the buildup of debris, grease, or tree roots invading the pipes. Regular maintenance, such as inspecting your sewer lines and clearing blockages, can help prevent these issues.
| Problem | Symptoms | Solution |
|---|---|---|
| Clogged Sewer Line | Slow drains, gurgling sounds | Use a drain snake or call a professional |
| Sewer Backup | Wastewater backing up into the home | Contact a plumbing professional immediately |
| Cracked Sewer Pipe | Water pooling around the yard, sinkholes | Repair or replace the damaged pipe |
For more detailed information on maintaining your home’s plumbing system, you can visit Understanding Your Home’s Plumbing System: A Beginner’s.
“Regular maintenance of your sewer system can save you from costly repairs and ensure the longevity of your plumbing system.”
By understanding the basics of your sewer system and being aware of common problems, you can take proactive steps to maintain your plumbing and avoid major issues.
Planning for Plumbing Projects
A well-planned DIY plumbing project can save you time, money, and unnecessary stress. Planning is crucial for successful DIY plumbing projects, as it helps you prepare for the task at hand and avoid potential pitfalls.
To start, it’s essential to understand the scope of your project. Are you fixing a leaky faucet or installing a new bathroom? Knowing the extent of your project will help you create a more accurate plan. For a comprehensive do it yourself plumbing guide, consider the steps involved and the materials needed.
Creating a Step-by-Step Plan
Creating a step-by-step plan is vital for the success of your plumbing project. Begin by breaking down the project into smaller, manageable tasks. This could include turning off the water supply, dismantling the existing fixture, and installing the new one. By having a clear plan, you’ll be able to tackle each step with confidence.
For complex tasks, consider the following steps:
- Identify the task and the tools required
- Research the best practices for the task
- Prepare a timeline for completing the task
- Execute the task according to your plan
Budgeting for Materials and Tools
Budgeting is another critical aspect of planning your DIY plumbing project. Start by listing all the materials and tools you’ll need. For a basic project like fixing a leaky faucet, you might need a set of wrenches, Teflon tape, and a replacement part. For more complex projects, such as installing a new bathroom sink, you’ll need additional materials like pipes, fittings, and possibly a new water supply line.
To save on costs, consider the following plumbing repair tips:
- Buy materials and tools in advance to avoid last-minute, costly purchases.
- Compare prices from different suppliers to get the best deals.
- Consider renting specialized tools instead of buying them.
By following these steps and tips, you’ll be well-prepared to tackle your DIY plumbing project with ease and confidence. Remember, a well-planned project is the key to a successful outcome.
Learning Advanced Plumbing Techniques

Advanced plumbing techniques can significantly enhance your ability to handle intricate plumbing tasks. As you progress in your DIY plumbing journey, mastering these techniques will allow you to tackle more complex projects with confidence.
For instance, understanding how to properly solder pipes is a fundamental skill that can greatly improve your plumbing capabilities. According to a professional plumber, “Soldering is a crucial technique in plumbing that requires precision and patience.”
“Soldering is not just about joining two pipes together; it’s about creating a durable, leak-proof connection that can withstand water pressure.”
Introduction to Soldering
Soldering involves joining two metal pieces together using a filler material, typically a tin-lead alloy. To start soldering, you’ll need a few essential tools, including a soldering torch, solder, and flux. Proper preparation is key to a successful soldering job.
First, ensure the surfaces to be soldered are clean and free of debris. Apply flux to the area, as it helps the solder flow smoothly and adhere to the metal. Then, heat the joint using the soldering torch until it reaches the appropriate temperature. Finally, apply the solder, allowing it to flow into the joint. For more detailed guidance, you can refer to resources like advanced plumbing videos.
Understanding the Basics of Drainage Systems
A drainage system is a critical component of any plumbing setup, responsible for removing wastewater from your home. Understanding how it works is essential for identifying and fixing potential issues.
The drainage system typically consists of a network of pipes that carry wastewater away from fixtures like sinks, toilets, and showers. Proper slope and venting are crucial for ensuring that wastewater flows freely and that sewer gases are vented outside.
Common issues with drainage systems include clogs and improper venting, which can lead to slow drains or backups. Regular maintenance, such as checking for blockages and ensuring proper venting, can help prevent these problems.
Resources for Ongoing Learning
Continuing education is key to mastering essential plumbing skills for DIY plumbing projects. To further develop your skills, it’s essential to have access to reliable resources that provide plumbing maintenance strategies and techniques.
Recommended Reading Materials
Several comprehensive guides are available, including “Plumbing Complete: Expert Advice from Start to Finish” and “The Complete Guide to Plumbing Updated, 8th Edition.” You can explore more recommended books on plumbing resources to enhance your knowledge.
Online Courses and Tutorials
In addition to books, online courses and video tutorials offer hands-on training and visual guidance. These resources cover a range of topics, from basic plumbing repairs to advanced techniques, helping you to refine your skills and stay updated on the latest plumbing maintenance strategies.