As a homeowner, having basic plumbing skills can be a lifesaver when faced with minor emergencies or unexpected issues. Imagine being able to fix a leaky faucet or unclog a drain without having to call a professional plumber. Not only can this save you money, but it also gives you a sense of accomplishment and independence.
Having home plumbing basics under your belt can help you tackle common household issues, from clogged drains to frozen pipes. By learning these DIY plumbing projects, you’ll be better equipped to handle emergencies and perform routine plumbing maintenance tips to prevent future problems. For more information on the tools and materials needed for these projects, you can visit top plumbing tools and pipes for DIY.
Key Takeaways
- Understand the basics of home plumbing to tackle minor issues.
- Learn to fix common problems like leaky faucets and clogged drains.
- Discover the importance of regular plumbing maintenance.
- Identify the essential tools needed for DIY plumbing projects.
- Gain confidence in handling plumbing emergencies.
Understanding Basic Plumbing Terminology
To tackle DIY plumbing tasks effectively, it’s essential to understand the basic terminology used in the trade. Understanding these terms will not only make it easier to diagnose problems but also facilitate communication with professional plumbers when needed.
Common Plumbing Terms You Should Know
Familiarizing yourself with common plumbing terms is the first step towards becoming proficient in DIY plumbing. Terms like “absolute pressure,” “backflow,” and “check valve” are frequently used in the plumbing industry.
- Absolute Pressure: The total pressure in a system, relative to a vacuum.
- Backflow: The reversal of flow of water or other substances into the potable water system.
- Check Valve: A valve that allows fluid to flow in one direction but prevents it from flowing in the opposite direction.
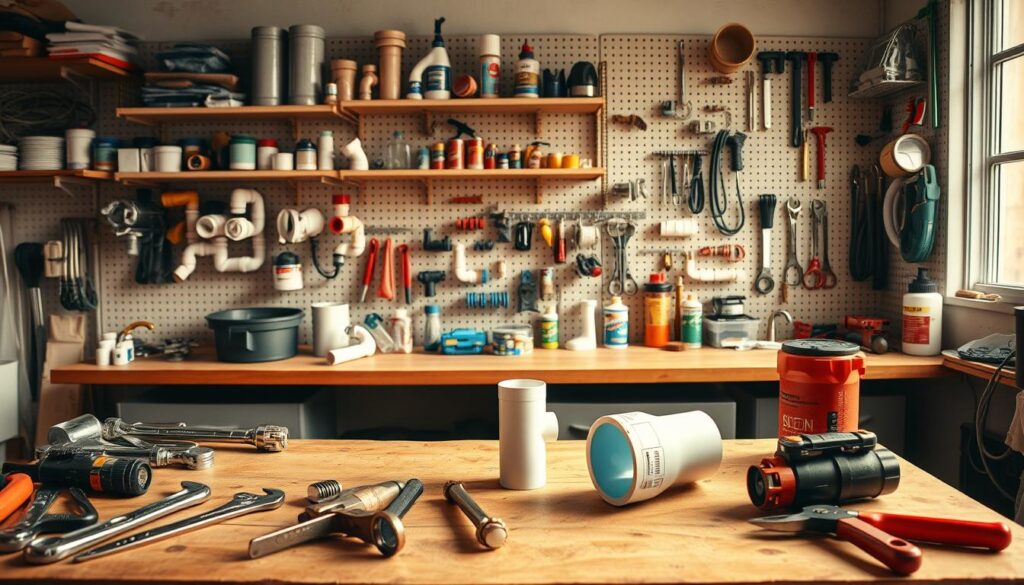
Tools Every DIY Plumber Needs
Having the right tools is crucial for any DIY plumbing project. Basic plumbing tools include:
| Tool Name | Description |
|---|---|
| Adjustable Wrench | Used for gripping and twisting objects |
| Pipe Cutter | Designed for cutting pipes cleanly and efficiently |
| Plunger | Essential for unclogging drains and toilets |
| Pliers | Useful for gripping small objects |
| Teflon Tape | Used for sealing pipe threads to prevent leaks |
By understanding these basic terms and having the necessary tools, DIY plumbers can confidently tackle a variety of plumbing tasks.
Identifying Common Plumbing Problems

Recognizing the signs of common plumbing issues is the first step in resolving them effectively. Plumbing problems can arise in various forms, from leaky faucets to malfunctioning water heaters. Being aware of these issues can help homeowners take prompt action, potentially saving them from costly repairs down the line.
Signs of Leaky Pipes
Leaky pipes are a common issue that can lead to significant water damage if not addressed. Signs of leaky pipes include water stains on walls or ceilings, a sudden increase in water bills, and the sound of running water when no faucets are on. Inspecting your pipes regularly can help identify leaks early.
To check for leaks, homeowners can perform a simple test by turning off all water sources in the house and then checking the water meter. If the meter is still moving, there’s likely a leak somewhere in the system.
Issues with Toilets
Toilets are another area where plumbing issues frequently arise. Common problems include continuous running, clogging, and weak flushing. A running toilet can waste a significant amount of water and increase your utility bills. Checking the flapper and fill valve can often resolve these issues.
For clogs, using a plunger is usually the first step. If the clog persists, it may be necessary to use a toilet auger to remove the blockage. Regular maintenance, such as checking the toilet’s internal mechanisms, can prevent many of these issues.
Water Heater Troubles
Water heater problems can range from inadequate hot water to complete system failure. Signs of water heater troubles include rusty water, strange noises from the heater, and leaks around the unit. Regularly inspecting the anode rod and ensuring the temperature is set correctly can help prolong the heater’s lifespan.
If you notice any of these signs, it’s essential to take action. Checking the heater’s connections and ensuring it’s properly insulated can help resolve some issues. However, for more complex problems, it may be necessary to consult a professional plumber.
Learning to Shut Off the Water Supply
Knowing how to shut off the water supply is vital for preventing water damage during plumbing repairs. It’s a simple yet crucial step that can save you from significant headaches and expenses. In this section, we’ll guide you through the process of locating and operating your main shut-off valve and understanding individual shut-off valves.
Locating Your Main Shut-Off Valve
The main shut-off valve is typically located near the water meter or where the water line enters your home. It’s essential to know where this valve is so you can shut off the water supply quickly in case of an emergency.
- Check near the water meter or where the water line enters your home.
- Look for a valve that controls the water supply to your entire house.
- Make sure you can turn the valve clockwise to shut off the water supply.
Once you’ve located the main shut-off valve, it’s a good idea to test it to ensure it’s working properly. Turn the valve clockwise to shut off the water supply, and then check various faucets around the house to confirm that the water is indeed off.
Understanding Individual Shut-Off Valves
In addition to the main shut-off valve, individual shut-off valves are located near specific fixtures such as sinks, toilets, and washing machines. These valves allow you to shut off the water supply to a particular fixture without affecting the rest of the house.
Key points to remember:
- Individual shut-off valves are usually located under or near the fixture they control.
- Turning the valve clockwise shuts off the water supply to the fixture.
- Using individual shut-off valves can be convenient when performing repairs or maintenance on specific fixtures.
By understanding how to shut off both the main water supply and individual shut-off valves, you’ll be better equipped to handle plumbing emergencies and perform routine maintenance tasks.
Mastering Pipe Maintenance Techniques

Regular maintenance of your pipes can significantly reduce the risk of plumbing emergencies. By understanding how to properly care for your pipes, you can ensure your plumbing system operates efficiently and effectively.
Cleaning and Maintaining Pipes
Cleaning your pipes regularly is a crucial step in maintaining your plumbing system. Over time, debris and sediment can build up inside your pipes, leading to clogs and other issues. To clean your pipes, you can use a mixture of baking soda and vinegar, which is a safe and effective method for removing buildup without damaging your pipes.
Steps to Clean Your Pipes:
- Pour 1 cup of baking soda down the drain.
- Follow with 1 cup of vinegar.
- Let the mixture sit for a few hours or overnight.
- Rinse with hot water.
Preventing Clogs in Drains
Preventing clogs in your drains is another important aspect of pipe maintenance. Clogs can lead to backups and overflows, causing damage to your home. To prevent clogs, be mindful of what you put down your drains. Avoid disposing of grease, oil, and large food particles through your sink drains.
Tips for Preventing Clogs:
- Use a drain screen to catch hair and other particles.
- Regularly clean your drains with a baking soda and vinegar solution.
- Avoid pouring grease or oil down your drains.
By following these tips and maintaining your pipes regularly, you can significantly reduce the risk of clogs and other plumbing issues, ensuring your system runs smoothly and efficiently.
Learning to Repair Leaky Faucets
A leaky faucet can be a significant source of frustration and wasted water, but fortunately, repairing it is a task that many homeowners can accomplish on their own. Leaky faucets are not only annoying due to the constant dripping sound, but they also contribute to higher water bills and can lead to further damage if not addressed promptly.
Tools Required for Faucet Repair
Before you start repairing your leaky faucet, it’s essential to have the right tools on hand. The specific tools needed may vary depending on the type of faucet you have, but generally, you’ll need an adjustable wrench, a screwdriver, and possibly a basin wrench for hard-to-reach areas. For cartridge or ball-and-socket faucets, you might need additional parts like O-rings or gaskets.
For a comprehensive guide on DIY plumbing tips, including faucet repair, you can visit Okat Mechanical’s Learning Center, which provides valuable resources for homeowners looking to improve their plumbing skills.
Step-by-Step Repair Process
The step-by-step repair process for a leaky faucet involves several key steps. First, you’ll need to shut off the water supply to the faucet by locating and turning the shut-off valves under the sink. Next, disassemble the faucet to identify the source of the leak. For most faucets, this involves removing the handle to access the cartridge or stem.
Once you’ve identified the leak’s source, you can replace the necessary parts, such as worn-out O-rings or gaskets, and reassemble the faucet. It’s crucial to follow the manufacturer’s instructions for your specific faucet model to ensure a proper repair.
- Turn off the water supply.
- Disassemble the faucet to find the leak.
- Replace damaged parts.
- Reassemble the faucet.
Properly Unclogging Drains

Unclogging drains can be a straightforward task if you have the right tools and techniques. Clogged drains are not only frustrating but can also lead to more significant plumbing issues if not addressed promptly.
Using a Plunger Effectively
A plunger is one of the most basic and effective tools for unclogging drains. To use a plunger correctly, ensure the drain is covered by the plunger’s cup, and then push down slowly and steadily until you feel resistance. Plunging should be done gently to avoid damaging the pipes.
For sinks and tubs, fill the basin with enough water to cover the drain, and then plunge vigorously. For toilets, ensure the water level is not too high, and create a good seal before plunging.
Chemical vs. Mechanical Solutions
When it comes to unclogging drains, you have two primary options: chemical drain cleaners and mechanical tools like plumbing snakes. Chemical drain cleaners can be effective but pose risks to your pipes and health if not used correctly.
Mechanical solutions, on the other hand, are generally safer and more environmentally friendly. A plumbing snake can be used to remove clogs further down the drain line.
| Method | Pros | Cons |
|---|---|---|
| Chemical Drain Cleaners | Quick and easy to use, effective for minor clogs | Can damage pipes, harmful to skin and respiratory system |
| Plunger | Simple, non-invasive, and cost-effective | May not work for severe clogs, requires some force |
| Plumbing Snake | Effective for deep clogs, safe for pipes | Can be messy, requires some skill to use |
Choosing the right method depends on the nature of the clog and your comfort level with different tools. For tougher clogs, a combination of methods may be necessary.
Installing a New Faucet
Installing a new faucet can be a rewarding DIY project that enhances your kitchen or bathroom’s functionality and aesthetic appeal. With the right tools and a bit of knowledge, you can successfully replace your old faucet with a new one.
Choosing the Right Faucet for Your Needs
Before you start the installation process, it’s crucial to choose the right faucet for your needs. Consider factors such as the type of sink you have, the style you’re aiming for, and the functionality you require. For instance, if you’re looking for a faucet for your kitchen, you might want one with a pull-down sprayer for added convenience.
“The right faucet can make a significant difference in your daily routine,” says a plumbing expert. “It’s not just about looks; it’s also about functionality and water efficiency.”
- Consider the finish and style to match your decor.
- Think about the type of valve (cartridge, ball, or disc) for durability and ease of maintenance.
- Check the flow rate to ensure it meets your water efficiency needs.
Step-by-Step Installation Guide
Once you’ve selected the perfect faucet, follow these steps for a successful installation:
- Turn off the water supply by locating the shut-off valves under the sink and turning them clockwise.
- Disconnect the old faucet by loosening the nuts that hold it in place, then remove any additional components like the aerator or sprayer.
- Clean the area around the sink holes to ensure a smooth installation.
- Mount the new faucet according to the manufacturer’s instructions, typically involving securing it with nuts and washers.
- Connect the water supply lines to the faucet, ensuring they are securely attached to prevent leaks.
- Turn on the water supply and check for leaks around the faucet and connections.
For a more detailed guide, you can refer to Lowe’s comprehensive guide on installing a kitchen, which provides additional tips and considerations for a successful installation.
By following these steps and choosing the right faucet, you can enjoy a functional and stylish addition to your home. Remember, the key to a successful faucet installation is preparation and attention to detail.
Working with PVC Pipes

Working with PVC pipes requires a basic understanding of how to cut and join them effectively. PVC pipes are a popular choice for plumbing projects due to their durability and resistance to corrosion.
Cutting and Joining PVC Pipes
To work with PVC pipes, you’ll need to know how to cut and join them. Cutting PVC pipes can be done using a PVC pipe cutter or a hacksaw. When cutting, ensure the pipe is straight and the cut is clean.
- Measure and mark the pipe where you need to cut it.
- Use a PVC pipe cutter for a clean cut, or a hacksaw for a more manual approach.
- Deburr the cut edge to remove any rough spots.
Joining PVC pipes involves using PVC cement and primer. Apply the primer to the pipe and fitting, then apply the cement, and quickly join the two pieces together.
Common Uses for PVC in Plumbing
PVC pipes are commonly used for drainage, irrigation, and plumbing systems due to their resistance to corrosion and chemicals. They are also used for vent pipes and other applications where their durability is beneficial.
Some of the key benefits of using PVC pipes include:
- Resistance to corrosion and chemical damage.
- Easy to install and join.
- Cost-effective compared to other materials.
Understanding Water Supply Systems
The water supply system is a critical component of your home’s plumbing infrastructure. It is responsible for delivering clean water to various parts of your home, including faucets, toilets, and appliances. Understanding how this system works is essential for maintaining and troubleshooting your plumbing.
A typical water supply system consists of several key components, including the main water supply line, individual shut-off valves, and water supply lines that connect to fixtures and appliances. Proper functioning of these components is crucial to ensure a steady supply of water throughout your home.
How Water Supply Lines Work
Water supply lines are responsible for carrying water from the main supply line to various fixtures and appliances in your home. These lines are typically made of copper, PEX, or PVC and are designed to withstand the water pressure within the system. It’s essential to understand that different materials have different advantages and are suited for different applications.
- Copper pipes are durable and resistant to corrosion but can be more expensive.
- PEX pipes are flexible, resistant to freezing, and easier to install.
- PVC pipes are cost-effective and resistant to corrosion but are not suitable for hot water lines.
For more detailed information on your home’s plumbing system, you can refer to Understanding Your Home’s Plumbing System: A Beginner’s.
Importance of Pressure Regulation
Pressure regulation is a critical aspect of a water supply system. Proper pressure ensures that water flows adequately to all parts of your home without causing damage to the pipes or fixtures. Excessive pressure can lead to leaks, bursts, and other issues, while low pressure can result in inadequate water supply.
To maintain optimal pressure, many homes are equipped with pressure-regulating valves. These valves help to regulate the water pressure coming into your home, ensuring that it remains within a safe and functional range.
- Check your home’s water pressure regularly to identify any potential issues.
- Consider installing a pressure-regulating valve if your home doesn’t already have one.
- Be aware of the signs of excessive or low water pressure, such as leaks or inadequate flow.
By understanding your water supply system and maintaining proper pressure regulation, you can help ensure the longevity and efficiency of your home’s plumbing.
Basics of Toilet Repairs

Understanding the basics of toilet repairs can help you tackle common issues effectively. Toilet repairs are a common DIY plumbing task that can be easily accomplished with the right tools and techniques.
Fixing Common Toilet Issues
Toilets can experience a variety of issues, from running toilets to clogged toilets. Running toilets can waste a significant amount of water, while clogged toilets can be a nuisance. To fix these issues, it’s essential to understand the causes and apply the appropriate fixes.
For a running toilet, the problem often lies in the flush valve or the fill valve. Adjusting or replacing these parts can resolve the issue. On the other hand, clogged toilets usually require the use of a plunger or a closet auger to clear the blockage.
Replacing Flush Mechanisms
The flush mechanism is a critical component of a toilet. Over time, it may need to be replaced due to wear and tear. Toilet installation and repair often involve working with flush mechanisms.
To replace a flush mechanism, you’ll need to follow these steps:
- Turn off the water supply to the toilet.
- Drain the tank and bowl.
- Disconnect the flush mechanism from the toilet.
- Install the new flush mechanism.
- Adjust the settings as necessary.
| Common Toilet Issues | Symptoms | Fixes |
|---|---|---|
| Running Toilet | Continuous water flow into the toilet bowl | Adjust or replace the flush or fill valve |
| Clogged Toilet | Toilet won’t flush properly | Use a plunger or closet auger |
| Weak Flush | Insufficient water flow during flushing | Check water level, clean the rim jets, or replace the flush valve |
By understanding and addressing these common toilet issues, you can maintain your toilet’s efficiency and extend its lifespan.
Handling Water Heater Issues
Troubleshooting water heater issues is crucial for maintaining a consistent hot water supply. Water heaters are vital appliances in our homes, providing hot water for various needs. However, like any other appliance, they can develop issues over time.
Common problems with water heaters include a lack of hot water, leaks, and unusual noises. Identifying the root cause of these issues is essential for effective troubleshooting.
Troubleshooting Water Heater Problems
To troubleshoot water heater problems, start by checking the power source and ensuring that the thermostat is set correctly. For electric water heaters, verify that the circuit breaker hasn’t tripped. For gas water heaters, check that the pilot light is on.
- Check for leaks around the water heater and its connections.
- Inspect the temperature and pressure relief valve for proper function.
- Ensure that the water heater is properly sized for your household needs.
If you notice any signs of leakage or corrosion, it may be necessary to replace the water heater. Regular maintenance, such as flushing the tank to remove sediment, can also help prevent issues.
When to Call a Professional
While some water heater issues can be resolved through DIY troubleshooting, certain problems require professional assistance. If you’re unsure about how to proceed or if the issue persists after basic troubleshooting, it’s time to call a professional plumber.
Signs that you need professional help include:
- Significant leaks or water damage.
- Unusual noises coming from the water heater.
- A lack of hot water despite proper thermostat settings.
Professional plumbers have the necessary expertise and equipment to diagnose and fix complex water heater issues safely and efficiently.
Importance of Slope in Drainage

Understanding the importance of slope in drainage can save homeowners from costly repairs. Proper drainage is essential for preventing water damage and ensuring that the plumbing system functions correctly.
Understanding Drainage Design
Drainage design is critical in ensuring that water flows freely and doesn’t accumulate in unwanted areas. A key aspect of drainage design is the slope of the drain pipes. For more detailed information on drain pipe slope, you can visit this resource.
The slope determines how quickly water and waste move through the pipes. If the slope is too little, waste can accumulate, leading to clogs and backups. Conversely, if the slope is too great, it can cause erosion and other issues.
Key Considerations for Drainage Design:
- Pipe material and size
- Slope and gradient
- Ventilation and airflow
Proper Drainage Techniques
Implementing proper drainage techniques is vital for maintaining an effective drainage system. This includes ensuring that the slope is correctly calculated and maintained during installation.
Some effective drainage techniques include:
- Regularly inspecting and maintaining drain pipes
- Ensuring proper venting to prevent siphoning
- Using the correct materials for the drainage system
By understanding and implementing the correct slope in drainage systems, homeowners can prevent many common plumbing issues, ensuring their system operates efficiently and effectively.
Learning Soldering Techniques
For those looking to tackle DIY plumbing projects, learning soldering techniques is essential. Soldering is a fundamental skill that allows homeowners to join copper pipes and fittings securely, ensuring leak-free connections.
The Role of Soldering in Plumbing
Soldering plays a critical role in plumbing as it provides a strong and durable bond between copper pipes and fittings. This technique is particularly important for water supply lines, where leaks can lead to significant water damage and waste. By mastering soldering, DIY enthusiasts can confidently install new fixtures, repair leaks, and maintain their plumbing system.
Essential Tools and Safety Precautions
To solder effectively, you’ll need a few essential tools, including a propane torch, solder, flux, and a pipe cutter. Safety precautions are also crucial when soldering, as the process involves high temperatures and potentially hazardous materials. It’s recommended to wear protective gear, such as gloves and safety glasses, and to ensure good ventilation in the work area.
For more detailed guidance on soldering techniques, including tips on preparing pipes and avoiding common mistakes, check out additional resources that can help you improve your skills.
By understanding the importance of soldering in plumbing and practicing the necessary techniques, homeowners can enhance their DIY capabilities and maintain their plumbing system with confidence.
Conducting Routine Maintenance

Conducting routine maintenance is crucial for a well-functioning plumbing system. Regular checks help identify potential issues before they become major problems, saving you time and money.
To ensure your plumbing system operates efficiently, it’s essential to perform routine maintenance tasks. This includes inspecting pipes, checking water pressure, and cleaning drains. By doing so, you can prevent clogs, leaks, and other issues that may lead to costly repairs.
Seasonal Plumbing Checklists
Creating a seasonal plumbing checklist can help you stay on top of maintenance tasks. Here’s a basic outline to get you started:
- Spring: Inspect outdoor faucets and hoses for damage or leaks.
- Summer: Check your irrigation system for leaks or inefficiencies.
- Fall: Drain and winterize your irrigation system, and inspect your water heater.
- Winter: Insulate exposed pipes in unheated areas, and let cold water drip from faucets served by exposed pipes.
For more detailed DIY plumbing tips, you can visithttps://hi-spec.com/blogs/news/exploring-diy-plumbing-tips-for-homeowners.
Keeping Your System Efficient
To keep your plumbing system efficient, it’s essential to monitor water pressure and inspect pipes regularly. Here’s a comparison of common pipe materials and their characteristics:
| Pipe Material | Durability | Corrosion Resistance |
|---|---|---|
| Copper | High | Medium |
| PVC | Medium | High |
| PEX | High | High |
By following these tips and staying on top of routine maintenance, you can keep your plumbing system running efficiently and effectively.
Knowing When to Call a Professional
While many plumbing tasks can be handled by DIY enthusiasts, some issues require professional assistance. Understanding the signs that indicate a need for help is crucial to prevent further damage and ensure safety.
Complex Issues and Emergencies
Complex plumbing issues, such as burst pipes or major leaks, often require immediate attention from a professional. If you’re dealing with a plumbing emergency, it’s best to call a reliable plumber who can provide prompt service.
Some signs that indicate a need for professional help include persistent leaks, low water pressure, or unusual noises from your pipes. If you’re unsure about how to address a plumbing issue or if the problem persists after attempting a DIY fix, it’s time to seek professional assistance.
To find a reliable plumber, look for licensed professionals with good customer reviews. Ensure they have experience with the specific issue you’re facing and can provide a clear estimate of the costs involved.