Understanding your home’s plumbing system is crucial for maintaining its health and addressing issues effectively, as emphasized by McGill Plumbing & Water Treatment, Inc.
Imagine being able to fix a leaky faucet or unclog a drain without calling a professional. Mastering plumbing basics can save you money and give you a sense of accomplishment. For DIY enthusiasts, acquiring fundamental skills is the first step towards becoming self-sufficient in home maintenance.
By learning basic plumbing skills, homeowners can tackle simple projects, understand when to call a professional, and ensure their plumbing system operates efficiently.
Key Takeaways
- Understanding your home’s plumbing system is essential for effective maintenance.
- Mastering plumbing basics can save you money and enhance your DIY skills.
- Learning fundamental plumbing skills helps in identifying when professional help is needed.
- DIY plumbing projects can range from fixing leaks to unclogging drains.
- Acquiring plumbing skills contributes to becoming self-sufficient in home maintenance.
Understanding Basic Plumbing Concepts
To effectively manage DIY plumbing projects, one must first understand the basic concepts that govern plumbing systems. Plumbing is not just about fixing leaks or unclogging drains; it’s about understanding how water supply and distribution systems work within your home.
Types of Plumbing Systems
There are primarily two types of plumbing systems found in homes: the water supply system and the drainage system. The water supply system is responsible for distributing clean water throughout the house, while the drainage system ensures that wastewater is efficiently removed.
- The water supply system includes pipes that carry water from the main supply line to various fixtures like sinks, toilets, and showers.
- The drainage system, on the other hand, consists of pipes that carry wastewater away from these fixtures to the sewer or septic system.
Common Plumbing Terminology
Understanding common plumbing terminology is crucial for diagnosing and fixing plumbing issues. Terms like “psi (pounds per square inch)” refer to water pressure, while “IPS (Iron Pipe Size)” is a standard for pipe sizing.
“Knowing the basics of plumbing can save homeowners a significant amount of money by enabling them to perform simple repairs and maintenance tasks themselves.” –
Other important terms include “fittings,” which are used to connect pipes together, and “fixtures,” which refer to devices like sinks and toilets that use water.
By grasping these fundamental concepts, DIY enthusiasts can better understand how their home’s plumbing system operates, making it easier to identify and fix problems as they arise.
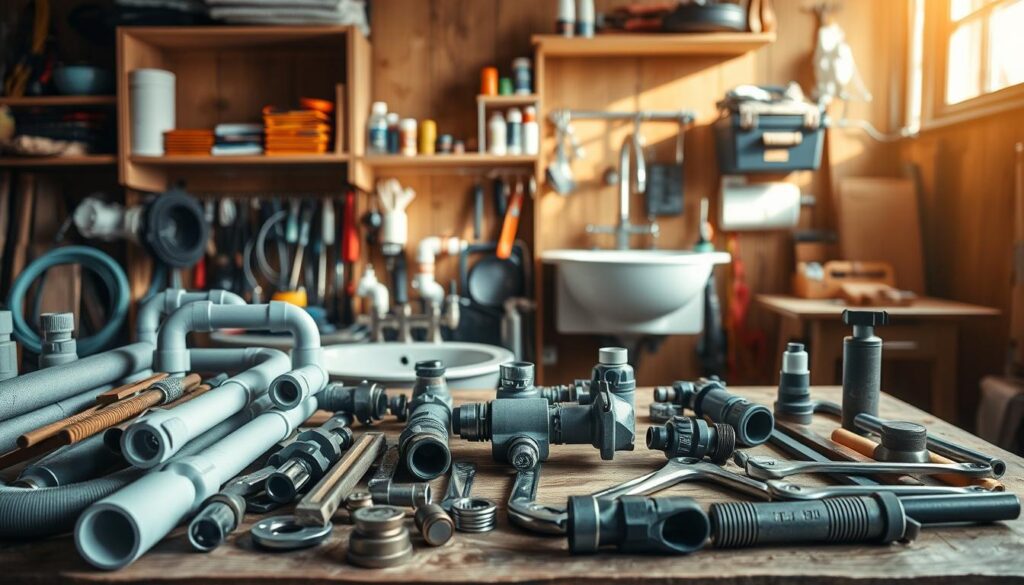
Essential Tools for DIY Plumbing

Before diving into DIY plumbing, it’s essential to assemble a collection of must-have tools and safety gear. Having the right DIY plumbing tools is crucial for the success and safety of your projects.
Must-Have Tools
To tackle various plumbing tasks, you’ll need a versatile set of tools. Some of the essential plumbing tools include:
- Adjustable wrenches for handling different pipe sizes
- Pipe cutters for cutting through pipes cleanly
- Plungers for unclogging drains
- Teflon tape for creating watertight seals
For more complex tasks, consider investing in a pipe snake or auger to clear stubborn clogs. You can find a comprehensive list of tools and their uses on Field Complete’s blog, which provides valuable insights into the world of DIY plumbing.
Safety Gear Considerations
Safety should always be your top priority when working on plumbing projects. Plumbing safety gear is designed to protect you from potential hazards. Some essential safety items include:
- Gloves to protect your hands from sharp edges and chemicals
- Safety goggles to shield your eyes from debris
- A dust mask to prevent inhaling dust and particles
By equipping yourself with the right tools and safety gear, you’ll be well-prepared to tackle DIY plumbing projects with confidence.
How to Identify Common Plumbing Problems
Common plumbing problems such as leaky faucets, running toilets, and clogged drains can be identified with a little knowledge and the right tools. Being able to recognize these issues early on can save homeowners from more significant problems down the line.
Leaky Faucets
A leaky faucet is not just annoying; it can also waste a significant amount of water. To identify a leaky faucet, look for signs such as dripping water from the faucet’s spout or handle. Check the faucet’s aerator for mineral buildup, which can cause leaks. If you suspect a leak, turn off the water supply and inspect the faucet’s washers and O-rings for wear.
Running Toilets
A running toilet can be a significant water waster, increasing your water bill unnecessarily. To identify a running toilet, listen for the sound of continuously running water. Check the toilet’s flapper and fill valve for proper function. If the flapper doesn’t seal correctly, water will continue to flow into the toilet bowl.
Clogged Drains
Clogged drains are another common plumbing issue. Signs of a clogged drain include slow draining water, gurgling sounds, and unpleasant odors. To identify the cause, check for blockages such as hair, soap scum, and grease buildup. Using a drain snake or plunger can help clear the clog. For more severe clogs, consider using a professional plumbing service.
| Problem | Signs | Potential Fixes |
|---|---|---|
| Leaky Faucet | Dripping water, mineral buildup | Replace washers and O-rings |
| Running Toilet | Continuous water flow, improper flapper seal | Adjust or replace flapper and fill valve |
| Clogged Drain | Slow draining, gurgling sounds, odors | Use drain snake or plunger, clean buildup |
“The key to solving plumbing problems is early detection and knowing how to address them. By being proactive, homeowners can avoid costly repairs and reduce water waste.”
By understanding how to identify common plumbing problems, DIY enthusiasts can take the first step towards fixing these issues and maintaining their plumbing system’s integrity.
Basic Pipe Types and Their Uses

Plumbing pipes come in various materials, each with its own set of advantages and disadvantages. The choice of pipe material can significantly affect the plumbing system’s performance, durability, and cost.
PVC Pipes
PVC (Polyvinyl Chloride) pipes are widely used in plumbing due to their corrosion resistance and affordability. They are suitable for both potable water and sewage systems. However, PVC pipes can become brittle with age and are not recommended for high-temperature applications.
According to a comprehensive guide on plumbing pipes, PVC pipes are a popular choice for DIY projects due to their ease of installation and resistance to chemical corrosion. For more detailed information, you can refer to this guide.
Copper Pipes
Copper pipes have been a longstanding choice for plumbing due to their durability and reliability. They are resistant to corrosion and can withstand high temperatures. However, copper pipes are more expensive than PVC and PEX, and their installation requires soldering, which can be challenging for DIY enthusiasts.
“Copper pipes are known for their long lifespan and ability to withstand high water pressure, making them a preferred choice for many plumbing systems.”
PEX Tubing
PEX (Cross-linked Polyethylene) tubing is a flexible and versatile piping material that has gained popularity in recent years. It is resistant to freezing and easy to install, making it an excellent choice for DIY plumbing projects. PEX tubing is also less prone to scaling and corrosion compared to copper pipes.
PEX tubing’s flexibility allows it to navigate through tight spaces, reducing the need for fittings and connectors. However, it is not suitable for outdoor applications due to its susceptibility to UV damage.
How to Turn Off the Water Supply
Before starting any plumbing work, it’s essential to understand how to shut off the water supply. This knowledge is crucial for preventing water damage and ensuring a safe working environment.
Locating the Main Shut-Off Valve
The main shut-off valve is typically located near the water meter or where the water line enters the house. It’s usually found in the basement, crawl space, or under the kitchen sink. To locate it, look for a valve that controls the water flow. Once you’ve found it, make sure you can easily access it in case of an emergency.
Understanding Valve Types
There are several types of shut-off valves, including gate valves, ball valves, and stop valves. Gate valves are typically used as main shut-off valves and are operated by turning a handle clockwise to shut off the water supply. Ball valves are also common and work by rotating a ball to control water flow. Understanding the type of valve you have is crucial for operating it correctly.
To turn off the water supply, simply rotate the valve clockwise. For gate valves, this may require several turns, while ball valves typically require a 90-degree turn. It’s essential to test the valve periodically to ensure it’s working correctly.
Fixing Leaky Faucets: A Step-by-Step Guide

A leaky faucet can be a nuisance, but fortunately, it’s a problem that can be fixed with basic plumbing skills. Leaky faucets not only waste water but can also lead to increased water bills and potential damage to your sink and surrounding areas.
Tools You’ll Need
Before you start fixing your leaky faucet, it’s essential to have the right tools. The type of faucet you have will determine the specific tools required, but generally, you’ll need:
- Adjustable wrench or basin wrench
- Channel-type pliers (for removing old O-rings or gaskets)
- Needle-nose pliers (for reaching into tight spaces)
- Teflon tape (for reassembling threaded parts)
- Replacement parts (washers, O-rings, or cartridges specific to your faucet type)
Stopping the Leak
The first step in fixing a leaky faucet is to stop the leak. This usually involves turning off the water supply to the faucet. Locate the shut-off valves under the sink and turn them clockwise to shut off the water supply. Open the faucet to drain the water from the pipes.
For compression faucets, the leak is often due to worn-out washers. For cartridge faucets, the issue might be with the cartridge itself. Identifying the type of faucet you have is crucial to fixing the leak correctly.
Replacing Washers and Cartridges
To replace washers or cartridges, you’ll need to disassemble the faucet. For a compression faucet, this involves removing the handle, unscrewing the stem, and replacing the worn-out washer. For a cartridge faucet, you’ll need to remove the handle and any retaining clips to access the cartridge.
| Faucet Type | Common Leak Source | Replacement Part |
|---|---|---|
| Compression Faucet | Worn-out washer | New washer |
| Cartridge Faucet | Faulty cartridge | New cartridge |
| Ball-and-Socket Faucet | Worn O-rings or seals | New O-rings or seals |
After replacing the necessary parts, reassemble the faucet in the reverse order that you disassembled it. Turn on the water supply and check the faucet for leaks.
Unclogging Drains: DIY Methods
When faced with a clogged drain, it’s reassuring to know that there are effective DIY methods to clear the blockage. Clogged drains can disrupt daily routines, but with the right techniques, you can resolve the issue without calling a professional.
Using a Plunger
A plunger is one of the most straightforward tools for unclogging drains. To use it effectively, ensure the plunger is properly seated over the drain, then push down slowly and steadily until you feel resistance, followed by a quick pull upwards. This process can help dislodge the clog.
Snaking a Drain
For more stubborn clogs, a drain snake (auger) can be used. Feed the snake into the drain and rotate it as you push it further into the pipe. This method is particularly effective for clogs that are further down the drain line.
Chemical Drain Cleaners
Chemical drain cleaners can dissolve clogs but should be used with caution. Always follow the manufacturer’s instructions, and be aware that these chemicals can damage pipes if used excessively.
Here’s a comparison of the DIY methods discussed:
| Method | Effectiveness | Safety Precautions |
|---|---|---|
| Plunger | High for simple clogs | None significant |
| Drain Snake | High for deeper clogs | Be cautious of pipe damage |
| Chemical Cleaners | Variable, depends on clog | Wear protective gear, avoid excessive use |
By understanding and applying these DIY methods, you can effectively unclog drains and maintain your plumbing system’s health.
Installing a New Faucet

Installing a new faucet can be a straightforward DIY project if you have the right tools and follow the correct steps. This process involves several key stages, from selecting the appropriate faucet for your needs to ensuring it’s properly installed.
Choosing Your Faucet
When it comes to selecting a new faucet, there are several factors to consider, including the type of sink you have, the style you’re aiming for, and the functionality you need. Modern faucets come in a variety of styles, from single-handle to touchless models, each offering different benefits.
For instance, if you’re looking for a faucet for your kitchen, you might want to consider a model with a pull-down or pull-out sprayer for added convenience. For bathrooms, a simpler design might be more appropriate. It’s also crucial to check the compatibility of the faucet with your sink’s configuration.
Preparing for Installation
Before you start the installation process, make sure you have all the necessary tools and materials. This typically includes the faucet itself, mounting hardware, water supply lines, and an adjustable wrench or basin wrench. It’s also a good idea to turn off the water supply to your sink by locating the shut-off valves under the sink and turning them clockwise.
For a more detailed guide on preparing your kitchen faucet for installation, you can refer to resources like Lowes’ How-To Guide, which provides step-by-step instructions and helpful tips.
Connecting the Water Lines
Once you’ve mounted the faucet, the next step is to connect the water supply lines. These lines are usually color-coded for hot and cold water. Ensure they’re securely attached to the corresponding valves under the sink. Use a wrench to tighten the connections, but be careful not to overtighten, which can damage the faucet or the lines.
After connecting the water lines, turn on the water supply and check for leaks. This is a critical step to ensure that your new faucet is properly installed and functioning as expected.
Toilet Repairs and Maintenance
Understanding how to repair and maintain your toilet can save you money and hassle. Toilets are among the most used fixtures in any home, and knowing how to address common issues can prevent minor problems from becoming major repairs.
Flushing Mechanisms Explained
The flushing mechanism is a critical component of your toilet. It involves the flapper, fill valve, and overflow tube working together to ensure a proper flush. The flapper is a rubber valve that covers the hole at the bottom of the tank. When you press the flush handle, it lifts the flapper, allowing water to flow into the bowl.
The fill valve is responsible for refilling the tank with water after a flush. It’s usually controlled by a float that rises and falls with the water level. If the water level gets too high, water flows into the overflow tube to prevent the tank from overflowing.
Fixing a Running Toilet
A running toilet can waste a significant amount of water. Common causes include a faulty flapper or an improperly adjusted fill valve. To fix a running toilet, first check the flapper for any signs of wear or misalignment. If it’s not sealing properly, consider replacing it.
Next, adjust the fill valve to ensure the water level is below the overflow tube. If the problem persists, you may need to replace the fill valve entirely.
Replacing Toilet Components
Over time, toilet components can wear out and need replacement. Common parts to replace include the flapper, fill valve, and toilet handle. When replacing these parts, ensure you choose components compatible with your toilet model.
| Component | Function | Common Issues |
|---|---|---|
| Flapper | Covers the hole at the bottom of the tank | Wear, misalignment |
| Fill Valve | Refills the tank with water | Improper adjustment, faulty valve |
| Overflow Tube | Prevents tank from overflowing | Clogging, improper water level |
By understanding and maintaining your toilet’s components, you can ensure it operates efficiently and effectively. Regular maintenance and prompt repairs can extend the life of your toilet and prevent costly issues down the line.
Understanding Drainage Systems

Drainage systems play a vital role in maintaining a safe and healthy home environment. They are designed to efficiently redirect wastewater and sewage away from homes and buildings, preventing potential health hazards and property damage.
For a comprehensive understanding of plumbing basics, including drainage systems, homeowners can refer to resources like Plumbing Basics 101, which provides an essential guide to understanding various plumbing concepts.
Gravity vs. Pressure Systems
Drainage systems can be broadly categorized into gravity and pressure systems. Gravity drainage systems rely on the natural flow of gravity to move wastewater through pipes, whereas pressure systems use mechanical means, such as pumps, to force waste through the pipes.
Gravity systems are more common and generally more reliable, as they do not require mechanical components that can fail. However, they require careful planning and installation to ensure that the pipes are sloped correctly to facilitate smooth flow.
Waste and Vent Systems
Waste and vent systems are critical components of a drainage system. The waste system carries wastewater away from fixtures like sinks, toilets, and showers, while the vent system allows air to enter the drainage pipes, preventing siphoning and ensuring smooth drainage.
Properly functioning vent systems are essential for preventing backflow and odors. For more information on the different branches of engineering, including those related to plumbing and drainage, one can explore resources like Branches of Engineering.
In conclusion, understanding drainage systems, including the differences between gravity and pressure systems, and the role of waste and vent systems, is crucial for maintaining a safe and healthy home environment. By grasping these concepts, homeowners can better appreciate the importance of proper plumbing maintenance and the need for professional assistance when issues arise.
Basic Plumbing Maintenance Tips
To keep your plumbing in top condition, it’s essential to adopt a routine maintenance schedule. Regular maintenance not only prevents costly repairs but also ensures the longevity of your plumbing fixtures.
Regular Inspections
Conducting regular inspections is a crucial step in plumbing maintenance. Check for signs of leaks, corrosion, and wear on your pipes and fixtures. Early detection of potential issues can save you from future headaches.
- Inspect visible pipes for leaks or damage.
- Check water pressure to ensure it’s within a safe range.
- Look for signs of water damage or staining.
Winterizing Your Plumbing
Winterizing your plumbing is vital to prevent pipes from freezing and bursting during cold weather. Here are some steps to follow:
- Disconnect and drain hoses from outdoor faucets.
- Insulate exposed pipes in unheated areas like the garage or basement.
- Seal any drafts or cracks near pipes to keep cold air out.
Table: Winterizing Plumbing Checklist
| Task | Description | Importance Level |
|---|---|---|
| Disconnect Hoses | Remove hoses from outdoor faucets | High |
| Insulate Pipes | Wrap exposed pipes with insulation | High |
| Seal Drafts | Seal cracks and drafts near pipes | Medium |
Cleaning Your Fixtures
Cleaning your fixtures regularly not only keeps them looking new but also helps in identifying any potential issues early. Use gentle cleaners that won’t damage the finish of your fixtures.
By following these basic plumbing maintenance tips, you can ensure your plumbing system remains in good condition, reducing the likelihood of unexpected repairs and prolonging the life of your fixtures.
When to Call a Professional Plumber

Not every plumbing issue requires a professional, but certain signs indicate it’s time to call in the experts. While DIY plumbing repairs can be cost-effective and empowering, there are situations where the risk of further damage or safety hazards necessitates the intervention of a skilled plumber.
Signs You Need Help
Several indicators suggest it’s time to hire a professional plumber. These include:
- Persistent leaks or water damage
- Low water pressure or discolored water
- Clogged drains that DIY methods can’t clear
- Noisy or malfunctioning water heaters
- Unusual odors or sewage backups
If you’re experiencing any of these issues, it’s crucial to assess whether your DIY skills are sufficient or if the problem requires the expertise of a professional.
Cost of Hiring a Professional
The cost of plumbing services can vary widely based on factors such as the plumber’s experience, the complexity of the job, and your location. On average, hiring a professional plumber can cost anywhere from $100 to $500 or more per visit, depending on the service required.
When considering the cost, it’s essential to factor in the potential savings from avoiding further damage or the cost-effectiveness of a properly done repair. Many plumbing professionals offer free initial consultations or estimates, which can help you make an informed decision about hiring a plumber.
Understanding the signs that indicate the need for professional plumbing assistance and being aware of the potential costs involved can help you make informed decisions about your plumbing needs.
Sustainable Plumbing Practices
As concern for the environment grows, incorporating sustainable plumbing practices has become a necessity for homeowners and DIY enthusiasts alike. Sustainable plumbing is about more than just fixing leaks; it’s about adopting practices and using fixtures that conserve water and reduce environmental impact.
Water-Saving Fixtures
One of the simplest ways to make your plumbing more sustainable is by installing water-saving fixtures. Low-flow showerheads, faucets, and toilets can significantly reduce water consumption without compromising performance. For instance, a low-flow toilet can save up to 1.6 gallons per flush compared to older models.
Benefits of Water-Saving Fixtures:
- Reduced water consumption
- Lower utility bills
- Less strain on local water resources
Eco-Friendly Repair Options
When it comes to repairs, choosing eco-friendly options can make a significant difference. This includes using materials that are sustainable, recycled, or have a lower environmental impact. For example, using PEX tubing, which is flexible and requires fewer fittings, can reduce waste and the energy needed for installation.
| Material | Eco-Friendliness | Durability |
|---|---|---|
| PEX Tubing | High | High |
| Copper Pipes | Medium | High |
| PVC Pipes | Low | Medium |
By adopting sustainable plumbing practices, homeowners can not only contribute to a healthier environment but also enjoy the benefits of lower utility bills and potentially increased property value. It’s a step towards a more eco-friendly future, starting with the way we manage water in our homes.
Common Mistakes and How to Avoid Them

Embarking on a DIY plumbing project requires caution, as overlooking simple safety measures can have serious consequences. Many homeowners are unaware of the potential pitfalls that can turn a simple repair into a costly disaster.
Safety Measures
One of the most critical aspects of DIY plumbing is safety. Skipping safety measures can lead to injuries and further damage. Always wear protective gear, including gloves and goggles, when working with plumbing fixtures. Ensure the workspace is well-lit and free from clutter to prevent accidents.
Over-Tightening Fixtures
Over-tightening is a common mistake that can damage fixtures and pipes. It’s essential to understand the correct torque required for tightening various plumbing components. Using the right tools, such as a torque wrench, can help prevent over-tightening and ensure a secure connection.
| Fixture Type | Recommended Torque | Common Issues with Over-Tightening |
|---|---|---|
| Faucet Handles | 10-15 Nm | Damaged handle or stripped threads |
| Pipe Connections | 20-25 Nm | Leaks or cracked pipes |
| Toilet Flapper | 5-10 Nm | Broken flapper or improper sealing |
Ignoring Local Codes
Ignoring local plumbing codes can result in fines and the need for costly rework. It’s crucial to familiarize yourself with local regulations before starting any plumbing project. For emergency situations that require professional attention, consider consulting services like emergency contractor services to ensure compliance and safety.
By being aware of these common mistakes and taking steps to avoid them, homeowners can successfully complete their DIY plumbing projects. Remember, safety and compliance are paramount to a successful plumbing project.
Resources and Further Learning
To further enhance your DIY plumbing skills, it’s essential to have access to reliable resources. Whether you’re a beginner or an experienced homeowner, there are numerous tools available to help you improve your knowledge and proficiency.
Online Resources
Websites like YouTube and online forums offer a wealth of online tutorials and videos that demonstrate various plumbing techniques. These resources can be invaluable in helping you troubleshoot common issues and learn new skills.
Plumbing Literature
For those who prefer learning through written materials, there are many recommended plumbing books available that cover a range of topics, from basic plumbing concepts to advanced techniques.
Hands-on Training
Additionally, consider enrolling in local plumbing classes or workshops, which provide hands-on experience and the opportunity to learn from experienced professionals. By leveraging these plumbing resources, you can continue to develop your skills and become more confident in your ability to tackle plumbing tasks.