A leaky faucet or clogged drain can be a real nuisance, but DIY plumbing repair tips can save the day.
Imagine being able to fix common plumbing issues on your own, without having to call a professional. By following step-by-step plumbing guides, homeowners can tackle simple fixes and avoid costly service calls.
For more complex issues, it’s always best to consult plumbing experts who can provide trusted repairs and guidance.
Key Takeaways
- Learn to fix leaky faucets and clogged drains with ease.
- Understand the basics of DIY plumbing repair.
- Follow step-by-step guides for common plumbing issues.
- Know when to call a professional for complex repairs.
- Save money by tackling simple plumbing fixes on your own.
Understanding Basic Plumbing Systems
Grasping the fundamentals of your home’s plumbing system is essential for effective home plumbing maintenance and repairs. A comprehensive understanding helps homeowners identify issues before they become major problems.
For a deeper dive into the world of plumbing, let’s explore the main components that make up your home’s plumbing system. You can find more detailed information on plumbing systems in resources like Oatey’s Home Plumbing System 101 guide.
What Are the Main Components of Plumbing?
The plumbing system in your home consists of several key elements: the water supply lines, drainage system, and fixtures such as faucets and toilets. The water supply lines bring fresh water into your home, while the drainage system removes wastewater.
Understanding how these components work together is vital for plumbing repair tutorials and ensuring your system operates smoothly.
How Water Supply and Drainage Work
The water supply system is responsible for distributing water throughout your home. It includes the main shut-off valve, water meter, and supply lines. On the other hand, the drainage system collects wastewater from various fixtures and directs it to the sewer or septic system.
For household plumbing projects for beginners, knowing how to turn off the main water supply is crucial. This knowledge can prevent significant water damage during repairs.
Common Plumbing Terms Every Homeowner Should Know
Familiarizing yourself with common plumbing terminology can make it easier to discuss issues with professionals. Terms like “P-trap,” “vent pipe,” and “shut-off valve” are frequently used in plumbing contexts.
Understanding these basics not only aids in home plumbing maintenance but also empowers homeowners to tackle simple repairs and projects, making it a valuable skill for anyone looking to become more self-sufficient in home maintenance.
Tools Every Homeowner Should Have

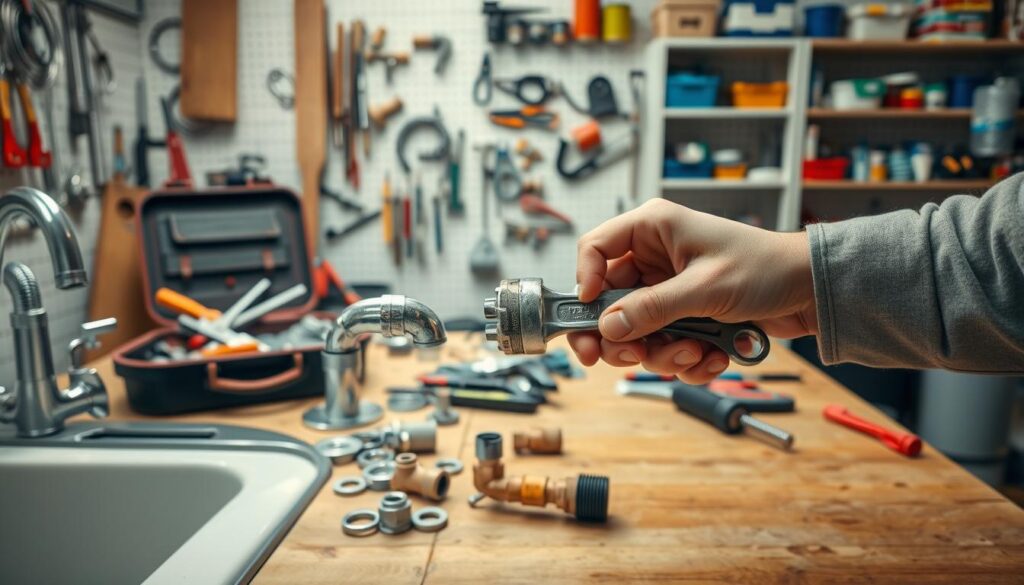
Equipping yourself with the necessary tools is the first step in becoming a proficient DIY plumber. Having the right tools is indispensable for simple fixes within your plumbing system. This not only saves you money on labor costs but also empowers you to tackle minor repairs and maintenance tasks efficiently.
Essential Plumbing Tools for Basic Repairs
To perform basic plumbing repairs, you’ll need a set of essential tools. These include:
- Adjustable wrenches for gripping and twisting pipe fittings and other objects.
- Pipe cutters for cutting through pipes cleanly and efficiently.
- Plungers for unclogging drains and toilets.
- Teflon tape for creating watertight seals on threaded pipe connections.
Safety Equipment for Plumbing Tasks
Safety should always be your top priority when performing plumbing tasks. Essential safety equipment includes:
- Gloves to protect your hands from sharp edges and chemicals.
- Safety goggles to shield your eyes from debris and chemical splashes.
- Work light to illuminate dark areas, such as under sinks or in crawl spaces.
How to Use Basic Plumbing Tools
Understanding how to use basic plumbing tools is crucial for successful DIY plumbing repairs. For instance, when using a plunger, ensure the drain is clogged and then create a tight seal over the drain. Push down slowly and steadily until you feel resistance, then pull up sharply to create suction. Repeat this process until the clog is cleared.
For more complex tasks, such as cutting pipes, use a pipe cutter to make a clean cut. Place the pipe cutter around the pipe and tighten it slowly until it cuts through. Always follow the manufacturer’s instructions for each tool to ensure safe and effective use.
Fixing a Leaky Faucet
Fixing a leaky faucet is a simple DIY task that can save homeowners a significant amount of water. A persistent drip from your faucet is often a sign that a washer or O-ring needs replacement. By following a step-by-step guide, homeowners can repair faucets effectively and efficiently.
Identify the Cause of the Leak
The first step in fixing a leaky faucet is to identify the source of the leak. Common causes include worn-out washers, damaged O-rings, or loose faucet handles. To diagnose the issue, turn off the water supply to the faucet and disassemble it to inspect the internal components.
Step-by-Step Guide to Repairing a Faucet
Repairing a faucet involves several straightforward steps:
- Turn off the water supply to the faucet.
- Disassemble the faucet to identify the faulty part.
- Replace the worn-out or damaged components, such as washers or O-rings.
- Reassemble the faucet and turn on the water supply to test for leaks.
For more detailed guides on the tools needed for such repairs, you can refer to resources like top plumbing tools and pipes for DIY.
Preventing Future Leaks
To prevent future leaks, regular maintenance is key. This includes checking faucet aerators for mineral buildup, inspecting faucet handles for looseness, and replacing worn-out parts before they cause leaks. By taking these preventive measures, homeowners can avoid the hassle and cost associated with faucet repairs.
Regular faucet maintenance not only saves water but also extends the lifespan of your plumbing fixtures. By following these simple steps, homeowners can ensure their faucets remain in good working condition.
Unclogging Drains

Understanding how to unclog drains is essential for maintaining a healthy plumbing system. Clogged drains can lead to a range of problems, from slow drainage to complete backups, often resulting from the accumulation of debris such as food scraps, grease, and soap deposits, particularly in kitchen sinks.
Signs of a Clogged Drain
Recognizing the signs of a clogged drain is the first step towards resolving the issue. Common indicators include slow draining water, unpleasant odors emanating from the sink, and gurgling sounds when water is draining. If you notice any of these signs, it’s crucial to act promptly to prevent further complications.
DIY Step-by-Step for Unclogging
For many clogs, a DIY approach can be effective. Start by using a plunger to create suction on the clog. If this doesn’t work, consider using a drain snake (auger) to remove the blockage. For more stubborn clogs, a mixture of baking soda and vinegar can be used to break down the debris. For detailed instructions and more DIY plumbing repair tips, you can refer to resources like this guide on fixing clogged drains.
- Use a plunger to create suction.
- Employ a drain snake to remove the clog.
- Apply a baking soda and vinegar mixture to break down debris.
When to Call a Professional
While many clogs can be resolved with DIY methods, there are situations where professional assistance is necessary. If you’ve tried multiple DIY approaches without success, or if you suspect a more complex issue within your plumbing system, it’s time to call a professional. Regular home plumbing maintenance can also help prevent clogs and identify potential issues before they become major problems.
By understanding the signs of a clogged drain and knowing how to address them, homeowners can maintain their plumbing systems effectively, ensuring a safe and healthy home environment.
Repairing Leaks in Pipes
Detecting and repairing leaks in pipes is a vital skill for homeowners to prevent costly water damage and mold growth. When you notice a damp spot on your wall or hear an unusual noise from your pipes, it could signal a minor leak that needs immediate attention.
How to Locate a Leak
Locating a leak can be challenging, but there are several methods to help you identify the source. First, check your water meter to see if it’s moving when all water-using appliances are turned off. If it is, you likely have a leak. Inspect visible pipes for signs of moisture or water droplets. For hidden leaks, you might need to use a stethoscope or listening device to detect the sound of dripping water.
Temporary Fixes for Pipe Leaks
For a temporary solution, you can use epoxy or pipe repair tape to seal the leak. This can help until you can get a permanent fix. It’s essential to turn off the main water supply before applying any temporary fix. For more significant leaks, consider using a pipe clamp to stop the leak.
Permanent Pipe Repair Solutions
For a permanent repair, you may need to replace the damaged section of the pipe. This involves cutting out the damaged area and replacing it with a new piece, using appropriate fittings. If you’re not comfortable with this process, it’s advisable to seek help from a professional plumber. For more information on trusted plumbing solutions, you can visit 24/7 Construction & Repair for expert assistance.
| Repair Method | Description | Skill Level |
|---|---|---|
| Epoxy Repair | Using epoxy to seal leaks | Beginner |
| Pipe Clamp | Clamping around the leak | Intermediate |
| Pipe Replacement | Replacing the damaged pipe section | Advanced |
Flushing a Water Heater

One of the most overlooked aspects of home plumbing maintenance is flushing the water heater. Flushing your water heater is an essential task that helps remove sediment and improve efficiency.
Why It’s Important to Flush Your Water Heater
Over time, sediment and minerals from the water can accumulate at the bottom of your water heater, reducing its efficiency and potentially causing damage. Flushing your water heater helps to remove these deposits, ensuring it continues to operate effectively. Regular flushing can also help prolong the lifespan of your water heater, saving you money on energy bills and potentially avoiding costly repairs.
Step-by-Step Flushing Procedure
Flushing your water heater is a relatively straightforward process that can be done with a few simple tools. Here’s a step-by-step guide:
- Turn off the power or gas supply to your water heater.
- Connect a hose to the drain valve at the bottom of the water heater.
- Place the other end of the hose in a drain or outside.
- Open the drain valve and allow the water to drain completely.
- Once drained, close the drain valve and remove the hose.
- Turn on the cold water supply to fill the tank, and then drain it again to remove any remaining sediment.
- Repeat the filling and draining process until the water runs clear.
- Finally, turn the power or gas supply back on.
Signs Your Water Heater Needs Maintenance
There are several signs that indicate your water heater may need maintenance, including:
- Reduced water temperature or inconsistent heating.
- Strange noises coming from the water heater.
- Leaks or rust around the water heater.
- Increased energy bills without a corresponding increase in usage.
If you notice any of these signs, it’s a good idea to check your water heater and consider flushing it as part of your home plumbing maintenance routine.
Replacing a Toilet
Toilet replacement is a common plumbing task that requires some knowledge and the right tools to execute successfully. Homeowners may need to replace their toilet due to various reasons such as age, inefficiency, or persistent issues.
Signs You Need a New Toilet
Before diving into the replacement process, it’s crucial to identify the signs that indicate the need for a new toilet. Some of these signs include:
- Frequent clogging despite proper use
- Visible cracks or damage to the toilet bowl or tank
- Increased water bills due to leaks
- Outdated or inefficient toilet models
Step-by-Step Guide to Replacing a Toilet
Replacing a toilet involves several steps that, when followed carefully, can make the process smoother. Here’s a step-by-step guide:
- Turn off the water supply to the toilet.
- Drain the tank and bowl.
- Disconnect the water supply line.
- Remove the toilet from the flange.
- Install a new wax ring on the flange.
- Carefully place the new toilet over the flange.
- Reconnect the water supply line.
- Turn on the water supply and test for leaks.
Common Mistakes to Avoid
When replacing a toilet, there are several common mistakes that homeowners should be aware of to ensure a successful installation. These include:
| Mistake | Consequence | Prevention |
|---|---|---|
| Improper toilet flange height | Leaks or uneven toilet | Adjust flange height or use spacers |
| Insufficient wax ring compression | Leaks under the toilet | Ensure proper tightening |
| Incorrect toilet positioning | Uneven toilet or flange damage | Carefully align and lower the toilet |
By being aware of these potential issues, homeowners can take the necessary precautions to avoid them, ensuring a successful toilet replacement.
Installing a New Faucet

A new faucet installation can breathe new life into your kitchen or bathroom, offering both style and functionality. For homeowners looking to enhance their home’s aesthetic and efficiency, this DIY project is both rewarding and relatively straightforward.
Choosing the Right Faucet: Key Considerations
When selecting a new faucet, several factors come into play. Consider the style, finish, and functionality that best suits your needs. Popular faucet styles include single-handle, double-handle, and touchless models, each offering unique benefits.
- Single-handle faucets offer ease of use with one lever controlling both temperature and flow.
- Double-handle faucets provide separate controls for hot and cold water, often preferred for their classic look.
- Touchless faucets, operated by sensors, offer a hygienic and modern solution.
Tools Needed for Faucet Installation
Gathering the right tools is crucial for a smooth installation process. Essential tools include an adjustable wrench, basin wrench, and channel-type pliers. Having these on hand will help you tackle the job with confidence.
- Adjustable wrench for tightening and loosening various sized nuts and bolts.
- Basin wrench for accessing and tightening faucet mounting nuts in tight spaces.
- Channel-type pliers for gripping and adjusting various parts of the faucet.
Step-by-Step Installation Guide
With the right faucet and tools in hand, follow these steps for a successful installation. Start by shutting off the water supply to avoid any leaks or water damage.
- Disconnect the old faucet, taking care to remove any remaining water from the lines.
- Clean the area around the sink holes to ensure a smooth installation.
- Mount the new faucet according to the manufacturer’s instructions, securing it firmly.
- Connect the water supply lines, checking for leaks before finishing.
By following these steps and considering the key factors outlined, homeowners can successfully install a new faucet, enhancing their home’s functionality and aesthetic. This project is a great example of a DIY plumbing repair tip that beginners can tackle with confidence.
Dealing with Low Water Pressure
Homeowners often encounter low water pressure, which can stem from various causes, including sediment buildup and corroded pipes. This issue can be frustrating and may indicate underlying problems in your plumbing system.
Causes of Low Water Pressure
Understanding the causes of low water pressure is crucial for effective troubleshooting. Common causes include:
- Sediment buildup in pipes
- Corroded or damaged plumbing
- Municipal water supply issues
- Clogged aerators or showerheads
As noted by plumbing experts, “Identifying the root cause of low water pressure is the first step towards resolving the issue.”
“Low water pressure can be a sign of a larger problem within your plumbing system, such as corroded pipes or mineral buildup.”
Step-by-Step Troubleshooting Guide
To address low water pressure, follow these steps:
- Check for visible leaks or damage to pipes.
- Inspect and clean aerators and showerheads.
- Verify that the issue isn’t isolated to a single fixture.
- Consider consulting a professional for complex issues.
For more complex plumbing issues, it’s advisable to seek help from professionals who specialize in 24/7 construction and repair services.
When to Seek Professional Help
If troubleshooting doesn’t resolve the issue, it may be time to call a professional. Signs that you need expert help include:
- Persistence of low water pressure despite DIY efforts
- Evidence of significant pipe damage or corrosion
- Uncertainty about the cause or solution
Regular home plumbing maintenance can help prevent issues like low water pressure. By understanding the causes and following a step-by-step troubleshooting guide, homeowners can often resolve the problem or determine when to seek professional assistance.
Repairing and Replacing Showerheads

Replacing or repairing your showerhead is a simple yet effective way to enhance your shower experience. A showerhead in good condition ensures optimal water flow and pressure, making your daily routine more enjoyable.
Signs Your Showerhead Needs Fixing
Before you decide to replace your showerhead, it’s crucial to identify if it actually needs fixing. Here are some common signs:
- Reduced water pressure or flow
- Visible mineral buildup or debris
- Leaks or drips when the shower is turned off
- Inconsistent water temperature
If you notice any of these issues, it might be time to either clean or replace your showerhead. Regular maintenance can extend the life of your showerhead and improve your shower experience.
Step-by-Step Replacement Process
Replacing a showerhead is a straightforward DIY task that requires minimal tools. Here’s a step-by-step guide:
- Turn off the water supply: Locate the shut-off valves and turn them clockwise to shut off the water supply to your shower.
- Remove the old showerhead: Use an adjustable wrench to loosen the showerhead. Once loose, you should be able to remove it by hand.
- Clean the shower arm: Use a cloth to wipe away any mineral deposits or debris from the shower arm.
- Install the new showerhead: Apply plumber’s tape to the threads of the shower arm, then screw on the new showerhead. Tighten it securely with your wrench.
- Turn on the water supply: Turn the shut-off valves counterclockwise to restore water supply.
- Test the showerhead: Turn on the shower to check for leaks and ensure proper function.
Cleaning Tips for Showerheads
Before replacing your showerhead, you might want to try cleaning it. Mineral buildup is a common issue that can reduce water flow. Here’s how to clean your showerhead:
- Soak the showerhead in vinegar for several hours or overnight to dissolve mineral deposits.
- Use a soft brush to gently scrub away any remaining debris.
- Rinse the showerhead thoroughly with warm water.
Regular cleaning can help maintain your showerhead’s performance and extend its lifespan. For more complex issues or if cleaning doesn’t resolve the problem, consider replacing your showerhead.
Fixing Running Toilets
Dealing with a running toilet is a straightforward process that can save you money and water. A running toilet can waste a significant amount of water, increasing your utility bills. Fortunately, fixing this common issue involves identifying the cause and following a simple repair process.
Identifying the Cause of a Running Toilet
The first step in fixing a running toilet is to identify the cause. Common culprits include a faulty flapper, an improperly adjusted float, or a clogged overflow tube. To diagnose the issue, start by checking the flapper for any signs of wear or misalignment. If the flapper is damaged, it may not be sealing properly, causing water to continuously flow into the toilet bowl.
Next, inspect the float and its adjustment. If the float is set too high, water will continue to flow into the overflow tube, leading to a running toilet. Adjusting the float or replacing it if necessary can resolve this issue.
Step-by-Step Repair Process
Once you’ve identified the cause, follow these steps to repair your running toilet:
- Turn off the water supply to the toilet by locating the shut-off valve behind the toilet and turning it clockwise.
- Inspect and replace the flapper if it’s damaged or not sealing correctly.
- Adjust the float to ensure it’s not set too high.
- Check the overflow tube for any clogs or blockages.
- Replace any other faulty parts, such as the fill valve, if necessary.
For a detailed guide on fixing a running toilet, you can refer to this resource, which provides comprehensive instructions and troubleshooting tips.
FAQs About Running Toilets
Here are some frequently asked questions about running toilets:
| Question | Answer |
|---|---|
| Why is my toilet running continuously? | A faulty flapper, improperly adjusted float, or clogged overflow tube are common causes. |
| How much water can a running toilet waste? | A running toilet can waste hundreds of gallons of water per day, significantly increasing your water bill. |
| Can I fix a running toilet myself? | Yes, most running toilet issues can be resolved by identifying and fixing the cause, such as adjusting or replacing the flapper or float. |
By following these steps and understanding the common causes, you can fix a running toilet and save water, reducing your utility bills.
Winterizing Your Plumbing System

Winterizing your plumbing system is a crucial step in maintaining your home’s integrity during the cold months. This process involves a series of actions designed to protect your plumbing from the harsh effects of winter, thereby preventing costly repairs.
Why Winterization Is Important
Winterization is essential because it helps prevent pipes from freezing and bursting, a common issue during winter. When water inside the pipes freezes, it expands, putting pressure on the pipe walls. This can lead to cracks and bursts, resulting in significant water damage and expensive repairs. By winterizing your plumbing system, you can avoid these issues and ensure your home remains safe and comfortable.
Step-by-Step Guide to Prepare for Winter
Preparing your plumbing system for winter involves several key steps. First, inspect your pipes for any exposed or vulnerable sections, particularly in unheated areas like the garage, basement, or crawlspace. Insulating these pipes can help prevent them from freezing.
Next, drain and disconnect any hoses from outdoor faucets to prevent water from freezing within the hoses. Consider installing freeze-proof faucets or frost-proof spigots as an alternative.
For a more comprehensive approach, consider the following steps:
- Seal any cracks or gaps around windows, doors, and pipes to prevent cold air from entering.
- Let cold water drip from faucets served by exposed pipes.
- Open cabinet doors under sinks to allow warm air to circulate.
- For additional protection, consider using a DIY pipe winterization guide to help you through the process.
Tips for Avoiding Winter Plumbing Issues
In addition to the steps outlined above, there are several other tips to help you avoid winter plumbing issues. Regularly checking your plumbing system for signs of wear or damage can help identify potential problems before they become major issues. Maintaining a consistent temperature in your home, even when you’re away, can also help prevent pipes from freezing.
By following these guidelines and taking proactive measures, you can protect your home’s plumbing system and avoid the costly repairs associated with winter damage. Engaging in home plumbing maintenance and being proactive with household plumbing projects for beginners can significantly reduce the risk of plumbing-related issues during the winter months.
Maintaining Your Plumbing System
Regular maintenance is key to extending the life of your plumbing system and preventing common problems. By incorporating simple checks into your routine, you can ensure your system operates smoothly and efficiently.
Regular Checks
Inspecting faucets, sinks, toilets, and pipes regularly can help catch minor issues before they escalate. Use a mild drain cleaner or a mixture of vinegar and baking soda to prevent clogs in sinks and shower drains. For more information on maintaining your plumbing system, you can refer to a comprehensive plumbing maintenance checklist.
Preventing Issues
Checking water pressure using a pressure gauge and aiming for 40-60 psi can help prevent damage to your plumbing system. Regularly inspect outdoor faucets and hoses during warmer months for leaks or damage.
Professional Inspections
Schedule a professional inspection of your sewer line to check for blockages or tree root intrusion. Have your septic tank inspected and pumped every 2-3 years depending on usage. By following these home plumbing maintenance tips and plumbing repair tutorials, you can prevent costly repairs and ensure your plumbing system remains in good condition.