Tackling plumbing issues on your own can be a rewarding and cost-saving endeavor. At J Blanton Plumbing, we believe in empowering Algonquin homeowners with the knowledge to handle minor plumbing issues effectively.
This guide is designed to walk you through essential DIY plumbing repairs, ensuring you can manage minor problems until professional help is needed. Understanding the basics of your plumbing system, identifying common issues, and knowing how to fix them are crucial steps in maintaining your home’s integrity.
Key Takeaways
- Understand the basics of your home’s plumbing system.
- Identify common plumbing issues such as leaky faucets and clogged drains.
- Learn step-by-step repair processes for minor plumbing problems.
- Recognize when to seek professional help for more complex issues.
- Regular maintenance can prevent significant plumbing problems.
Understanding Basic Plumbing Systems
Understanding your home’s plumbing system can save you from unexpected repairs. Home plumbing is a complex network of pipes, fixtures, and appliances that require a basic understanding to maintain effectively.
Overview of Home Plumbing
Home plumbing encompasses the supply and drainage subsystems. The supply system brings fresh water into your home, while the drainage system removes wastewater. These two subsystems operate distinctly but are interconnected through various plumbing fixtures.
Types of Plumbing Systems
There are primarily two types of plumbing systems: the direct water supply system and the indirect water supply system. The direct system supplies water directly from the municipal supply or a well, whereas the indirect system uses a storage tank.
How Water Flows Through Your Home
Water flows into your home through the main water line, branching out to various fixtures such as sinks, toilets, and showers. Understanding this flow is crucial for identifying and fixing leaks or other issues. For DIY plumbing projects, it’s essential to have the right plumbing tools and pipes.
| Plumbing System Component | Function | Common Issues |
|---|---|---|
| Main Water Line | Supplies water to the home | Leaks, Freezes |
| Water Heater | Heats water for household use | Leaks, Inefficiency |
| Drainage Pipes | Removes wastewater | Clogs, Backups |
By understanding the basics of your home’s plumbing system, you can better maintain it and address issues before they become major problems.
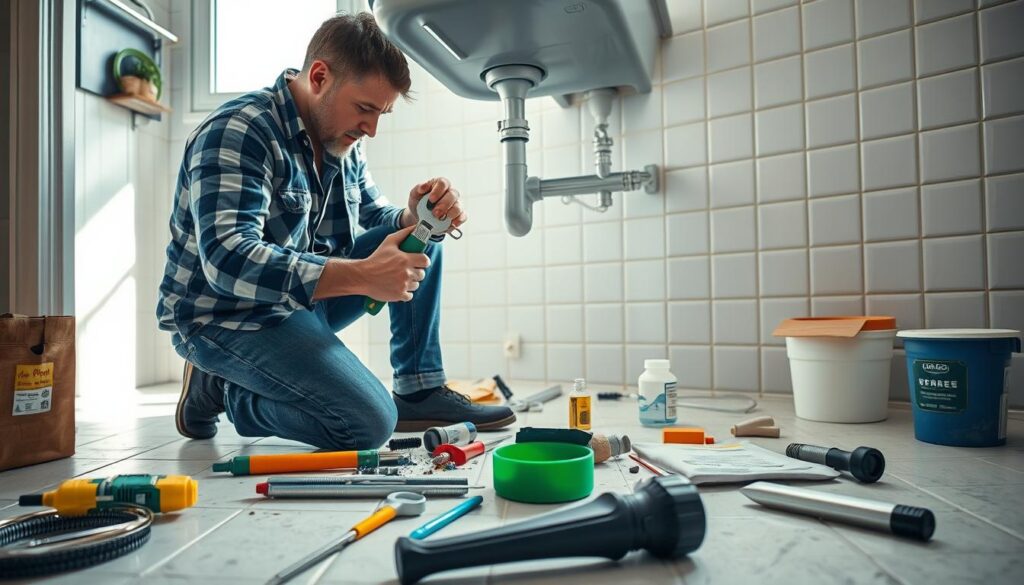
Essential Plumbing Tools Every Homeowner Should Have

Having the right plumbing tools is crucial for homeowners to tackle DIY repairs effectively. Basic plumbing repairs can be daunting, but with the right equipment, homeowners can save time and money.
List of Basic Tools
To perform simple plumbing tasks, homeowners need a set of fundamental tools. These include:
- Plungers: Essential for unclogging drains and toilets.
- Drain Snakes: Useful for clearing clogs deeper in the pipes.
- Pipe Wrenches: Necessary for gripping and twisting pipes.
- Adjustable Wrenches: Handy for tightening and loosening various pipe fittings.
- Teflon Tape: Important for creating watertight seals on threaded pipe connections.
As Family Handyman notes, “A good plumber always has the right tools for the job.” Having these basic tools on hand can make a significant difference in the success of DIY plumbing repairs.
Safety Gear and Equipment
Safety should always be a top priority when performing plumbing repairs. Essential safety gear includes:
- Gloves: Protect hands from sharp edges and cold temperatures.
- Goggles: Shield eyes from potential splashes and debris.
- Work Light: Illuminate work areas to prevent accidents.
According to
“Safety is not just a precaution, it’s a necessity when working with plumbing systems.”
Ensuring you have the right safety gear can prevent injuries and make the repair process smoother.
Where to Purchase Plumbing Tools
Homeowners can find plumbing tools at various hardware stores and online retailers. Popular options include:
- Home Depot: Offers a wide selection of plumbing tools and supplies.
- Lowe’s: Provides a variety of plumbing tools and equipment.
- Amazon: Convenient online shopping with a vast range of plumbing tools.
When purchasing plumbing tools, it’s essential to choose high-quality products that will last. As Consumer Reports advises, “Investing in good-quality tools can save money in the long run.”
Common Plumbing Problems Homeowners Face
As a homeowner, you’re likely to face several plumbing challenges, including leaky faucets and clogged drains. These issues not only cause inconvenience but can also lead to significant water waste and increased utility bills if not addressed promptly.
Leaky Faucets
A leaky faucet is one of the most common plumbing problems. It can waste a significant amount of water over time, leading to higher water bills. The causes can range from worn-out O-rings to damaged valve seats. For more information on fixing leaky faucets, you can visit Brock Mechanical.
Running Toilets
A running toilet is another prevalent issue that can waste a lot of water. It occurs when the toilet tank doesn’t shut off completely after flushing, causing water to continuously flow into the toilet bowl. The most common causes include a faulty flapper or an improperly adjusted float.
Clogged Drains
Clogged drains are a frequent plumbing problem that can cause significant disruption. Hair, soap scum, and grease are common culprits that can clog sink, shower, and toilet drains. Using the right tools and techniques can help clear these blockages.
Understanding these common plumbing issues is the first step towards resolving them. By being aware of the causes and taking prompt action, homeowners can save water, reduce their utility bills, and avoid more costly repairs down the line.
How to Fix a Leaky Faucet

A leaky faucet can be frustrating, but fortunately, it’s a problem you can fix yourself with the right guidance. Fixing a leaky faucet involves a few straightforward steps that can help you save water and reduce your utility bills.
Identifying the Source of the Leak
The first step in fixing a leaky faucet is to identify where the leak is coming from. Common sources of leaks include worn-out O-rings, damaged valve seats, or loose connections. To diagnose the issue, turn on the faucet and observe where the water is coming from. This will help you determine the necessary repair.
Step-by-Step Repair Process
Once you’ve identified the source of the leak, follow these steps to repair your faucet:
- Turn off the water supply to the faucet by locating the shut-off valves under the sink and turning them clockwise.
- Disassemble the faucet to access the damaged part. This may involve removing the handle or knob.
- Inspect the parts for wear or damage. Commonly, the O-ring or gasket needs to be replaced.
- Replace the worn-out parts with new ones. Make sure to purchase the correct replacement parts for your faucet type.
- Reassemble the faucet in the reverse order that you disassembled it.
- Turn on the water supply and check for leaks.
Tips for Replacement Parts
When selecting replacement parts, ensure they are compatible with your faucet’s brand and model. Consider the following tips:
- Take the old part to the hardware store to ensure a correct match.
- Opt for high-quality replacement parts to extend the lifespan of your faucet.
- Consider upgrading to a faucet with a more modern, leak-resistant design if your current faucet is old or frequently problematic.
By following these steps and tips, you can successfully fix a leaky faucet and enjoy a more efficient, cost-effective plumbing system.
Steps to Unclog a Drain
Unclogging a drain can seem like a daunting task, but with the right tools and techniques, it’s achievable for any homeowner. Clogged drains are not only frustrating but can also lead to more significant plumbing issues if not addressed promptly.
Identifying the Type of Clog
The first step in unclogging a drain is to identify the type of clog you’re dealing with. Clogs can be categorized into two main types: those caused by hair and soap buildup, and those resulting from grease or food particles. Understanding the nature of the clog helps in choosing the most effective method for DIY drain unclogging.
Tools for Unclogging Drains
Having the right tools is crucial for successfully unclogging a drain. Common tools include a plunger, drain snake (also known as an auger), and chemical drain cleaners. For a more environmentally friendly approach, baking soda and vinegar can be used to dissolve the clog. As plumbing solutions go, these methods are both effective and budget-friendly.
Step-by-Step Unclogging Guide
Here’s a simple, step-by-step guide to unclogging your drain:
- Start by using a plunger to create suction on the clog. Make sure there’s enough water in the sink or tub to cover the plunger’s cup.
- If plunging doesn’t work, use a drain snake to break up or retrieve the clog. Feed the snake into the drain until you feel resistance, then twist and pull.
- For a more natural approach, pour 1/2 cup of baking soda down the drain, followed by 1 cup of vinegar. Let the mixture sit for a few hours or overnight before rinsing with hot water.
- If the clog persists, consider using a chemical drain cleaner. Be sure to follow the manufacturer’s instructions and take necessary safety precautions.
By following these steps, you can effectively unclog your drain without needing to call a professional plumber. Remember, regular maintenance is key to preventing future clogs and ensuring your plumbing system runs smoothly.
“A well-maintained plumbing system is crucial for the comfort and safety of your home. Regularly checking and clearing your drains can prevent many common plumbing issues,” says a plumbing expert.
Dealing with a Running Toilet

A running toilet is not just annoying; it’s also a waste of water that can lead to higher utility bills. Understanding how to fix this common issue can save you money and reduce your water footprint.
Understanding the Mechanism
A toilet’s operation is based on a simple mechanism involving several key components: the flapper, the fill valve, and the float. When you flush the toilet, the flapper opens, allowing water to flow from the tank into the bowl. As the water level in the tank drops, the float descends, triggering the fill valve to refill the tank. Once the tank is full, the flapper closes, and the float rises to shut off the fill valve.
Common Causes of Running Toilets
Most running toilets are caused by issues with the flapper, fill valve, or float. A worn-out or misaligned flapper can prevent the tank from sealing properly, causing continuous water flow into the bowl. Similarly, a malfunctioning fill valve can lead to an overflow, triggering the toilet to run constantly. Adjusting or replacing these parts can usually resolve the issue.
Repairing or Replacing Toilet Parts
To fix a running toilet, start by inspecting the flapper and its seal. If it’s damaged, consider replacing it. Adjusting the float arm or replacing the fill valve might also be necessary. For detailed instructions and troubleshooting tips, you can refer to resources like BHG’s guide on fixing a running. By addressing these common issues, you can stop your toilet from running and save on your water bill.
Fixing Low Water Pressure
Homeowners often encounter low water pressure, which can stem from various causes, including mineral buildup and leaks. Low water pressure can significantly impact daily life, making simple tasks like showering or washing dishes frustratingly difficult.
Possible Causes of Low Water Pressure
Several factors can contribute to low water pressure in a home. Mineral buildup from hard water is a common cause, as it can clog pipes and fixtures, reducing water flow. Leaks in the plumbing system can also lead to decreased pressure, as water escapes before reaching its destination. Additionally, issues with the municipal water supply, such as maintenance or peak usage periods, can affect pressure.
Steps to Diagnose the Issue
To effectively address low water pressure, it’s crucial to diagnose the root cause. Start by checking all faucets and fixtures to see if the issue is localized or widespread. If it’s isolated to one faucet, the problem might be with that specific fixture. For more widespread issues, inspect your home’s plumbing system for signs of leaks or corrosion. You can also check the pressure regulator if your home is equipped with one.
Using a pressure gauge can provide a more accurate measurement of your water pressure. This tool can help determine if the issue lies within your home’s plumbing or with the municipal supply.
Solutions for Restoring Pressure
Once the cause of low water pressure is identified, appropriate solutions can be implemented. For mineral buildup, consider installing a water softener to reduce mineral deposits in your pipes. If leaks are detected, repair or replace the affected pipes to prevent further loss of pressure.
In cases where the municipal supply is the issue, contacting your water provider can offer insight into any ongoing maintenance or problems. In some instances, installing a booster pump can help increase water pressure within your home.
By understanding the causes of low water pressure and taking steps to diagnose and address the issue, homeowners can restore adequate water pressure, improving their overall quality of life.
How to Replace a Showerhead

Learning how to replace a showerhead is a valuable plumbing skill for homeowners. It not only enhances your shower experience but also helps in maintaining your bathroom’s overall functionality.
Tools Needed for Replacement
Before you start, gather the necessary tools to make the process smoother. You’ll need:
- An adjustable wrench or basin wrench
- Teflon tape (thread seal tape)
- A cloth or rag
- The new showerhead
Step-by-Step Replacement Guide
Replacing a showerhead involves a few straightforward steps:
- Turn off the water supply to your shower. This is usually done at the main water shut-off valve.
- Remove the old showerhead by unscrewing it counterclockwise with your wrench.
- Clean the threads on the shower arm with a cloth to remove any mineral deposits or debris.
- Wrap Teflon tape around the threads of the shower arm in a clockwise direction to create a watertight seal.
- Screw the new showerhead onto the shower arm clockwise until it’s snug.
- Turn on the water supply and check for leaks.
For a more detailed guide on changing a showerhead, you can visit Home Depot’s guide.
Tips for Choosing the Right Showerhead
Selecting the right showerhead can significantly impact your shower experience. Consider the following factors:
| Feature | Description |
|---|---|
| Spray Patterns | Choose from various spray patterns like rainfall, massage, or mist to suit your preference. |
| Water Efficiency | Look for showerheads with low flow rates (around 2.5 GPM or less) for water conservation. |
| Material | Opt for durable materials like brass or stainless steel for longevity. |
By following these steps and tips, you can successfully replace your showerhead and enjoy an enhanced shower experience. Remember to consider factors like water efficiency and material durability when selecting a new showerhead.
Repairing or Replacing a Toilet
The decision to repair or replace a toilet depends on several factors, including the extent of the damage and the toilet’s age. Understanding these factors is crucial for homeowners to make an informed decision.
Signs You Need a New Toilet
Several signs indicate that it’s time to replace your toilet. These include frequent clogs, cracks in the bowl, and persistent leaks. If your toilet is old or inefficient, it might be costing you more in water bills than necessary.
- Frequent clogs or overflows
- Visible cracks or damage
- High water bills due to leaks
- Age of the toilet (over 15 years)
Step-by-Step Replacement Process
Replacing a toilet can seem daunting, but breaking it down into steps makes it manageable. First, you’ll need to gather the necessary tools and the new toilet. Ensure the new toilet fits the existing flange and floor space.
- Turn off the water supply and drain the tank and bowl.
- Disconnect the water supply line and remove the toilet from the flange.
- Clean the flange and surrounding area.
- Install a new wax ring on the flange.
- Carefully place the new toilet over the flange, ensuring it’s centered.
- Secure the toilet to the floor and reconnect the water supply line.
Toilet Maintenance Tips
Regular toilet maintenance can extend its lifespan and prevent costly repairs. Check for leaks around the base and inside the tank. Avoid using harsh chemicals that can damage the toilet’s components.
| Maintenance Task | Frequency | Benefit |
|---|---|---|
| Check for Leaks | Monthly | Prevents Water Waste |
| Clean the Toilet | Weekly | Prevents Stains and Odors |
| Inspect the Flapper | Every 6 Months | Ensures Proper Flushing |
By understanding the signs that indicate a need for a new toilet, following a step-by-step replacement process, and practicing regular toilet maintenance, homeowners can ensure their toilets operate efficiently and effectively.
Basics of Pipe Repair

Understanding the basics of pipe repair can help homeowners tackle common plumbing issues effectively. Pipe leaks and damages are not only frustrating but can also lead to significant water damage and increased utility bills if left unaddressed.
Identifying Pipe Leaks
Identifying pipe leaks early is crucial to preventing extensive damage. Signs of pipe leaks include water damage on walls or ceilings, warped flooring, and the sound of running water when no faucets are on. Visual inspections are a good starting point, but sometimes, leaks are hidden behind walls or under floors, requiring more sophisticated detection methods.
Temporary Fixes for Pipe Leaks
For minor leaks, temporary fixes can be applied to mitigate damage until a permanent repair can be made. Using pipe repair clamps or epoxy putty can seal small leaks temporarily. However, these solutions are not meant to be permanent and should be followed up with a more durable fix as soon as possible.
Permanent Repair Options
Permanent repairs often involve replacing the damaged section of the pipe. This can be done by cutting out the damaged area and replacing it with a new piece of pipe, using appropriate fittings to ensure a watertight seal. For more extensive damage, it may be necessary to consult a professional plumber to ensure the repair is done correctly and safely.
Water Heater Maintenance and Repairs
Understanding how to maintain and repair your water heater can save you money in the long run. Regular maintenance not only prolongs the lifespan of your water heater but also ensures it operates efficiently.
Common Water Heater Issues
Water heaters, like any other appliance, can develop issues over time. Common problems include leaks, inadequate hot water, and strange noises. Leaks can be particularly problematic, as they can lead to water damage if not addressed promptly.
Some common signs of water heater issues include:
- Leaking around the temperature and pressure relief valve
- Insufficient hot water
- Unusual noises coming from the water heater
- Visible signs of rust or corrosion
Step-by-Step Maintenance Guide
Performing regular maintenance on your water heater can help prevent many common issues. Here’s a step-by-step guide:
- Check the temperature and pressure relief valve to ensure it’s working correctly.
- Inspect the anode rod for corrosion and replace it if necessary.
- Check for leaks around the water heater and its connections.
- Test the water heater’s temperature to ensure it’s not too hot or too cold.
| Maintenance Task | Frequency | Importance |
|---|---|---|
| Check Temperature and Pressure Relief Valve | Every 6 months | High |
| Inspect Anode Rod | Every 12 months | High |
| Check for Leaks | Every 6 months | High |
When to Call a Professional
While many maintenance tasks can be performed by homeowners, there are times when it’s necessary to call a professional. If you’re unsure about how to perform a task or if you’ve identified a complex issue, it’s best to seek expert help. Professional plumbers have the training and equipment to diagnose and fix problems efficiently.
Signs that you need to call a professional include:
- Persistent leaks or water damage
- Failure to heat water properly
- Unusual noises that persist after draining the tank
Understanding Plumbing Codes and Regulations

Understanding plumbing codes and regulations is crucial for homeowners to ensure their plumbing systems are safe and compliant. Plumbing codes are in place to safeguard public health and safety by dictating the standards for plumbing installations, repairs, and maintenance.
Importance of Plumbing Codes
Plumbing codes play a vital role in preventing hazards associated with poorly installed or maintained plumbing systems. These codes ensure that all plumbing work is done to a standard that minimizes the risk of leaks, contamination, and other safety issues. Compliance with plumbing codes is not only a legal requirement but also a crucial aspect of maintaining the integrity of a home’s plumbing system.
For instance, the basic plumbing codes provide a comprehensive guide for homeowners and plumbers to follow, ensuring that all plumbing work meets the necessary safety and quality standards.
Common Code Violations to Avoid
Homeowners should be aware of common code violations to avoid potential legal and safety issues. Some of the most common violations include improper venting, incorrect sizing of pipes, and inadequate support for plumbing fixtures. Ensuring that all plumbing work is inspected and approved by local authorities can help prevent these violations.
| Common Code Violations | Description | Consequences |
|---|---|---|
| Improper Venting | Inadequate or incorrect venting of plumbing fixtures. | Can lead to siphoning of traps, causing sewer gases to enter the home. |
| Incorrect Pipe Sizing | Pipes that are too small for the intended use. | Can result in low water pressure and increased risk of leaks. |
| Inadequate Fixture Support | Poorly supported or unsecured plumbing fixtures. | Can lead to fixture damage, leaks, and safety hazards. |
Resources for Homeowners
Homeowners can access various resources to learn more about plumbing codes and regulations. Local government websites, plumbing supply stores, and professional plumbing services are valuable sources of information. Additionally, online guides and tutorials can provide step-by-step instructions on how to comply with plumbing codes.
By understanding and complying with plumbing codes and regulations, homeowners can ensure their plumbing systems are safe, efficient, and compliant with local laws. This not only protects their homes but also contributes to the overall safety of the community.
Preventative Plumbing Maintenance Tips
By staying on top of plumbing maintenance, homeowners can avoid unexpected and expensive repairs. Regular plumbing maintenance is essential for ensuring the longevity and efficiency of your home’s plumbing system.
Regular Inspections
Conducting regular inspections is a crucial step in preventative plumbing maintenance. Homeowners should check for signs of leaks, corrosion, and wear on pipes, fittings, and fixtures. Inspecting your plumbing system regularly can help identify potential issues before they become major problems.
Some areas to focus on during inspections include:
- Visible pipes under sinks, around toilets, and near water heaters
- Faucets and fixtures for leaks or mineral buildup
- Toilets for proper flushing and signs of leaks
- Water heaters for signs of corrosion or leaks
Seasonal Maintenance Tasks
In addition to regular inspections, there are several seasonal maintenance tasks that homeowners can perform to keep their plumbing system in good condition. These tasks include:
| Season | Task |
|---|---|
| Spring | Inspect and clean drains, check for outdoor faucet leaks |
| Summer | Check for signs of leaks around outdoor faucets and hoses |
| Fall | Drain and winterize outdoor faucets, inspect water heaters |
| Winter | Insulate exposed pipes, let cold water drip from faucets served by exposed pipes |
Importance of Professional Inspections
While regular homeowner inspections are important, professional plumbing inspections can provide a more thorough assessment of your plumbing system. Professional plumbers have the training and equipment to identify issues that may not be apparent to homeowners.
A professional inspection can help:
- Identify potential issues before they become major problems
- Improve the efficiency and longevity of your plumbing system
- Provide recommendations for repairs and maintenance
By combining regular inspections, seasonal maintenance tasks, and professional inspections, homeowners can keep their plumbing system in good condition and avoid costly repairs.
When to Call a Professional Plumber

Understanding when to hire a professional plumber can save homeowners from further damage and costly repairs. While many plumbing issues can be resolved with DIY fixes, certain problems require the expertise of a licensed plumber.
Signs That Require Expert Attention
There are several signs that indicate the need for a professional plumber. These include:
- Persistent leaks that won’t stop
- Low water pressure throughout the house
- Clogged drains that DIY methods can’t clear
- Running toilets that won’t stop
- Any signs of water damage or flooding
If you’re experiencing any of these issues, it’s time to call a professional.
Benefits of Hiring a Professional
Hiring a professional plumber offers several benefits, including:
- Expertise: Professional plumbers have the training and experience to diagnose and fix complex plumbing issues.
- Efficiency: They can complete repairs quickly, minimizing disruption to your daily routine.
- Safety: Professionals are equipped to handle potentially hazardous situations, such as gas leaks or electrical issues related to plumbing.
- Warranty: Many professional plumbers offer warranties on their work, providing peace of mind.
Finding the Right Plumber for Your Needs
When searching for a professional plumber, consider the following:
- Check for licenses and certifications
- Read reviews and ask for referrals
- Get multiple quotes to compare prices
- Ask about their experience with your specific issue
By taking these steps, you can find a reliable and skilled plumber who meets your needs.
Cost-Effective Plumbing Solutions for Homeowners
Cost-effective plumbing is not just about saving money; it’s about smart decision-making for homeowners. By adopting the right strategies, homeowners can significantly reduce their plumbing expenses without compromising on quality.
Budgeting for Repairs and Maintenance
Effective budgeting is the cornerstone of cost-effective plumbing. Homeowners should allocate a specific budget for plumbing repairs and maintenance. This proactive approach helps in avoiding last-minute, costly fixes.
Here are some tips for budgeting:
- Set aside a monthly or annual budget for plumbing expenses.
- Regularly inspect your plumbing system to identify potential issues early.
- Prioritize repairs based on urgency and importance.
| Plumbing Task | Average Cost | DIY Potential |
|---|---|---|
| Fixing a Leaky Faucet | $100-$300 | High |
| Unclogging a Drain | $100-$500 | Medium |
| Replacing a Toilet | $200-$1,000 | Low to Medium |
DIY vs. Hiring a Professional
Deciding whether to DIY or hire a professional is a crucial aspect of cost-effective plumbing. While DIY can save labor costs, complex tasks require professional expertise to avoid further damage.
“The key to cost-effective plumbing lies in knowing when to DIY and when to call in the professionals. It’s about balancing cost savings with the quality of work.” – Plumbing Expert
Consider the following when deciding between DIY and hiring a professional:
- The complexity of the task.
- Your level of plumbing knowledge.
- The potential risks and consequences of a DIY mistake.
Long-Term Cost Savings
Investing in certain plumbing solutions can lead to significant long-term savings. For instance, installing low-flow fixtures can reduce water bills, and regular maintenance can prevent costly repairs.
- Installing water-efficient appliances.
- Regularly maintaining your plumbing system.
- Using quality materials for repairs and replacements.
By implementing these cost-effective plumbing solutions, homeowners can enjoy a well-functioning plumbing system while keeping expenses in check.
Emergency Plumbing Tips for Homeowners

In the event of a plumbing emergency, knowing the right steps to take can significantly reduce damage and stress. Plumbing emergencies can range from burst pipes to overflowing toilets, and being prepared is key to handling them effectively.
How to Shut Off Your Water Supply
One of the most critical steps in managing a plumbing emergency is knowing how to shut off your water supply. This simple action can prevent extensive water damage. Typically, the main water shut-off valve is located near the water meter or where the water line enters your home. It’s essential to familiarize yourself with its location and ensure it is accessible.
Temporary Fixes for Emergencies
While waiting for professional help to arrive, temporary fixes can help mitigate the situation. For instance, using pipe clamps or epoxy putty can temporarily seal leaks. It’s also useful to keep a supply of towels and buckets handy to contain spills.
“A stitch in time saves nine.” Knowing how to apply temporary fixes during plumbing emergencies can save homeowners from more significant problems down the line.
Preparing for Plumbing Disasters
Preparation is key to handling plumbing emergencies. Homeowners should have an emergency plumbing kit that includes essentials like pipe tape, a pipe wrench, and a plunger. Regularly inspecting your plumbing system can also help identify potential issues before they become emergencies.
- Keep an emergency plumbing kit handy.
- Regularly inspect your plumbing system.
- Know the location of your main water shut-off valve.
By being prepared and knowing how to respond, homeowners can minimize damage and stress during emergency plumbing situations.
Conclusion: Empowering Homeowners with Plumbing Knowledge
Understanding plumbing systems is crucial for effective home maintenance. By familiarizing yourself with the components and functionalities of your plumbing system, you can troubleshoot common issues and prevent major problems.
Key Takeaways
The essential repairs covered in this guide, such as fixing leaky faucets and unclogging drains, can be managed with basic DIY plumbing skills. Regular maintenance practices, including inspecting pipes and checking water heater efficiency, can extend the lifespan of your plumbing components.
Continuing Your DIY Journey
To further enhance your DIY plumbing skills, explore additional resources, such as those provided by Suburban Plumbing Experts, which offers expert guidance on understanding home plumbing systems.
Further Learning
By continuing to develop your plumbing knowledge and DIY plumbing skills, you can ensure your home’s plumbing system operates efficiently and safely. Utilize plumbing resources to stay informed and address any issues promptly.