Imagine being able to fix a leaky faucet or unclog a drain without calling a professional plumber. Mastering DIY plumbing repairs can save homeowners time and money, empowering them to handle minor issues effectively. According to J Blanton Plumbing, understanding the fundamentals of plumbing repairs is crucial for maintaining a home’s overall integrity.
This guide provides a comprehensive step-by-step plumbing repair guide, walking homeowners through common issues like leaky faucets and clogged drains. By following this guide, individuals can gain the confidence to tackle these problems, ensuring their homes remain well-maintained and functional.
Key Takeaways
- Understand the fundamentals of DIY plumbing repairs.
- Learn to fix common issues like leaky faucets and clogged drains.
- Gain confidence in maintaining your home’s plumbing system.
- Discover the benefits of a step-by-step guide for plumbing repairs.
- Save time and money by handling minor plumbing issues effectively.
Understanding Common Plumbing Issues
Understanding the most frequent plumbing issues can help homeowners take proactive measures to prevent water damage and reduce their utility bills. Common plumbing issues at home can lead to significant problems if not addressed promptly.
Leaky Faucets
A leaky faucet is not just a minor annoyance; it’s a sign of a potentially larger issue. Leaky faucets can waste a significant amount of water, leading to higher water bills. The causes can range from worn-out O-rings to damaged valve seats. For more information on fixing leaky faucets, you can visit Plumbing United.
Running Toilets
A running toilet can be a significant source of water waste, with some toilets wasting up to 200 gallons per day. The issue is often due to a faulty flapper or an improperly adjusted fill valve. Diagnosing and fixing the problem early can save homeowners a substantial amount on their water bills.
Clogged Drains
Clogged drains are another common issue that can lead to more severe problems like backups and overflows. Hair, soap scum, and grease are common culprits. Using the right tools, such as a drain snake, can help clear clogs. For DIY plumbing projects, including unclogging drains, World Civil Society provides a list of top plumbing tools.
| Issue | Causes | Consequences |
|---|---|---|
| Leaky Faucets | Worn-out O-rings, damaged valve seats | Water waste, higher bills |
| Running Toilets | Faulty flapper, improperly adjusted fill valve | Significant water waste |
| Clogged Drains | Hair, soap scum, grease | Backups, overflows |
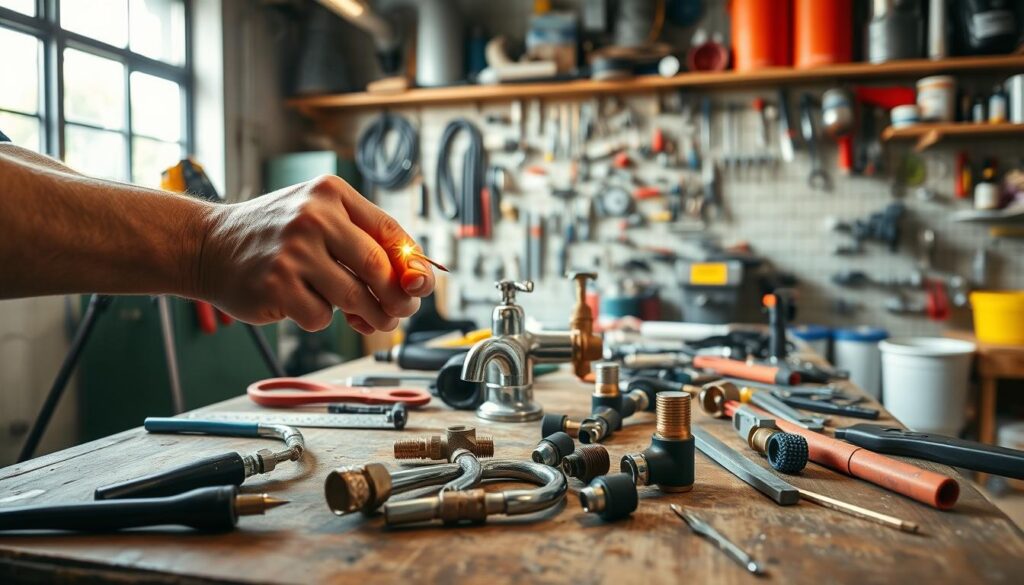
Essential Tools Every Homeowner Should Have

A well-stocked toolkit is indispensable for homeowners who wish to undertake DIY plumbing repairs. Having the right tools not only makes the job easier but also ensures that repairs are done correctly and safely.
Wrenches
Wrenches are a fundamental tool in any plumbing toolkit. They are used for tightening and loosening fittings and pipes. Adjustable wrenches are particularly useful as they can be adapted to fit various sizes of nuts and bolts. It’s essential to have at least one adjustable wrench and a set of basin wrenches for reaching into tight spaces.
Plungers
A plunger is a must-have for any homeowner dealing with clogged drains. There are different types of plungers, including cup plungers for sinks and flange plungers for toilets. Using the correct type of plunger can make a significant difference in effectively clearing clogs.
Pipe Cutters
Pipe cutters are essential for cutting through pipes during repairs or installations. They come in different types, including tube cutters for smaller pipes and pipe saws for larger or more stubborn pipes. Using the right pipe cutter ensures clean cuts and minimizes damage to surrounding areas.
Teflon Tape
Teflon tape, also known as plumber’s tape, is used to create watertight seals on threaded pipe connections. It’s a simple yet crucial tool for preventing leaks. To use Teflon tape effectively, wrap it around the male threads of the pipe in a clockwise direction before making a connection.
By equipping yourself with these essential tools, you’ll be better prepared to handle common plumbing issues that arise in your home. Remember, having the right tool for the job can save time, reduce frustration, and prevent further damage.
How to Fix a Leaky Faucet
A leaky faucet can be more than just a nuisance; it’s a waste of water that can be fixed with some basic plumbing knowledge. Fixing a leaky faucet involves several key steps, starting with identifying the type of faucet you have.
Identifying the Type of Faucet
Before you begin the repair, it’s crucial to determine the type of faucet you’re dealing with. Common types include cartridge, ball-and-socket, and compression faucets. Each type requires a different approach to repair.
Disassembly and Replacement of Parts
Once you’ve identified your faucet type, the next step is to disassemble it. This usually involves removing the handle to access the internal parts. For a cartridge faucet, you’ll need to remove the cartridge. For a ball-and-socket faucet, you’ll need to remove the ball and socket. For a compression faucet, you’ll need to replace the worn-out O-rings or washers.
For detailed instructions on how to fix a leaky faucet, you can visit Home Depot’s guide on the topic.
| Faucet Type | Parts to Replace | Tools Needed |
|---|---|---|
| Cartridge | Cartridge | Adjustable wrench, channel-type pliers |
| Ball-and-Socket | Ball, O-rings | Allen wrench, needle-nose pliers |
| Compression | O-rings, washers | Adjustable wrench, screwdriver |
Reassembly and Testing for Leaks
After replacing the necessary parts, reassemble the faucet in the reverse order that you disassembled it. Turn on the water supply and check for leaks. If you’ve done everything correctly, your faucet should no longer leak.
Tips for a Successful Repair:
- Turn off the water supply before starting the repair.
- Use the right tools for the job.
- Follow the manufacturer’s instructions for specific faucet models.
Dealing with Running Toilets

One of the most common plumbing issues homeowners face is a running toilet, which can be resolved by understanding its causes and applying the appropriate fixes. A running toilet not only wastes water but also increases your utility bills, making it a problem that needs prompt attention.
Diagnosing the Problem
The first step in fixing a running toilet is to identify the cause. Common issues include a faulty flapper valve, an improperly adjusted float, or problems with the fill valve. To diagnose the issue, start by removing the tank lid and inspecting the components inside.
Check if the flapper is sealing correctly and if the chain is too long or too short, as this can prevent the flapper from closing properly. Also, inspect the float to ensure it’s not stuck or set too high, causing water to continuously flow into the overflow tube.
Flapper Valve Replacement
If the diagnosis points to a faulty flapper valve, replacing it is a relatively straightforward process. First, turn off the water supply to the toilet by locating the shut-off valve behind the toilet and turning it clockwise.
Next, drain the tank and disconnect the chain from the flapper. Remove the old flapper and take it to a hardware store to find a matching replacement. Install the new flapper, ensuring it’s properly seated and connected to the chain.
Adjusting the Fill Valve
If the issue lies with the fill valve, adjustments may be necessary to ensure it’s working correctly. Check the water level in the tank and adjust the float arm or the valve itself according to the manufacturer’s instructions.
The goal is to have the water level about halfway between the bottom of the overflow tube and the top of the tank. Proper adjustment of the fill valve is crucial for preventing continuous running water and ensuring the toilet operates efficiently.
By following these steps, homeowners can effectively diagnose and fix running toilets, saving water and reducing their utility bills. Regular maintenance and inspections can also help prevent such issues from arising in the future.
Tips for Unclogging Drains
Unclogging drains can be achieved through various DIY techniques, making it a task that homeowners can handle with the right tools. Clogged drains are a common issue that can cause significant inconvenience, but understanding the methods to clear them can save time and money.
Using a Plunger
A plunger is one of the most effective and simplest tools for unclogging drains. To use a plunger, ensure the drain is filled with enough water to cover the plunger’s cup. Then, plunge vigorously to create suction that can dislodge the clog. For more stubborn clogs, consider using a plunger with an extension handle for extra force.
Employing a Drain Snake
A drain snake, also known as an auger, is a long, flexible rod that can be inserted into the drain to break up or retrieve clogs. To employ a drain snake, feed the cable into the drain and rotate it as you push it further into the pipe. This method is particularly effective for clogs that are further down the drain line. For a more detailed guide on using a drain snake, you can visit this resource for additional tips.
Chemical Drain Cleaners: Pros and Cons
Chemical drain cleaners can be a quick solution for unclogging drains, but they come with their own set of risks. On the positive side, they can dissolve clogs quickly and are easily available at most hardware stores. However, they can also damage pipes, especially if used excessively or in older plumbing systems. It’s essential to follow the instructions carefully and consider alternative methods before resorting to chemical cleaners. For complex or persistent clogs, it may be wise to consult a professional, such as those at 24/7 Construction Repair, for trusted solutions.
| Method | Effectiveness | Potential Risks |
|---|---|---|
| Plunger | High for surface clogs | Low risk of damage |
| Drain Snake | High for deeper clogs | Moderate risk of scratching pipes |
| Chemical Drain Cleaners | Variable, depends on clog type | High risk of pipe damage and chemical exposure |
In conclusion, unclogging drains can be achieved through various methods, each with its pros and cons. By understanding these techniques and their applications, homeowners can tackle clogs effectively and maintain their plumbing systems.
Basic Toilet Repairs for Homeowners

Simple toilet repairs can significantly improve the functionality and longevity of your toilet. By understanding how to perform these basic fixes, homeowners can avoid unnecessary plumbing costs and ensure their toilet operates efficiently.
Replacing a Toilet Seat
Replacing a toilet seat is a straightforward process that requires minimal tools. First, you’ll need to purchase a new toilet seat that matches your toilet’s specifications. To begin, turn off the water supply to the toilet and flush it to drain the tank and bowl. Then, unscrew the old seat from the toilet bowl and remove it. Clean the area around the mounting bolts before installing the new seat. Secure the new seat with the provided hardware, ensuring it’s tightened firmly but not overtightened, which can damage the toilet.
Fixing a Wobbly Toilet
A wobbly toilet can be annoying and may lead to more serious issues if not addressed. To fix it, start by checking the toilet flange and the floor around it for any signs of damage or unevenness. If the flange is damaged, it may need to be replaced. For a wobbly toilet on an uneven floor, consider using toilet shims to stabilize it. Tightening the toilet mounting bolts can also help secure the toilet and eliminate the wobble. For more complex issues, it might be worth consulting a professional, such as those offering emergency contractor services.
Resetting a Toilet
Resetting a toilet involves reattaching it to the floor after it has been removed or repositioned. Start by ensuring the toilet flange is clean and free of old wax. Apply a new wax ring around the flange, then carefully lower the toilet onto it, ensuring it’s centered. Press down firmly on the toilet to compress the wax ring and create a seal. Secure the toilet to the floor using the mounting bolts, tightening them evenly to avoid cracking the toilet. Finally, reconnect the water supply and test the toilet to ensure it’s functioning properly and not leaking.
By mastering these basic toilet repairs, homeowners can significantly enhance their DIY plumbing skills. For more complex plumbing issues or for those who prefer professional assistance, consider consulting resources like top plumbing fixes every homeowner should. This not only saves money but also provides a sense of accomplishment and independence in maintaining one’s home.
Maintaining Your Plumbing System
To prevent costly repairs and ensure the longevity of your plumbing system, regular maintenance is crucial. A well-maintained plumbing system not only saves you money in the long run but also ensures the comfort and safety of your home.
Regular Inspections
Regular inspections are the first line of defense against plumbing issues. By regularly checking your pipes, faucets, and toilets, you can identify potential problems before they become major issues. Look for signs of leaks, corrosion, and wear on your plumbing fixtures.
Inspecting your water heater is also a critical part of regular maintenance. Check the temperature setting and ensure it’s not too high, as this can lead to increased energy bills and potential safety hazards.
Preventative Measures for Common Issues
Preventative measures can significantly reduce the likelihood of common plumbing issues. For example, using drain screens can catch hair and other debris before they clog your drains. Regularly cleaning your drains with a natural cleaner or a drain snake can also help prevent clogs.
Another preventative measure is to be mindful of what you put down your drains. Avoid pouring grease, oil, or food scraps down the kitchen sink, as these can cause significant clogs and damage to your pipes.
Winterizing Your Plumbing
Winterizing your plumbing system is essential to prevent pipes from freezing and bursting during cold weather. Start by insulating exposed pipes in unheated areas like the garage, basement, or crawlspace.
Disconnect and drain hoses from outdoor faucets, and consider installing freeze-proof faucets or frost-proof spigots. Let cold water drip from faucets served by exposed pipes, and open cabinet doors under sinks to allow warm air to circulate.
By taking these steps, you can protect your plumbing system from the harsh effects of winter and ensure it continues to function properly throughout the year.
Dealing with Low Water Pressure

Homeowners often encounter low water pressure, which can be due to various factors, including clogged faucet aerators and leaks. Understanding the causes and implementing simple DIY fixes can significantly improve water flow in your home.
Identifying Causes of Low Pressure
Low water pressure can result from several issues. Some common causes include:
- Clogged faucet aerators
- Leaks in the plumbing system
- Mineral buildup in pipes
- Faulty or clogged water filters
Identifying the root cause is crucial to resolving the issue effectively.
Cleaning Faucet Aerators
Faucet aerators can become clogged with mineral deposits, reducing water flow. Cleaning or replacing them can often restore normal water pressure.
To clean a faucet aerator:
- Remove the aerator from the faucet.
- Soak it in vinegar to dissolve mineral deposits.
- Rinse thoroughly and reinstall.
Checking for Leaks
Leaks in the plumbing system can significantly reduce water pressure. Checking your pipes and fixtures for signs of leaks is an essential step.
For more detailed guidance on addressing low water pressure, you can visit Harris Water Main and Sewers for professional advice and services.
Basic Pipe Repair Techniques
Basic pipe repair techniques are vital for maintaining a home’s plumbing system and preventing water damage. Homeowners who master these techniques can address leaks and other issues promptly, reducing the need for costly professional services.
Patching Small Holes
Patching small holes in pipes is a straightforward repair that can be done using epoxy or pipe repair tape. Epoxy is a durable solution that bonds well with metal pipes, while pipe repair tape is a quick fix that can temporarily seal small leaks.
To patch a small hole, first, turn off the water supply to the affected pipe. Clean the area around the leak, removing any dirt or debris. Apply the epoxy or wrap the tape around the pipe, following the manufacturer’s instructions for application and drying times.
Using Pipe Clamps
Pipe clamps are another effective solution for repairing leaks, especially for larger holes or cracks in pipes. A pipe clamp works by sealing the leak between the clamp and the pipe, providing a secure and watertight fix.
To use a pipe clamp, identify the damaged section of the pipe and measure it to select the correct clamp size. Place the clamp over the leak, tightening the screws to secure it in place. Ensure the clamp is tightened evenly to prevent further damage to the pipe.
Replacing Sections of Pipe
In cases where the damage to the pipe is extensive, replacing the affected section may be necessary. This involves cutting out the damaged section and installing a new piece of pipe, using fittings to connect it to the existing plumbing system.
To replace a section of pipe, turn off the water supply and cut the pipe using a pipe cutter. Remove the damaged section and clean the ends of the remaining pipe. Use pipe fittings to connect the new section, applying Teflon tape to the threads to ensure a watertight seal.
| Repair Technique | Best For | Tools Needed |
|---|---|---|
| Patching Small Holes | Small leaks, minor damage | Epoxy, pipe repair tape |
| Using Pipe Clamps | Larger holes, cracks | Pipe clamp, screwdriver |
| Replacing Sections of Pipe | Extensive damage | Pipe cutter, pipe fittings, Teflon tape |
Understanding Plumbing Codes and Regulations

Plumbing codes and regulations are in place to safeguard public health and safety, making it vital for homeowners to be aware of them. These codes are designed to ensure that plumbing systems are installed and maintained in a way that prevents hazards and ensures efficiency.
Importance of Compliance
Compliance with local plumbing codes is not just a legal necessity; it’s also crucial for the safety and integrity of your home’s plumbing system. Non-compliance can lead to serious consequences, including fines and potential hazards such as water damage or health risks due to improper waste disposal.
Key reasons for compliance include:
- Ensuring the safety of the plumbing system
- Avoiding legal penalties and fines
- Maintaining the value and integrity of your property
Local Codes to Know
Local plumbing codes can vary significantly, so it’s essential to familiarize yourself with the specific regulations in your area. These codes cover a wide range of topics, from the materials used in plumbing to the procedures for installing new fixtures or repairing existing ones.
For instance, some areas may have specific requirements for water conservation, such as low-flow fixtures, while others may have regulations regarding the disposal of wastewater.
Seeking Professional Help
While DIY repairs can be cost-effective and empowering, there are times when seeking professional help is the best course of action. Complex plumbing projects or those that involve significant alterations to your plumbing system may require the expertise of a licensed plumber.
“Hiring a professional plumber ensures that the work is done to code, reducing the risk of future problems and potential legal issues.” – Plumbing Expert
By understanding and complying with plumbing codes and regulations, homeowners can ensure their plumbing projects are safe, legal, and successful.
Hiring a Professional Plumber: When to Call
Understanding when to hire a professional plumber is crucial for homeowners to avoid exacerbating plumbing issues. While many minor repairs can be handled with DIY techniques, certain situations demand the expertise of a licensed plumber.
Signs You Need Professional Help
There are several indicators that it’s time to call a professional plumber. These include complex plumbing issues that are beyond your skill level, gas line problems which can be dangerous if not handled correctly, and major leaks that can cause significant water damage.
Complex Issues: If you’re dealing with a plumbing problem that involves intricate piping, old or corroded fixtures, or you’re unsure of the source of the issue, it’s best to seek professional help.
Gas Line Problems: Any issues related to gas lines should be handled by a professional due to the potential risks involved.
Preparing for the Plumber’s Visit
To ensure that the plumber can efficiently address your plumbing issue, it’s essential to prepare your home. This includes clearing access to the affected area, turning off the main water supply if necessary, and having relevant information about your plumbing system ready.
- Clear the area around the plumbing issue to give the plumber easy access.
- Know the location of your main water shut-off valve and turn it off if you’re dealing with a leak or burst pipe.
- Gather any relevant documents or information about your plumbing system.
Questions to Ask Your Plumber
To ensure you’re hiring a reliable and competent plumber, there are several questions you should ask during the initial consultation or before hiring.
- Are you licensed and insured?
- Can you provide references or reviews from previous clients?
- What is your experience with issues like mine?
- Do you provide a warranty for your work?
- What is the estimated cost for the repair or service?
By knowing when to hire a professional plumber and how to prepare for their visit, homeowners can ensure their plumbing issues are resolved efficiently and effectively.
Water Heater Troubleshooting

Understanding how to troubleshoot your water heater is essential for maintaining its efficiency and longevity. Water heaters are crucial for daily comfort, providing hot water for bathing, cleaning, and other household needs.
Common Issues with Water Heaters
Several common issues can affect your water heater’s performance, including leaks, inadequate hot water, and strange noises. Leaks can occur due to loose connections or corrosion, while inadequate hot water might be caused by a malfunctioning thermostat or heating element.
Strange noises, such as rumbling or banging sounds, often indicate sediment buildup inside the tank. Regularly checking your water heater can help identify these issues early on.
Maintaining Your Water Heater
Regular maintenance is key to extending the life of your water heater. This includes checking the temperature and pressure relief valve, inspecting for leaks, and flushing the tank to remove sediment.
- Check the anode rod periodically to prevent corrosion.
- Insulate exposed hot water pipes to reduce heat loss.
- Consider installing a water heater timer to save energy.
When to Replace Your Water Heater
Knowing when to replace your water heater can save you from unexpected failures and costly repairs. Signs that it’s time for a replacement include age (typically after 8-12 years), frequent leaks, and a significant decrease in efficiency.
If your water heater is nearing the end of its expected lifespan or is showing signs of deterioration, consider consulting a professional to assess whether a replacement is necessary.
Eco-Friendly Plumbing Upgrades
Eco-friendly plumbing upgrades are a simple yet effective way to reduce your household’s water consumption. By installing water-saving fixtures and implementing innovative systems, homeowners can significantly lower their water usage and contribute to a more sustainable future.
Water-Saving Faucets and Showerheads
One of the easiest ways to start your eco-friendly plumbing journey is by installing water-saving faucets and showerheads. These fixtures are designed to use less water while maintaining the pressure you’re used to. For example, a low-flow showerhead can save up to 2.5 gallons of water per minute.
To give you a better understanding, here’s a comparison of standard and water-saving fixtures:
| Fixture Type | Water Usage | Potential Savings |
|---|---|---|
| Standard Faucet | 2.5 gallons/minute | – |
| Water-Saving Faucet | 1.5 gallons/minute | 1 gallon/minute |
| Standard Showerhead | 2.5 gallons/minute | – |
| Low-Flow Showerhead | 1.8 gallons/minute | 0.7 gallons/minute |
Low-Flow Toilets
Low-flow toilets are another effective eco-friendly plumbing upgrade. They use significantly less water per flush compared to traditional toilets. For more information on how to make your home more sustainable, you can visit Adaven Plumbing’s blog on eco-friendly plumbing.
For instance, a dual-flush toilet can use as little as 0.8 gallons per flush for liquid waste, compared to the 1.6 gallons used by older models.
Rainwater Harvesting Systems
For a more significant impact, consider installing a rainwater harvesting system. These systems collect and store rainwater for non-potable uses such as watering plants, washing cars, or even flushing toilets. This not only reduces your water bill but also decreases the demand on municipal water supplies.
By implementing these eco-friendly plumbing upgrades, homeowners can make a significant difference in their water consumption and contribute to a more sustainable environment. Whether it’s through simple changes like installing low-flow fixtures or more substantial investments like rainwater harvesting systems, every step counts towards a greener future.
Final Thoughts and Conclusion
By mastering basic plumbing repairs, homeowners can save money, reduce waste, and gain a sense of accomplishment. This guide has provided a comprehensive overview of common plumbing issues, essential tools, and step-by-step repair techniques.
Key takeaways include identifying and fixing leaky faucets, running toilets, and clogged drains, as well as understanding when to call a professional plumber. By applying these DIY plumbing repairs, homeowners can maintain their plumbing systems more effectively.
Practical Resources for Homeowners
For those looking to expand their knowledge, online resources such as the EPA’s WaterSense and National Association of Home Inspectors websites offer valuable information on water conservation and plumbing best practices.
Continuing Your DIY Journey
As you continue to develop your DIY plumbing skills, consider exploring eco-friendly plumbing upgrades, such as low-flow toilets and rainwater harvesting systems, to further reduce your environmental footprint.