As a homeowner, you’ve likely experienced the sudden burst of a leaky faucet or the clog of a drain. These unexpected issues can be frustrating and costly if not addressed promptly. Having essential plumbing knowledge can save you time and money by enabling you to fix small issues before they become major problems.
Learning simple plumbing repairs is a wise investment for any homeowner. By knowing how to fix a leaky faucet or unclog a drain, you can be more self-sufficient and avoid costly plumbing bills. In this article, we’ll cover the various plumbing issues that every homeowner should know how to fix.
Key Takeaways
- Understand the importance of having basic plumbing knowledge
- Learn how to fix common plumbing issues like leaky faucets and clogged drains
- Discover how having plumbing skills can save you time and money
- Be more self-sufficient in handling plumbing emergencies
- Avoid costly plumbing bills by learning simple repairs
Understanding Your Plumbing System
To tackle plumbing problems efficiently, it’s essential to have a basic understanding of your home’s plumbing system. This knowledge will enable you to identify potential issues early and perform easy plumbing maintenance tips.
Components of a Plumbing System
A typical household plumbing system consists of several key components. These include the water supply lines, drainage pipes, fixtures (such as faucets and toilets), and appliances (like water heaters and dishwashers).
The water supply lines bring fresh water into your home, while the drainage pipes carry wastewater away. Fixtures and appliances are connected to these systems, and understanding how they work together is crucial for effective household plumbing troubleshooting.
Common Plumbing Terminology
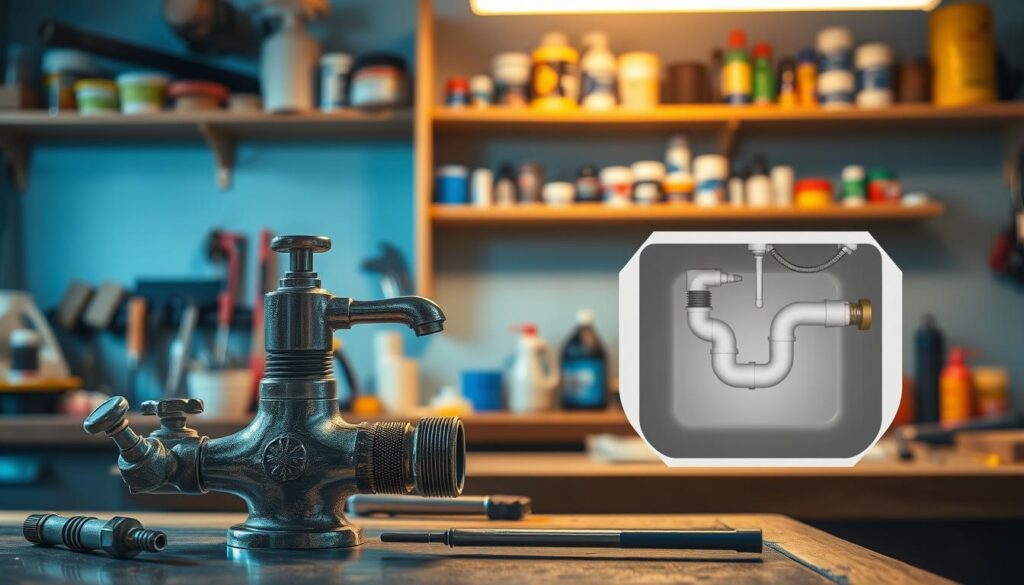
Familiarizing yourself with common plumbing terminology can help you better understand your system’s needs and identify common plumbing issues at home. Terms like “shut-off valve,” “P-trap,” and “water hammer” are frequently used in the plumbing industry.
| Term | Description |
|---|---|
| Shut-off Valve | A valve that controls the water supply to a specific area or fixture. |
| P-trap | A curved pipe under sinks that traps a small amount of water, preventing sewer gases from entering the home. |
| Water Hammer | A banging noise in pipes caused by sudden changes in water flow. |
Understanding these terms and the components of your plumbing system can significantly simplify troubleshooting and maintenance. By knowing what to look for, you can apply easy plumbing maintenance tips to prevent issues before they become major problems.
Tools Required for Basic Repairs

Before diving into DIY plumbing fixes, it’s essential to have the necessary tools. Basic plumbing repairs can be daunting without the right equipment, but with a well-stocked toolbox, homeowners can tackle common issues effectively.
Essential Plumbing Tools
Having the right tools is crucial for simple plumbing solutions for DIYers. Some of the essential tools include:
- Adjustable wrench: Useful for gripping and twisting objects like pipes and faucets.
- Pipe wrench: Designed for gripping and twisting pipes, this tool is a must-have for any plumbing task.
- Teflon tape: Used to create a watertight seal on threaded pipe connections.
- Plunger: Essential for unclogging drains and toilets.
- Drain snake: Useful for clearing clogs further down the drain line.
| Tool | Use |
|---|---|
| Adjustable wrench | Gripping and twisting objects |
| Pipe wrench | Gripping and twisting pipes |
| Teflon tape | Creating watertight seals |
Safety Gear for Plumbing Work
Safety should always be a top priority when performing quick plumbing repairs for beginners. Some essential safety gear includes:
- Safety goggles: Protects your eyes from chemical splashes or debris.
- Work gloves: Provides grip and protection for your hands while working with tools and pipes.
- First aid kit: Essential for treating minor injuries that may occur during plumbing work.
By having the right tools and safety gear, homeowners can confidently tackle basic plumbing repairs, ensuring a safe and successful DIY experience.
Fixing a Leaky Faucet
One of the most basic yet essential plumbing repairs every homeowner should know is how to fix a leaky faucet. A leaky faucet can waste a significant amount of water, leading to increased utility bills and potential damage to your home.
Identifying the Source of the Leak
The first step in fixing a leaky faucet is to identify the source of the leak. Common areas where leaks occur include the faucet’s handle, spout, or drain. To diagnose the issue, turn off the water supply to the faucet and disassemble it to inspect the internal components.
Common causes of leaks include worn-out O-rings, damaged valve seats, or loose connections. Inspecting these parts carefully will help you determine the necessary repairs.
Step-by-Step Repair Process
Once you’ve identified the source of the leak, you can begin the repair process. For a detailed guide, you can refer to resources like Home Depot’s guide on fixing a leaky. Generally, the steps involve replacing the damaged parts, such as O-rings or gaskets, and reassembling the faucet.
- Turn off the water supply to the faucet.
- Disassemble the faucet to inspect internal components.
- Replace damaged or worn-out parts.
- Reassemble the faucet and turn on the water supply to test for leaks.
When to Call a Professional
While many leaky faucet repairs can be done DIY, there are situations where it’s best to call a professional plumber. If you’re unsure about the source of the leak, or if the repair requires complex tools or techniques, it’s wise to seek professional help. Additionally, if you notice persistent leaks after attempting a repair, it may indicate a more significant issue that requires expert attention.
Knowing when to call a professional can save you time and prevent further damage to your plumbing system.
Unclogging a Drain

Understanding how to unclog a drain effectively is crucial for maintaining a functional plumbing system. Clogged drains can lead to backups, odors, and even damage to your pipes.
Tools for Unclogging
To tackle a clogged drain, you’ll need the right tools. Commonly used tools include a plunger, drain snake (also known as an auger), and chemical drain cleaners. Each tool has its specific use depending on the nature and location of the clog.
- A plunger is effective for sink and toilet clogs, creating suction to dislodge blockages.
- A drain snake is useful for more stubborn clogs, allowing you to break up or retrieve the clogging material.
- Chemical drain cleaners dissolve blockages but should be used with caution due to their corrosive nature.
Methods to Unclog Drains
There are several methods to unclog drains, ranging from simple to more complex techniques. The first step is usually to try plunging the drain. If this doesn’t work, using a drain snake or chemical cleaners may be necessary.
For a more environmentally friendly approach, baking soda and vinegar can be used to clear minor clogs. Pouring baking soda down the drain followed by vinegar can help break down the clog, and then hot water can be used to rinse the drain.
| Method | Description | Effectiveness |
|---|---|---|
| Plunger | Creates suction to dislodge clogs | High |
| Drain Snake | Breaks up or retrieves clogs | High |
| Chemical Cleaners | Dissolves blockages | Moderate |
| Baking Soda & Vinegar | Natural method to break down clogs | Low to Moderate |
Preventative Measures
Preventing clogs is often easier than dealing with them. Regular maintenance, such as checking your drains for hair and other debris, can help. Using drain screens or filters can also catch potential clogging materials before they go down the drain.
“Regular drain maintenance is key to avoiding clogs. Simple practices like using baking soda and vinegar monthly can keep your drains flowing smoothly.”
Being mindful of what you put down your drains is also crucial. Avoid disposing of grease, oil, and large food particles down the kitchen sink, and be cautious about what you flush down the toilet.
Repairing a Running Toilet
Diagnosing and repairing a running toilet is a relatively simple process that can save homeowners from unnecessary water waste. A running toilet can be a significant issue, wasting a considerable amount of water and increasing your utility bills.
Diagnosing the Issue
The first step in fixing a running toilet is to identify the cause. Common issues include problems with the flapper, fill valve, or overflow tube. To diagnose the issue, start by checking the flapper to see if it’s sealing properly. If it’s not, water will continue to flow into the toilet bowl.
Parts of a Toilet to Check
Several parts of a toilet can cause it to run continuously. These include:
- The flapper: Ensuring it seals properly
- The fill valve: Checking if it’s functioning correctly
- The overflow tube: Making sure it’s not too low
Inspecting these parts can help you identify the root cause of the problem.
Simple Fixes for Common Problems
Once you’ve identified the issue, you can proceed to fix it. For instance, if the flapper is not sealing correctly, you might need to replace it. Adjusting or replacing the fill valve can also resolve the issue. For more detailed guidance, you can refer to resources like this guide on fixing a running.
| Issue | Possible Cause | Simple Fix |
|---|---|---|
| Toilet keeps running | Faulty flapper | Replace the flapper |
| Water level too high | Incorrectly adjusted fill valve | Adjust the fill valve |
| Continuous water flow | Clogged or dirty overflow tube | Clean or adjust the overflow tube |
By following these steps and checking the relevant parts, you can fix a running toilet and save water. For more complex issues or if you’re unsure, consider consulting plumbing experts for professional assistance.
Dealing with Low Water Pressure

Low water pressure is not just an inconvenience; it can also be a sign of underlying plumbing issues that need attention. Homeowners often encounter this problem, and understanding its causes and solutions is crucial for effective household plumbing troubleshooting.
Common Causes of Low Pressure
Several factors can contribute to low water pressure in a household. These include:
- Mineral buildup or sediment in pipes and fixtures
- Leaks or cracks in the plumbing system
- Clogged or faulty water filters
- Poorly designed or installed plumbing systems
- Issues with the municipal water supply
As “a well-maintained plumbing system is key to avoiding low water pressure”, regular checks can help identify potential issues before they become major problems.
Troubleshooting Steps
To diagnose low water pressure, homeowners can follow these DIY plumbing fixes:
- Check for leaks or visible signs of damage in the plumbing system
- Inspect and clean or replace clogged aerators or filters
- Test water pressure at different fixtures to isolate the issue
- Consider using a water pressure test kit for more accurate measurements
“Understanding the root cause is essential for applying the correct fix.”
Fixing Low Water Pressure Issues
Once the cause is identified, several solutions can be applied. For mineral buildup, using a water softener or descaling solution can be effective. For leaks or cracks, repairing or replacing the damaged sections is necessary. In cases of clogged filters, cleaning or replacing them can restore pressure.
“The key to resolving low water pressure lies in identifying and addressing the underlying cause effectively.” – Plumbing Expert
By applying these essential plumbing knowledge for homeowners tips, individuals can effectively troubleshoot and fix low water pressure issues, ensuring a more comfortable and functional home.
Adjusting the Water Heater
Understanding how to maintain your water heater is a vital DIY skill that can help ensure a steady supply of hot water while reducing energy consumption.
Temperature Settings
The temperature setting on your water heater is crucial for both comfort and safety. Setting the temperature too high can lead to scalding, while setting it too low may not provide sufficiently hot water. Most manufacturers recommend setting the temperature to 120°F (49°C) to balance between the two.
Benefits of Optimal Temperature Setting:
- Energy Efficiency: Reduces energy consumption.
- Safety: Minimizes the risk of scalding.
- Longevity: Helps extend the lifespan of the water heater.
Signs Your Water Heater Needs Attention
Recognizing the signs that your water heater needs maintenance can prevent unexpected failures and costly repairs. Common indicators include:
- Leaks or rusty water coming from the heater.
- Inconsistent water temperature.
- Unusual noises emanating from the unit.
If you notice any of these signs, it’s essential to take action promptly to avoid further complications.
Flushing the Water Heater
Flushing your water heater is a simple yet effective maintenance task. Sediment buildup can reduce the efficiency and lifespan of your water heater. Flushing helps remove these sediments, ensuring the heater operates optimally.
| Maintenance Task | Frequency | Benefits |
|---|---|---|
| Check Temperature | Every 6 months | Ensures optimal temperature, enhancing safety and efficiency. |
| Flush the Tank | Annually | Removes sediment, improving efficiency and longevity. |
| Inspect for Leaks | Every 3 months | Early detection of leaks, preventing water damage. |
By following these simple plumbing solutions for DIYers, homeowners can ensure their water heaters operate efficiently, providing a reliable supply of hot water while minimizing energy costs.
Dealing with Pipe Leaks

Pipe leaks are a common issue that can lead to significant water damage if not addressed promptly. Recognizing the signs of a pipe leak early is crucial for minimizing damage and ensuring a quick resolution.
Recognizing Pipe Leak Signs
Identifying a pipe leak can be challenging, but there are several signs to look out for. These include:
- Unexplained increases in your water bill
- Water damage or warping of walls and floors
- The sound of running water when no faucets are on
- Mold or mildew growth in unusual places
For more information on emergency plumbing services, consider visiting a reliable resource.
Temporary Fixes for Pipe Leaks
While waiting for a professional to arrive or before you can undertake a permanent repair, there are some temporary fixes you can apply. These include:
- Tightening loose connections
- Using pipe clamps or epoxy putty to seal leaks
- Turning off the main water supply to prevent further damage
Permanent Repair Solutions
For a lasting solution, you may need to replace the damaged section of the pipe. This involves:
- Cutting out the damaged section
- Replacing it with a new piece of pipe
- Using appropriate fittings to secure the new section
| Repair Method | Temporary or Permanent | Skill Level Required |
|---|---|---|
| Tightening loose connections | Temporary | Beginner |
| Using pipe clamps or epoxy putty | Temporary | Beginner |
| Replacing a section of pipe | Permanent | Advanced |
Understanding the appropriate repair method and having the necessary skills can make a significant difference in dealing with pipe leaks effectively.
Replacing a Showerhead
Improving your shower’s performance with a new showerhead is a quick and easy DIY plumbing fix that can enhance your overall shower experience. A showerhead that is clogged or outdated can lead to poor water pressure and inefficient water use.
Tools Needed for Replacement
Before you start, gather the necessary tools to make the replacement process smooth. You’ll need an adjustable wrench or basin wrench to loosen the old showerhead, and possibly some Teflon tape for creating a watertight seal on the new showerhead.
- Adjustable wrench or basin wrench
- Teflon tape
- New showerhead
Choosing the Right Showerhead
Selecting the right showerhead can be overwhelming due to the numerous options available. Consider factors such as water pressure, spray patterns, and eco-friendliness. For instance, a showerhead with multiple spray settings can offer a more personalized experience.
As noted by plumbing experts, “The right showerhead can not only improve your shower experience but also contribute to water conservation efforts.”
Choosing a showerhead that balances performance and water efficiency is key.
Installation Tips
Once you’ve selected your new showerhead, installation is relatively straightforward. Start by turning off the water supply to avoid any leaks or water damage. Use the adjustable wrench to remove the old showerhead, and then apply Teflon tape to the threads of the shower arm before screwing on the new showerhead.
- Turn off the water supply.
- Remove the old showerhead using an adjustable wrench.
- Apply Teflon tape to the shower arm threads.
- Screw on the new showerhead.
By following these simple steps, you can successfully replace your showerhead and enjoy an improved shower experience with potentially better water pressure and efficiency.
Maintaining Sump Pumps

A well-maintained sump pump is your home’s first line of defense against water damage. Sump pumps are critical for removing water that accumulates around the foundation of a house, thereby preventing basement flooding and potential structural damage.
Importance of Sump Pump Maintenance
Regular maintenance of your sump pump ensures it is functioning correctly when you need it most. According to experts, neglecting sump pump maintenance can lead to pump failure, resulting in costly water damage repairs. For more detailed information on sump pump care, you can visit Chicago Plumbing Experts for comprehensive guidelines.
As Bob Vila once said, “A sump pump is only as good as its maintenance.” Regular checks can help identify potential issues before they become major problems.
Testing Your Sump Pump
Testing your sump pump is a straightforward process that can be done by pouring water into the sump pit to activate the pump. This test helps ensure the pump is working correctly and can handle the water volume. It’s also an opportunity to check for any unusual noises or vibrations that might indicate a problem.
- Pour water into the sump pit.
- Observe the pump’s operation.
- Check for any signs of malfunction.
Troubleshooting Common Issues
Common issues with sump pumps include clogged intake screens, faulty float switches, and power supply problems. Troubleshooting these issues involves checking the power source, inspecting the float switch for debris, and cleaning the intake screen. For persistent problems, it may be necessary to consult a professional plumber.
“Regular maintenance is key to extending the life of your sump pump and ensuring your home remains protected from water damage.”
By following these easy plumbing maintenance tips and troubleshooting steps, homeowners can ensure their sump pumps are in good working condition, providing peace of mind and protection against potential water damage.
Importance of Regular Plumbing Inspections
Understanding the importance of regular plumbing inspections can save homeowners from costly repairs down the line. Regular inspections help identify potential issues before they become major problems.
What to Look for During Inspections
During a plumbing inspection, homeowners should look for signs of leaks, water damage, and wear on plumbing fixtures and pipes. It’s also essential to check the water pressure and inspect the condition of the water heater.
Some key areas to inspect include:
- Visible pipes for signs of rust or corrosion
- Faucets and toilets for leaks
- Drainage for slow draining or backups
- Water heater for signs of leakage or rust
Benefits of Routine Maintenance
Routine maintenance offers several benefits, including preventing costly repairs, reducing water waste, and extending the lifespan of plumbing fixtures and appliances. For instance, a well-maintained plumbing system can significantly reduce the risk of sudden failures that lead to expensive emergency repairs.
| Benefits | Description |
|---|---|
| Cost Savings | Prevents costly emergency repairs by identifying issues early. |
| Water Conservation | Reduces water waste by fixing leaks and improving efficiency. |
| Extended Lifespan | Prolongs the life of plumbing fixtures and appliances. |
When to Schedule an Inspection
It’s recommended to schedule a plumbing inspection at least once a year. However, homes with older plumbing systems or those that have experienced previous plumbing issues may benefit from more frequent inspections. For professional plumbing services, consider reaching out to experts available at 24/7 Construction Repair.
How to Read a Water Bill

Your water bill holds secrets to your plumbing system’s health. Understanding it can help you identify potential issues before they become major problems.
Understanding Your Water Usage
The first step in reading your water bill is to understand your water usage. Your bill typically includes the total amount of water used during a billing cycle, usually measured in gallons or cubic feet.
To put this into perspective, the average American household uses around 80-100 gallons of water per person per day for drinking, cooking, and hygiene. Monitoring your usage can help you detect leaks or other issues.
Identifying Unusual Charges
Unusual charges on your water bill can indicate a hidden plumbing issue. Look for sudden spikes in usage or charges that don’t align with your typical consumption patterns.
Some common causes of unusual charges include:
- Leaks in your plumbing system
- Running toilets or faucets
- Outdoor irrigation issues
Action Steps for High Bills
If you notice a significant increase in your water bill, take immediate action. Here are some steps to follow:
| Step | Description |
|---|---|
| 1 | Check your meter for leaks by turning off all water-using appliances and checking if the meter still moves. |
| 2 | Inspect your home for visible leaks, including under sinks and around toilets. |
| 3 | Consider hiring a professional plumber to detect and fix hidden leaks. |
By following these steps and understanding your water bill, you can quickly identify and address plumbing issues, saving you money and preventing further damage.
Common Plumbing Myths Debunked
There’s a plethora of misinformation surrounding plumbing, and it’s time to set the record straight. Homeowners often encounter various myths and misconceptions when dealing with plumbing repairs and maintenance. Understanding the truth behind these myths can save time, money, and unnecessary stress.
Misconceptions About Drain Cleaners
Drain cleaners are a common solution for clogged drains, but many myths surround their use. One misconception is that drain cleaners are a safe and effective solution for all types of clogs. However, these chemicals can damage pipes and cause more harm than good. For instance, using drain cleaners frequently can corrode metal pipes and damage ceramic or PVC pipes.
As noted by a plumbing expert, “Chemical drain cleaners can be harsh on your pipes and should be used as a last resort.”
“The overuse of chemical drain cleaners can lead to pipe deterioration and potentially costly repairs.”
| Drain Cleaner Type | Effectiveness | Potential Risks |
|---|---|---|
| Chemical Drain Cleaners | Effective for minor clogs | Pipe corrosion, damage to PVC or ceramic pipes |
| Enzyme-Based Cleaners | Safe for most pipes, environmentally friendly | May not work as quickly as chemical cleaners |
The Truth About DIY Repairs
Many homeowners believe that DIY plumbing repairs are a cost-effective and efficient solution. While some minor repairs can be handled DIY, complex issues often require professional expertise. For example, attempting to fix a leaky faucet without proper knowledge can lead to further damage and increased water bills.
For more information on plumbing myths and the truth behind DIY repairs, visit https://www.mtnvalleyplumbing.com/blog/plumbing-myths-debunked/. This resource provides valuable insights into common plumbing misconceptions and offers guidance on when to DIY and when to call a professional.
DIY repairs can be beneficial for simple tasks, such as replacing a showerhead or fixing a running toilet. However, more complex issues like pipe leaks or sewer line problems require the expertise of a licensed plumber.
Myths Around Fixing Leaks
Leaks are a common plumbing issue, and many myths surround their repair. One common misconception is that all leaks require immediate attention and a professional plumber. While some leaks, like those in the main water line, are emergencies, others can be temporarily managed or fixed DIY.
For instance, a small leak under the sink can often be fixed by tightening loose connections or replacing worn-out washers. However, it’s crucial to identify the source of the leak and assess the severity before attempting a repair.
By understanding the truth behind common plumbing myths, homeowners can make informed decisions and avoid costly mistakes. Whether it’s choosing the right drain cleaner or deciding when to call a professional, being informed is key to effective household plumbing troubleshooting and DIY plumbing fixes.
Knowing When to Call a Professional
While many plumbing issues can be resolved with DIY solutions, some problems require the expertise of a licensed plumber. Understanding when to seek professional help is crucial for preventing further damage and ensuring that repairs are done correctly.
Signs of a Serious Plumbing Issue
Homeowners should be aware of signs that indicate a serious plumbing issue, such as persistent leaks, significant water pressure drops, or sewage backups. These issues often require specialized tools and knowledge to resolve effectively.
Benefits of Hiring a Licensed Plumber
Hiring a licensed plumber provides homeowners with the assurance that the work is done to code and with the necessary safety precautions. Licensed plumbers have the training and experience to handle complex plumbing systems, offering quick plumbing repairs for beginners and essential plumbing knowledge for homeowners.
Cost Considerations
Although hiring a professional may seem costly upfront, it can save homeowners money in the long run by preventing further damage and reducing the need for future repairs. Simple plumbing solutions for DIYers can be cost-effective, but knowing when to call a professional is key to avoiding costly mistakes.