As a homeowner, dealing with a leaky faucet or a clogged drain can be frustrating and costly. However, with some DIY plumbing tips, you can save time and money by fixing small issues before they become major problems.
Having a basic understanding of plumbing repairs can be incredibly empowering. It allows you to identify potential issues early, preventing them from escalating into costly disasters.
Key Takeaways
- Learn to identify common plumbing issues early.
- Save money by fixing small problems yourself.
- Understand the importance of regular plumbing maintenance.
- Discover simple DIY fixes for common plumbing issues.
- Know when to call a professional plumber.
Common Plumbing Problems and Solutions
Many homeowners face common plumbing problems that can be resolved with the right knowledge and tools. Understanding these issues is the first step towards maintaining a well-functioning plumbing system.
Common plumbing problems include leaky faucets, running toilets, and slow drains. These issues not only waste water but can also lead to more significant problems if not addressed promptly.
Leaky Faucets
A leaky faucet is not just annoying; it can also significantly increase your water bill. The most common cause is a worn-out washer or O-ring. Replacing these parts is a simple fix that can save water and money.
Running Toilets
A running toilet can waste a substantial amount of water. The issue is often due to a faulty flapper or an improperly adjusted float. Adjusting or replacing these components can resolve the problem.
Slow Drains
Slow drains are typically caused by a buildup of hair, soap, or grease. Using a drain snake or a natural drain cleaner can help clear the blockage and restore normal flow.
Here is a summary of common plumbing problems and their solutions:
| Problem | Cause | Solution |
|---|---|---|
| Leaky Faucet | Worn-out washer or O-ring | Replace washer or O-ring |
| Running Toilet | Faulty flapper or float issue | Adjust or replace flapper or float |
| Slow Drain | Buildup of hair, soap, or grease | Use drain snake or natural cleaner |
By understanding and addressing these common plumbing issues, homeowners can prevent more significant problems from arising and maintain a more efficient plumbing system.
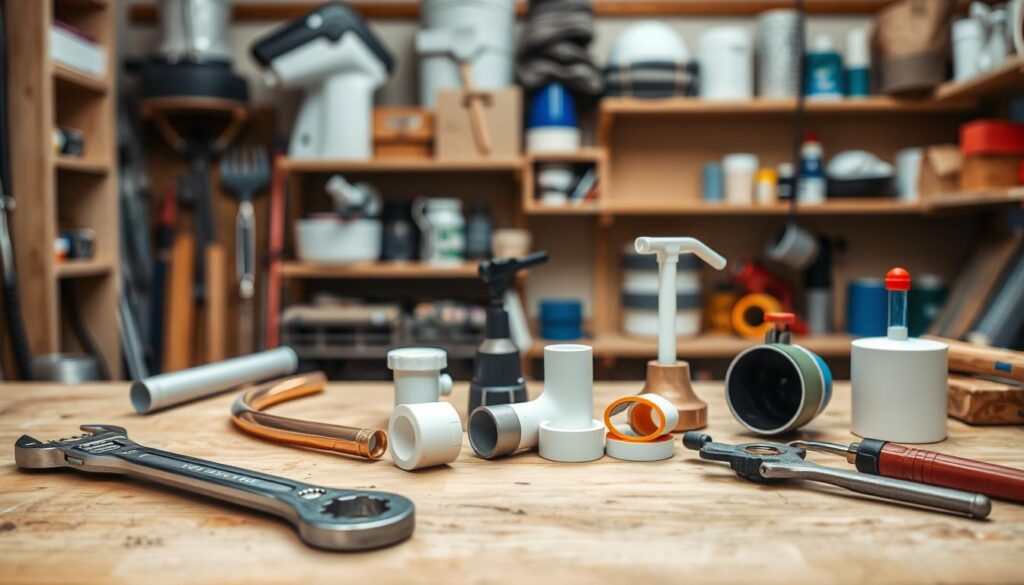
Essential Tools for Plumbing Repairs

Before diving into plumbing repairs, it’s crucial to have the essential tools at your disposal. Having the right equipment not only makes the job easier but also ensures that repairs are done correctly and safely.
Pipe Wrench
A pipe wrench is a fundamental tool for any plumbing task. It provides the grip and leverage needed to loosen or tighten pipes and fittings. For beginners, investing in an adjustable pipe wrench is advisable as it can accommodate various pipe sizes.
Plumber’s Tape
Plumber’s tape, also known as Teflon tape, is used to create a watertight seal on threaded pipe connections. It’s a simple yet crucial tool for preventing leaks. To use it effectively, wrap the tape clockwise around the threads before assembling the pipes.
Auger
An auger is a handy tool for clearing clogs in drains. It works by inserting a flexible rod into the drain and maneuvering it to break up or retrieve the blockage. For household plumbing repairs, a manual auger or a drill-powered auger can be very effective.
For more information on plumbing tools and pipes for DIY projects, you can visit top plumbing tools and pipes for DIY. This resource provides a comprehensive guide to the tools and materials needed for various plumbing tasks.
| Tool | Use | Tips for Beginners |
|---|---|---|
| Pipe Wrench | Loosening/Tightening Pipes and Fittings | Invest in an adjustable pipe wrench for versatility. |
| Plumber’s Tape | Creating Watertight Seals | Wrap tape clockwise around threads for effective sealing. |
| Auger | Clearing Clogs in Drains | Use a manual or drill-powered auger for household clogs. |
How to Fix a Leaky Faucet
Don’t let a leaky faucet waste water and drive up your utility bills; learn how to fix it yourself with these easy plumbing fixes and DIY plumbing tips.
Identify the Type of Faucet
The first step in fixing a leaky faucet is to identify its type. Faucets come in various styles, including cartridge, ball-and-socket, and compression faucets. Knowing the type of faucet you have is crucial because it determines the tools and replacement parts you’ll need.
Replace Washers and O-Rings
Once you’ve identified your faucet type, the next step is to replace the worn-out parts. For many faucets, this involves replacing the washers and O-rings. These parts are prone to wear and tear, and replacing them is a simple yet effective DIY plumbing tip.
| Faucet Type | Parts to Replace | Tools Needed |
|---|---|---|
| Compression | Rubber washers, O-rings | Adjustable wrench, screwdriver |
| Cartridge | Cartridge, O-rings | Cartridge puller, adjustable wrench |
| Ball-and-Socket | O-rings, seals, springs | Allen wrench, screwdriver |
Reassemble and Test
After replacing the necessary parts, reassemble the faucet in the reverse order that you disassembled it. Turn on the water supply and check for leaks. This step is crucial to ensure that your DIY plumbing fix was successful.
By following these steps, you can easily fix a leaky faucet, saving water and reducing your utility bills. Remember, regular plumbing maintenance can prevent many common issues, including leaky faucets.
Unclogging Drains: Quick Fixes

Clearing a clogged drain can be achieved through various methods, ranging from simple tools to homemade cleaners. Clogged drains are not only frustrating but can also lead to more significant plumbing issues if not addressed promptly.
Using a Plunger
A plunger is one of the most straightforward tools for unclogging drains. To use it effectively, ensure the plunger is properly seated over the drain and push down slowly and steadily until you feel resistance. This method is particularly effective for sink and toilet clogs.
Trying a Drain Snake
For more stubborn clogs, a drain snake (auger) can be used to remove blockages further down the drain line. Feed the snake into the drain and rotate it as you push it further into the pipe. This can help break up or retrieve the clogging material.
Homemade Drain Cleaners
For a more natural approach, homemade drain cleaners can be effective. A mixture of baking soda and vinegar can help dissolve grease and other substances causing the clog. Pour the mixture down the drain and let it sit before rinsing with hot water. For more information on clearing drain clogs, you can visit Mr. Rooter’s guide on easy ways to clear a drain clog.
By employing these quick plumbing solutions, homeowners can often resolve clogged drain issues without the need for professional assistance. Regular maintenance, including the use of simple plumbing tutorials, can also help prevent future clogs.
Toilet Troubles: DIY Fixes
A malfunctioning toilet can be frustrating, yet tackling the issue yourself is easier than you think with the right guidance. Toilet troubles are a common household issue that can lead to wasted water and increased utility bills if not addressed promptly.
Diagnosing a Running Toilet
A running toilet is one of the most common issues homeowners face. It’s often caused by a faulty flapper or an improperly adjusted float. To diagnose the problem, start by checking the flapper for any signs of wear or misalignment. If the flapper seems fine, inspect the float to ensure it’s not stuck or set too high.
Key components to check:
- The flapper and its seal
- The float arm and its adjustment
- The water level in the tank
Replacing the Flapper
Replacing the flapper is a straightforward DIY task. First, turn off the water supply to the toilet by locating the shut-off valve behind the toilet and turning it clockwise. Then, drain the tank and remove the old flapper. When installing the new flapper, ensure it’s properly seated and aligned.
As noted by plumbing experts, “A correctly installed flapper can save gallons of water per day.”
Adjusting the Float
The float is another critical component that can cause issues if not adjusted correctly. To adjust the float, you’ll typically need to tweak the float arm. For most modern toilets, this involves either bending the arm slightly or adjusting a screw that sets the float’s height. The goal is to ensure the water level is just below the overflow tube.
By following these DIY plumbing tips, you can resolve common toilet troubles and maintain your household plumbing repairs knowledge. Regular checks and adjustments can prevent more significant issues down the line, saving you time and money.
Water Heater Basics and Maintenance

Regular maintenance of your water heater can help prevent unexpected repairs and reduce energy bills. A well-functioning water heater is essential for daily comfort, and neglecting its maintenance can lead to common plumbing problems.
Signs Your Water Heater Needs Repairs
Identifying signs that your water heater needs repairs is crucial for home plumbing maintenance. Look out for rusty water, strange noises, or leaks around the heater. If you notice any of these signs, it may be time to inspect your water heater more closely or call a professional for assistance. For trusted repairs, consider consulting plumbing experts.
Flushing Your Water Heater
Flushing your water heater is a simple yet effective maintenance task. It involves draining the tank to remove sediment buildup, which can improve efficiency and prolong the heater’s lifespan. To flush your water heater, turn off the power supply, attach a hose to the drain valve, and carefully drain the tank.
Adjusting Temperature Settings
Adjusting the temperature settings on your water heater can also impact its performance and energy consumption. The ideal temperature is typically between 120°F and 140°F. Setting the temperature too high can increase energy bills and risk scalding, while setting it too low may not provide sufficiently hot water.
By following these basic maintenance steps, you can ensure your water heater operates efficiently and effectively, providing a reliable supply of hot water for your household needs.
Dealing with Low Water Pressure
Understanding the causes of low water pressure is crucial for finding an effective solution to this common plumbing issue. Low water pressure can manifest in various ways, from a weak trickle from faucets to a complete loss of water flow. It’s a problem that can be caused by a variety of factors, including clogs, leaks, or issues with the pressure regulator.
Checking for Clogs
One of the first steps in addressing low water pressure is to check for clogs in your plumbing system. Clogs can occur due to the buildup of minerals, debris, or even tree roots in outdoor pipes. To check for clogs, start by inspecting aerators on faucets and showerheads. These can often be unscrewed and cleaned. For more stubborn clogs, using a drain snake or plumbing auger can be effective.
Easy plumbing fixes like using a plunger or a chemical drain cleaner can also help. However, be cautious with chemical cleaners as they can damage pipes over time.
Inspecting Pipes for Leaks
Leaks are another common cause of low water pressure. Even small leaks can collectively lead to a significant drop in water pressure. Inspect your pipes for signs of leaks, such as water stains, warped flooring, or running water sounds when no fixtures are in use. Plumbing tools for beginners like a pipe wrench and Teflon tape can be useful for fixing leaks.
To inspect pipes effectively, turn off the main water supply and check the meter. If it continues to move, you likely have a leak somewhere in your system.
Adjusting Pressure Regulator
If your home is equipped with a pressure regulator, it might be the culprit behind your low water pressure. The pressure regulator is designed to protect your plumbing system from high water pressure coming from the municipal supply. Adjusting or replacing the pressure regulator can sometimes resolve low water pressure issues.
To adjust the pressure regulator, you’ll typically need to loosen the lock nut and turn the adjustment screw. It’s advisable to consult a professional if you’re unsure about how to do this, as improper adjustment can lead to further issues.
By following these steps, homeowners can often resolve low water pressure issues on their own. However, if the problem persists, it may be time to call a professional plumber to diagnose and fix the issue.
Sump Pump Maintenance

Sump pump maintenance is a critical aspect of home plumbing maintenance that should not be overlooked. A sump pump plays a vital role in preventing water damage by removing water that accumulates in the sump pit, typically found in basements.
Regular maintenance ensures that your sump pump operates effectively when needed. Neglecting this crucial device can lead to costly repairs and potential safety hazards.
Testing Your Sump Pump
To ensure your sump pump is functioning correctly, it’s essential to test it regularly. Start by filling the sump pit with water to activate the float switch. As the water level rises, the pump should turn on and begin to discharge the water. If it doesn’t, you may need to check the power supply, inspect for blockages, or replace the pump if it’s old or faulty.
Key aspects to check during testing include:
- The pump’s ability to turn on and off
- The discharge line for any blockages or kinks
- The condition of the float switch
Cleaning the Pit
Cleaning the sump pit is another crucial step in maintaining your sump pump. Debris and sediment can accumulate in the pit, potentially clogging the pump or interfering with its operation. Remove any visible debris and dirt, and ensure the pit is free from obstructions.
Regular cleaning also provides an opportunity to inspect the pump and its components for signs of wear or damage.
Preparing for Flood Season
Preparing your sump pump for flood season is vital to ensure it operates effectively during heavy rainfall or flooding. Check the pump’s battery backup, if applicable, and ensure it’s fully charged. Inspect the discharge line to ensure it’s clear and not frozen.
Consider the following table to prepare your sump pump for flood season:
| Task | Frequency | Notes |
|---|---|---|
| Test the sump pump | Monthly | Ensure it’s working correctly |
| Clean the sump pit | Quarterly | Remove debris and sediment |
| Inspect the discharge line | Before flood season | Check for blockages or kinks |
By following these steps, you can help ensure your sump pump is ready to handle excess water during flood season, protecting your home from potential water damage.
Regular sump pump maintenance is a simple yet effective way to safeguard your home against water damage.
Understanding Pipe Types and Materials
Understanding the different types of pipes and materials is essential for any homeowner looking to tackle basic plumbing repairs. The type of pipe material used can significantly impact the overall efficiency and longevity of a plumbing system.
There are several types of pipe materials commonly used in residential plumbing. The most popular options include PVC, copper, and PEX. Each material has its unique characteristics, advantages, and disadvantages.
PVC vs. Copper vs. PEX
When choosing between PVC, copper, and PEX pipes, several factors come into play, including durability, cost, and resistance to corrosion. Here’s a comparison:
| Material | Durability | Cost | Corrosion Resistance |
|---|---|---|---|
| PVC | High | Low | Excellent |
| Copper | High | High | Good |
| PEX | High | Moderate | Excellent |
For more detailed information on plumbing materials, you can visit this resource.
Common Pipe Fittings
Pipe fittings are crucial components of any plumbing system, allowing pipes to be connected, redirected, or terminated. Common types include elbows, tees, couplings, and adapters. Understanding the different types of fittings and their applications is vital for successful plumbing repairs.
When to Replace Pipes
Knowing when to replace pipes is essential for maintaining a plumbing system’s integrity. Signs that indicate pipe replacement may be necessary include frequent leaks, discolored water, and decreased water pressure. Regular inspections can help identify potential issues before they become major problems.
By understanding the different types of pipe materials and fittings, homeowners can make informed decisions about their plumbing systems, ensuring they are well-maintained and functioning efficiently.
Recognizing Signs of Plumbing Trouble

Homeowners should be vigilant about certain signs that may indicate underlying plumbing issues. Being proactive can help prevent minor problems from becoming major repairs. Common plumbing problems can often be identified through visible signs and unusual occurrences within the home.
Water Stains on Walls or Ceilings
Water stains are one of the most obvious indicators of a plumbing issue. These stains can appear on walls, ceilings, or floors and are often accompanied by warping or discoloration. If you notice water stains, it’s essential to investigate the source promptly to prevent further damage. Check for leaky faucets, toilets, or pipes that may be causing the issue.
Unpleasant Odors
Unpleasant odors emanating from drains or toilets can signal a blockage or other plumbing issue. These odors can be caused by the buildup of debris, grease, or other substances in your pipes. Using a quick plumbing solution like a drain cleaner or plumbing snake can help alleviate the problem. However, persistent odors may require professional attention.
Increased Water Bills
A sudden increase in your water bill can indicate a hidden leak or other plumbing issue. Leaks can waste a significant amount of water, leading to higher bills and potential water damage. Check your meter regularly to detect any unusual usage patterns, and inspect your pipes and fixtures for signs of leaks.
By being aware of these common signs of plumbing trouble, homeowners can take swift action to address issues before they escalate. Regular maintenance and inspections can also help prevent problems from arising in the first place.
Winterizing Your Plumbing System
Winterizing your plumbing system is a crucial task that can prevent costly damages and disruptions during the cold months. As temperatures drop, the risk of pipes freezing and bursting increases, potentially leading to significant water damage and expensive repairs.
Insulating Pipes
One of the most effective ways to protect your plumbing system is by insulating exposed pipes in unheated areas such as the garage, basement, or crawlspace. Pipe insulation can be purchased at most hardware stores and is relatively easy to install.
Types of Pipe Insulation:
- Foam pipe insulation
- Fiberglass pipe insulation
- Rubber pipe insulation
Draining Outdoor Fixtures
Outdoor faucets and fixtures are particularly vulnerable to freezing temperatures. To prevent damage, it’s essential to drain these fixtures before winter sets in.
Steps to Drain Outdoor Fixtures:
- Turn off the water supply to outdoor faucets.
- Drain the faucets and hoses.
- Store hoses in a protected area.
Preventing Frozen Pipes
In addition to insulating pipes and draining outdoor fixtures, there are several other measures you can take to prevent frozen pipes.
| Method | Description |
|---|---|
| Let cold water drip from faucets. | Allowing cold water to drip from faucets served by exposed pipes can help prevent freezing. |
| Open cabinet doors. | Opening cabinet doors under sinks can help warm air circulate around the pipes. |
| Seal drafts. | Sealing drafts around doors and windows can help keep cold air out. |
By taking these steps, homeowners can significantly reduce the risk of plumbing-related issues during the winter months. Regular home plumbing maintenance, including winterization, is a key aspect of DIY plumbing tips that can save time and money in the long run.
Basic Plumbing Security Measures

Basic plumbing security measures are essential for protecting your home and family from potential hazards. Ensuring the integrity of your plumbing system involves several key steps.
Regular Inspections
Regular inspections are crucial for identifying potential issues before they become major problems. By checking your plumbing system regularly, you can detect leaks, corrosion, and other forms of damage early on.
To conduct a thorough inspection, look for signs of wear and tear on pipes, fittings, and fixtures. Check under sinks, around toilets, and near water heaters for any signs of moisture or water damage.
Emergency Shut-Off Valves
Knowing the location of emergency shut-off valves is vital for responding quickly in case of a plumbing emergency. These valves control the water supply to your home, and being able to turn them off promptly can prevent extensive water damage.
Make sure all household members know where these valves are located and how to operate them. It’s also a good idea to label them clearly so that they can be easily identified during an emergency.
Careful Usage of Chemicals
Using chemicals carefully is another important aspect of plumbing security. Harsh chemicals can damage pipes and pose health risks if not handled properly.
When using chemical drain cleaners or other plumbing chemicals, always follow the manufacturer’s instructions and take necessary safety precautions, such as wearing gloves and protective eyewear. Consider using alternative, eco-friendly products whenever possible.
| Security Measure | Description | Benefits |
|---|---|---|
| Regular Inspections | Checking for signs of wear and tear on plumbing components | Early detection of potential issues, reduced risk of emergencies |
| Emergency Shut-Off Valves | Knowing the location and operation of shut-off valves | Quick response to emergencies, minimized water damage |
| Careful Chemical Use | Safe handling and use of plumbing chemicals | Reduced risk of pipe damage and health hazards |
For more information on plumbing safety measures, visit Robert Bair’s website for comprehensive guidance on protecting your home and family.
Local Plumbing Codes and Permits
Familiarizing yourself with local plumbing codes and permits is a crucial aspect of home ownership, especially for DIY plumbing projects. Local plumbing codes are in place to ensure that all plumbing work is done to a certain standard, safeguarding both the homeowner and the community.
Importance of Compliance
Compliance with local plumbing codes is not just a legal requirement; it’s also essential for safety. Non-compliance can lead to serious consequences, including fines and potential hazards to your health and safety. Ensuring that your plumbing repairs and installations meet local codes can prevent future issues, such as water damage or contamination.
Key benefits of compliance include:
- Ensuring safety and avoiding potential hazards
- Preventing legal issues and fines
- Maintaining property value through compliant plumbing systems
Knowing When to Call a Pro
While DIY plumbing projects can be cost-effective and rewarding, there are times when it’s necessary to call a professional. Complex plumbing jobs, such as those involving gas lines or major pipe installations, often require a licensed plumber to ensure compliance with local codes.
If you’re unsure about any aspect of your plumbing project, it’s better to err on the side of caution. A professional plumber can provide guidance and ensure that the work is done correctly and in compliance with local regulations.
Finding Local Regulations
To find local plumbing codes and permit requirements, homeowners can start by visiting their local government’s website or contacting their local building department. Many municipalities also provide resources and guides for homeowners undertaking DIY plumbing projects.
Tips for finding local regulations:
- Check your local government’s website for plumbing code information
- Contact your local building department for specific requirements
- Consult with local professionals for insights into common practices and regulations
Hiring Professional Plumbers

When it comes to complex plumbing issues, knowing when to hire a professional plumber is crucial. While DIY plumbing tips can help with minor repairs, more significant problems require the expertise of a licensed plumber. If you’re dealing with a persistent leak, a clogged drain, or a malfunctioning water heater, it’s time to consider seeking professional help.
When to Seek Professional Help
There are several scenarios where hiring a professional plumber is the best course of action. For instance, if you’re experiencing low water pressure, it’s likely due to a more complex issue within your plumbing system. Similarly, if you notice signs of water damage or have a burst pipe, immediate professional assistance is necessary to mitigate further damage. For emergency contractor services, it’s essential to have a reliable plumber on call.
Questions to Ask Potential Plumbers
Before hiring a plumber, it’s essential to ask the right questions. Start by inquiring about their licensing and certification. A reputable plumber should be happy to provide this information. You should also ask about their experience with similar plumbing issues and request references if necessary. Additionally, clarify their pricing structure and ask about any additional fees associated with their services.
Understanding Service Fees
Understanding how plumbers charge for their services can help you make an informed decision. Most plumbers charge either an hourly rate or a flat fee for specific services. Be sure to ask about any additional costs, such as materials or emergency call-out fees. By understanding the total cost upfront, you can avoid unexpected expenses and ensure that you’re hiring a plumber who fits within your budget.
Eco-Friendly Plumbing Tips
Adopting eco-friendly plumbing practices is not only beneficial for the environment, but it also enhances the efficiency of your household plumbing system. By making a few simple changes, you can significantly reduce your water consumption and contribute to a more sustainable future.
Water-Saving Fixtures
One of the easiest ways to make your plumbing system more eco-friendly is by installing water-saving fixtures. Low-flow showerheads, faucets, and toilets can significantly reduce your water usage without compromising performance. For example, installing a low-flow toilet can save up to 1.6 gallons per flush.
Rainwater Harvesting
Rainwater harvesting is another effective way to reduce your environmental impact. By collecting and storing rainwater, you can use it for non-potable purposes such as watering plants, washing cars, or even flushing toilets. This not only conserves water but also reduces the demand on municipal water supplies.
Sustainable Maintenance Practices
Regular maintenance is crucial for ensuring that your plumbing system operates efficiently. This includes checking for leaks, inspecting pipes for damage, and clearing clogs promptly. By adopting sustainable maintenance practices, you can prevent water waste and extend the lifespan of your plumbing fixtures.
| Eco-Friendly Practice | Water Savings | Environmental Benefit |
|---|---|---|
| Low-Flow Fixtures | Up to 20 gallons per day | Reduces water consumption |
| Rainwater Harvesting | Variable, based on collection system | Decreases stormwater runoff |
| Regular Leak Checks | Up to 10 gallons per day | Prevents water waste |
By implementing these eco-friendly plumbing tips, you can make a positive impact on the environment while also enhancing the efficiency of your household plumbing repairs. Whether it’s through easy plumbing fixes or more significant upgrades, every step counts towards a more sustainable future.
Conclusion: Take Control of Home Plumbing
By mastering basic plumbing repairs at home, homeowners can save money and become more self-sufficient. The DIY plumbing tips provided throughout this article have equipped you with the knowledge to tackle common plumbing issues.
Key Takeaways
Recapping the essential tips, you’ve learned how to fix leaky faucets, unclog drains, and diagnose toilet troubles. Understanding how to perform these basic plumbing repairs at home can significantly reduce the need for professional interventions.
Practicing DIY Plumbing
Embracing DIY plumbing tips empowers homeowners to take control of their plumbing systems. Regular maintenance and prompt repairs can prevent minor issues from escalating into major problems.
Staying Proactive
To maintain a healthy plumbing system, remember to inspect your pipes regularly, winterize your plumbing, and adopt eco-friendly practices. By doing so, you’ll not only save on water bills but also contribute to a more sustainable future.
With these skills and knowledge, you’re well on your way to becoming proficient in basic plumbing repairs at home. Stay proactive, and you’ll enjoy a more efficient and cost-effective plumbing system.