Imagine being able to fix that flickering light or tripped circuit breaker without calling an electrician. For many homeowners, DIY electrical repairs can seem daunting, but with the right guidance, it’s entirely achievable. According to Ron Hazelton’s “Home Basics – Electrical Made Easy: A Step-by-Step Guide,” homeowners can learn to tackle simple electrical issues with confidence.
Understanding basic electrical troubleshooting can significantly reduce the risk of electrical shocks and fires. In fact, a study referenced in a comprehensive guide on basic electrical troubleshooting highlights that 98% of all electrical faults are ground faults, which can be addressed with proper knowledge and precautions.
Key Takeaways
- Learn to identify common electrical issues that can be fixed at home.
- Understand the importance of ground fault protection systems.
- Discover how to safely perform DIY electrical repairs.
- Find out when it’s necessary to call a professional electrician.
- Get started with simple electrical troubleshooting techniques.
Understanding Basic Electrical Safety
Before diving into any electrical repair, understanding basic safety measures is essential. Electrical safety is not just about avoiding shocks; it’s about creating a safe environment for you and your family.
Importance of Safety Gear
Wearing the right safety gear can significantly reduce the risk of injury during electrical repairs. This includes insulated gloves, safety glasses, and a fire-resistant apron. These items protect you from electrical shocks and potential arc flashes.
- Insulated gloves prevent electrical shock.
- Safety glasses protect your eyes from debris.
- A fire-resistant apron shields your body from flames.
Identifying Hazardous Situations
Being able to identify hazardous situations is crucial for safe electrical repairs. Look out for exposed wiring, overheated appliances, and outdated electrical panels. Recognizing these hazards early can prevent accidents.
According to safety experts, a significant number of electrical accidents occur due to negligence or lack of knowledge. By understanding and implementing basic electrical safety measures, homeowners can significantly reduce these risks.
“Electrical safety is everyone’s responsibility. By taking the right precautions, we can prevent accidents and ensure a safe environment for everyone.” –
For beginner-friendly electrical projects, always start with a thorough assessment of the task at hand. This includes understanding the tools required and the potential hazards involved. For more home electrical repair tips, consider consulting resources that provide step-by-step guides and safety checklists.
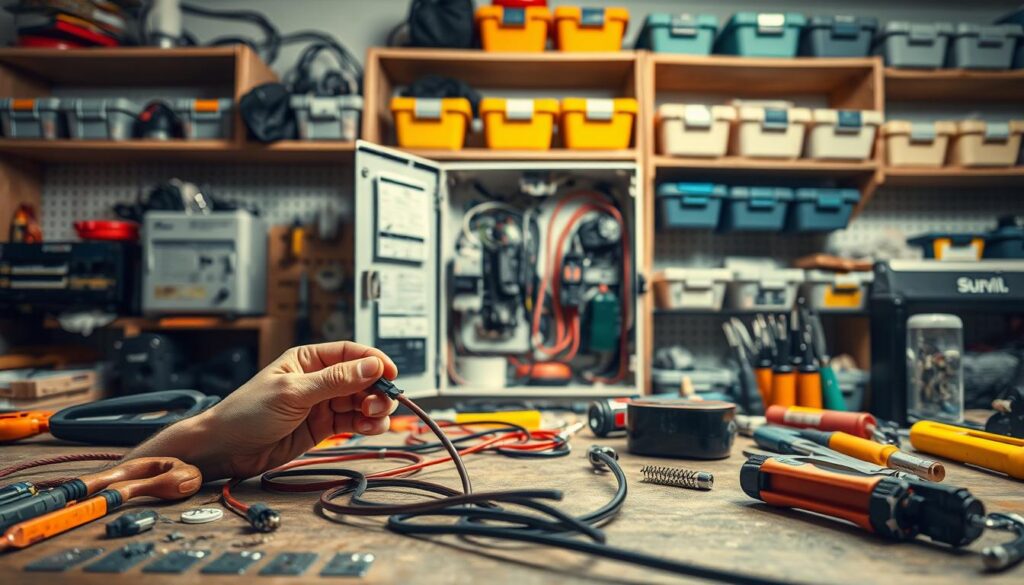
Essential Tools for DIY Electrical Repairs

Embarking on DIY electrical repairs requires a well-stocked toolkit to ensure safety and efficiency. Having the right tools not only makes the job easier but also reduces the risk of accidents and ensures that repairs are done correctly.
Basic Hand Tools You’ll Need
For most DIY electrical repairs, you’ll need a set of basic hand tools. These include:
- Needle-nose pliers for gripping small objects and reaching into tight spaces.
- Lineman pliers for gripping and twisting wire.
- Wire strippers for removing insulation from electrical wires.
- Phillips and flathead screwdrivers for various tasks, including removing outlet and switch plates.
- Voltage tester to ensure that the power is off before starting work.
These tools are fundamental for many electrical tasks and are likely already part of your toolkit.
Specialty Tools for Specific Repairs
Some electrical repairs require more specialized tools. For instance:
- Circuit tester for diagnosing issues within your electrical circuit.
- Wire nuts or connectors for securely connecting wires.
- Electrical tape for insulating wires and connections.
Investing in these specialty tools can make specific repairs more manageable and ensure they’re done safely.
| Tool | Purpose |
|---|---|
| Needle-nose Pliers | Gripping small objects and reaching into tight spaces |
| Lineman Pliers | Gripping and twisting wire |
| Wire Strippers | Removing insulation from electrical wires |
| Voltage Tester | Ensuring the power is off before starting work |
By equipping yourself with these essential and specialty tools, you’ll be well-prepared to tackle a variety of DIY electrical repairs safely and effectively.
How to Replace a Light Switch
A faulty light switch can be a nuisance, but replacing it is a manageable DIY electrical repair project that can be completed with basic tools and some guidance.
Tools Required
Before starting, gather the necessary tools to ensure a smooth replacement process. You’ll need:
- A screwdriver (flathead and Phillips)
- Needle-nose pliers
- Voltage tester
- The new light switch
Having these tools on hand will simplify the process and help you avoid unnecessary trips to the hardware store.
Step-by-Step Replacement Guide
Replacing a light switch involves several key steps:
- Turn off the power to the switch at the circuit breaker or fuse box. Verify the switch is completely dead using a voltage tester.
- Remove the faceplate by unscrewing it. This will expose the switch and its wiring.
- Unscrew the switch from the electrical box. Gently pull it out to access the wires.
- Identify the wires connected to the switch. Typically, there’s a black (hot) wire, a white (neutral) wire, and a copper (ground) wire.
- Disconnect the wires from the old switch. Connect them to the new switch in the same configuration.
- Secure the new switch in the electrical box and replace the faceplate.
- Turn the power back on and test the switch.
This simple electrical repair project can significantly improve your home’s functionality and is a great way to gain confidence in your DIY electrical repair skills.
Fixing a Broken Electrical Outlet

Electrical outlets are crucial for powering our devices, and fixing a broken one is easier than you might think. Whether you’re dealing with a non-functional outlet or one that’s showing signs of wear, this guide will walk you through the process of identifying and fixing the issue.
Signs of a Faulty Outlet
Before you start the repair, it’s essential to identify the signs of a faulty outlet. These can include:
- Sparks or burning smells when plugging in or unplugging devices
- Loose or worn-out outlet covers
- Devices not functioning properly when plugged into the outlet
- Visible signs of wear or damage on the outlet itself
Recognizing these signs early can prevent more serious issues, such as electrical fires. If you notice any of these symptoms, it’s crucial to address them promptly.
Repair Steps Explained
Fixing a broken electrical outlet involves several steps, starting with turning off the power to the outlet at your circuit breaker or fuse box. Always verify that the power is off using a voltage tester to ensure your safety during the repair.
- Remove the outlet cover plate by unscrewing it.
- Pull the outlet out from the wall box to access the wiring.
- Check the wiring connections for any signs of damage or wear.
- Tighten any loose connections or replace damaged wires.
- If the outlet is damaged, replace it with a new one, ensuring it’s rated for the same amperage and voltage.
- Reassemble everything in reverse order, and turn the power back on.
By following these steps, homeowners can safely and effectively fix a broken electrical outlet, enhancing their home’s electrical safety. For more complex issues or if you’re unsure about any part of the process, consider consulting a professional electrician.
Changing a Light Fixture Safely
Safety is paramount when it comes to changing a light fixture, and with the right guidance, homeowners can do it effectively. This task, while seemingly straightforward, requires attention to detail and an understanding of basic electrical safety principles.
Preparing for Installation
Before starting, ensure you have the necessary tools and materials. This includes a new light fixture compatible with your existing wiring, a voltage tester, and basic hand tools like a screwdriver and pliers. Always turn off the power to the circuit at your main electrical panel before beginning work. Verify the power is off using a voltage tester to ensure your safety.
It’s also crucial to read the manufacturer’s instructions for the new light fixture. Different models may have specific installation requirements, and understanding these beforehand can simplify the process.
Understanding Wiring Connections
Wiring connections are a critical aspect of installing a new light fixture. Typically, you’ll encounter three types of wires: black (hot), white (neutral), and copper (ground). Properly connecting these wires is essential for safe and functional operation.
| Wire Color | Function | Connection Tip |
|---|---|---|
| Black | Hot Wire | Connect to the black wire from the light fixture |
| White | Neutral Wire | Connect to the white wire from the light fixture |
| Copper | Ground Wire | Connect to the grounding screw or grounding wire from the light fixture |
As emphasized by electrical safety experts, “Understanding the basics of wiring and taking the necessary precautions can significantly reduce the risk of electrical shock or fire.”
“The key to safe electrical work is preparation and attention to detail. Always ensure you understand the wiring and have the necessary safety equipment before starting.”
By following these guidelines and taking the necessary precautions, homeowners can safely change a light fixture, enhancing their home’s lighting while maintaining electrical safety.
Troubleshooting Circuit Breaker Issues

Understanding how to troubleshoot circuit breaker issues is essential for maintaining your home’s electrical system. Circuit breakers are designed to protect your home from electrical overloads, and when they trip, it can be inconvenient. However, with a step-by-step electrical repair guide, you can identify and potentially fix the problem.
Signs of a Tripped Breaker
A tripped circuit breaker can manifest in different ways. You might notice that a particular part of your home has lost power, or that the breaker itself has moved to the “off” position. Sometimes, a breaker might not trip completely but instead go into a “tripped” state where it’s not fully on or off. Identifying these signs is crucial for beginner-friendly electrical projects.
Steps to Reset a Circuit Breaker
Resetting a circuit breaker involves a few straightforward steps. First, identify the breaker that’s tripped by checking your electrical panel. Once you’ve located the tripped breaker, switch it fully to the “off” position. Then, wait for a few minutes to allow any potential overload to dissipate. After waiting, switch the breaker back to the “on” position. If it trips again immediately, there might be a more serious issue that requires professional attention.
It’s also important to understand that frequent tripping can be a sign of a deeper electrical issue. If your breaker trips repeatedly, it’s a good idea to investigate the cause. This might involve checking for overloaded circuits or identifying faulty wiring. For more complex issues, consulting a professional electrician is advisable.
By following these steps and understanding the basics of your home’s electrical system, you can tackle circuit breaker issues with confidence. Remember, safety should always be your top priority when dealing with electrical systems.
Replacing a Ceiling Fan
With the right tools and a bit of know-how, replacing a ceiling fan can be a rewarding DIY electrical repair project. This task not only updates your home’s lighting but also enhances its comfort and aesthetic appeal.
Components of a Ceiling Fan
Before diving into the replacement process, it’s essential to understand the components of a ceiling fan. A typical ceiling fan consists of a motor, blades, a downrod, and a mounting bracket. Some models may also include a light kit. Familiarizing yourself with these parts will make the installation process smoother.
As noted by experts like Ron Hazelton in his guide “Do It Yourself… Easy!”, understanding the components is crucial for a successful installation. “Knowing what you’re working with is half the battle when it comes to DIY projects,” he emphasizes.
Installation Steps Simplified
The installation process involves several key steps. First, ensure you’ve turned off the power to the circuit at your main electrical panel. Verify this by checking that the fan is completely dark and not spinning.
- Remove the old fan by detaching the blades and then the mounting bracket.
- Inspect the wiring and connections. If you’re not comfortable with the wiring, consider consulting a professional.
- Install the new mounting bracket, ensuring it’s securely fastened.
- Connect the wiring according to the manufacturer’s instructions.
- Attach the new fan, following the manufacturer’s guide for specific instructions.
For a more detailed guide, you can refer to resources like Family Handyman’s ceiling fan installation guide, which provides comprehensive instructions and tips for a successful DIY project.
By following these steps and understanding the components involved, you can successfully replace your ceiling fan, enhancing your home’s ambiance and functionality.
Dealing with Ungrounded Outlets

Ungrounded outlets can pose a significant risk to homeowners, making it crucial to understand how to identify and address them. Ensuring your home’s electrical system is safe involves recognizing the signs of ungrounded outlets and taking appropriate action.
Identifying Ungrounded Outlets
To identify if an outlet is ungrounded, you can start by checking the outlet’s configuration. Typically, an ungrounded outlet will have only two prongs instead of three. You can also use a circuit tester or a multimeter to check for grounding. If you’re unsure, it’s always best to consult a professional.
A key indicator of an ungrounded outlet is the absence of a grounding prong, which is usually the third prong on a standard outlet. Homeowners can also look for labels or markings on the outlet that indicate it is grounded or ungrounded.
Solutions for Grounding
If you’ve identified an ungrounded outlet, there are several solutions you can consider. One option is to replace the ungrounded outlet with a grounded one, but this may require running new grounding wires. Another solution is to install a Ground Fault Circuit Interrupter (GFCI) outlet, which can provide protection even without a grounding wire.
It’s essential to follow safety guidelines when working with electrical outlets. Always turn off the power to the circuit at the main electrical panel before starting work. If you’re not comfortable with DIY electrical repairs, consider hiring a licensed electrician.
According to electrical safety experts, “Grounding is a critical aspect of electrical safety, and ungrounded outlets can lead to serious safety hazards, including electrical shock and fires.” Ensuring your outlets are properly grounded is a crucial step in maintaining your home’s electrical safety.
For homeowners looking for more home electrical repair tips, it’s recommended to regularly inspect your electrical outlets and wiring. Following an electrical repair tutorial for beginners can also be beneficial in understanding the basics of electrical safety and repair.
Understanding Circuit and Wiring Basics
To tackle electrical repairs with confidence, it’s vital to comprehend the underlying circuit and wiring principles. Electrical circuits and wiring are the foundation upon which a home’s electrical system is built. Understanding these basics is crucial for any homeowner looking to undertake beginner-friendly electrical projects.
For a step-by-step electrical repair guide, one must first grasp the different components of electrical circuits. Circuits are essentially pathways through which electricity flows. They can be categorized into several types based on their configuration and functionality.
Different Types of Circuits
There are primarily three types of electrical circuits: series, parallel, and series-parallel (or combination) circuits. A series circuit is one where components are connected end-to-end, so there is only one path for current to flow. If one component fails, the entire circuit is broken.
In contrast, a parallel circuit has components connected between the same two points, allowing multiple paths for the current. This means that if one component fails, others can continue to function.
A series-parallel circuit combines elements of both series and parallel circuits, offering a balance between the two configurations.
Common Wiring Configurations
Wiring configurations refer to how the wires are arranged and connected within a circuit. Common configurations include romex wiring (non-metallic sheathed cable) and conduit wiring. Romex wiring is widely used in residential construction due to its ease of installation and cost-effectiveness.
“Understanding the wiring configurations in your home is key to making informed decisions about electrical repairs and upgrades.” – Electrical Safety Foundation
For more complex wiring configurations, consulting a professional may be necessary. However, for many beginner-friendly electrical projects, understanding the basics of circuit and wiring can provide a solid foundation for DIY repairs.
Managing Electrical Cords and Cables

One of the simplest yet most effective easy home electrical fixes is organizing electrical cords and cables. Proper management not only enhances the aesthetic appeal of your home but also significantly reduces electrical hazards.
Organizing Cords for Safety
To keep your home safe, it’s essential to organize cords in a way that prevents tripping hazards and reduces the risk of electrical fires. Here are some steps to follow:
- Use cable organizers or zip ties to keep cords tidy.
- Label cords to easily identify their purpose.
- Route cords away from heat sources and water.
Protecting Cables from Damage
Protecting cables from damage is crucial for maintaining electrical safety. Damaged cables can lead to short circuits and electrical fires. Consider the following:
| Protection Method | Description | Benefit |
|---|---|---|
| Cable protectors | Cover cords with protectors to prevent wear and tear. | Extends cable life |
| Cord concealers | Hide cords from view to prevent damage. | Enhances home appearance |
| Proper routing | Route cords carefully to avoid pinching or bending. | Reduces risk of electrical hazards |
Fixing Flickering Lights
Flickering lights are not just annoying; they can also be a sign of a more serious electrical problem. Understanding the causes and knowing how to troubleshoot them can save you time and potentially prevent more significant issues down the line.
Causes of Flickering Lights
Flickering lights can be caused by a variety of factors, including loose bulb connections, faulty light fixtures, or issues with your home’s electrical wiring. Sometimes, the problem might be as simple as a loose bulb that needs tightening. Other times, it could indicate a more complex issue such as voltage fluctuations or overloaded circuits.
Common Causes:
- Loose or faulty bulb connections
- Deteriorated or damaged wiring
- Overloaded circuits
- Incorrect bulb type or wattage
Step-by-Step Troubleshooting Guide
To effectively troubleshoot flickering lights, follow these steps:
- Check the Bulb: Ensure the bulb is screwed in tightly. If the problem persists, try replacing the bulb with a new one to rule out any issues with the bulb itself.
- Inspect the Fixture: Examine the light fixture for any signs of wear or damage. Make sure all connections are secure.
- Check for Overloaded Circuits: If multiple lights are flickering, it could be a sign of an overloaded circuit. Consider redistributing your electrical load or consulting an electrician.
- Examine the Wiring: For more complex issues, inspecting your home’s wiring might be necessary. Look for any signs of damage or deterioration.
If after these steps the problem persists, it may be wise to consult a professional electrician to diagnose and fix the issue.
By following these simple electrical repair projects and tips, you can often resolve the issue of flickering lights on your own. However, if you’re unsure or uncomfortable at any point, don’t hesitate to seek professional help.
Installing Dimmer Switches

Installing a dimmer switch can significantly enhance the ambiance of your living space. Dimmer switches offer homeowners the flexibility to adjust lighting levels according to their needs, creating a more comfortable and inviting atmosphere.
Selecting the Appropriate Dimmer
Before starting the installation, it’s crucial to choose the right dimmer switch for your needs. Consider the type of lighting you have; dimmer switches are compatible with certain types of bulbs, such as LED or incandescent. Ensure the dimmer switch you select is compatible with your existing lighting fixtures.
Key Considerations:
- Compatibility with bulb type
- Load capacity
- Smart home integration if needed
Step-by-Step Installation Guide
Once you’ve selected the appropriate dimmer switch, follow these steps for a successful installation:
- Turn off the power to the circuit at your electrical panel.
- Remove the existing light switch cover plate and switch.
- Disconnect the wires from the old switch, noting their colors and connections.
- Connect the wires to the new dimmer switch according to the manufacturer’s instructions.
- Secure the dimmer switch in place and replace the cover plate.
- Turn the power back on and test the dimmer switch.
By following these steps, homeowners can successfully install dimmer switches, enhancing their home’s lighting and ambiance. Remember to always follow safety guidelines when working with electrical systems.
GFCI Outlet Installation Made Simple
Ensuring electrical safety in your home is crucial, and one effective way to achieve this is by installing GFCI outlets. GFCI outlets are designed to protect against electrical shock, particularly in areas prone to moisture like kitchens and bathrooms.
What is a GFCI Outlet?
A Ground Fault Circuit Interrupter (GFCI) outlet is a type of outlet that is designed to protect against ground faults, which occur when there is an unintended path of electricity flowing to ground, often through water or a person. GFCI outlets are equipped with a sensor that detects imbalances in the circuit and interrupts the power supply when a fault is detected.
The importance of GFCI outlets cannot be overstated. They are a critical safety feature in modern homes, significantly reducing the risk of electrical shock. According to safety guidelines, GFCI outlets should be installed in areas where electrical appliances are used near water, such as in kitchens, bathrooms, and outdoor areas.
Installation Process
Installing a GFCI outlet is a relatively straightforward process that can be completed with basic DIY skills. Here’s a step-by-step guide:
- Turn off the power to the circuit at the main electrical panel.
- Remove the existing outlet and disconnect the wires.
- Identify the line and load wires. The line wires are connected directly to the power source, while the load wires feed other outlets downstream.
- Connect the line wires to the corresponding terminals on the GFCI outlet.
- If you’re wiring multiple outlets, connect the load wires to the appropriate terminals on the GFCI outlet.
- Replace the outlet and turn the power back on.
- Test the GFCI outlet by pressing the test button and verifying that it trips and cuts off power.
For a more detailed guide, you can refer to Home Depot’s GFCI outlet installation instructions.
| Step | Description |
|---|---|
| 1 | Turn off power to the circuit |
| 2 | Remove existing outlet and disconnect wires |
| 3 | Identify line and load wires |
| 4 | Connect line wires to GFCI outlet |
| 5 | Connect load wires (if applicable) |
| 6 | Replace outlet and turn power back on |
| 7 | Test GFCI outlet |
By following these steps, you can ensure a safe and successful GFCI outlet installation, enhancing the electrical safety of your home.
Recognizing Signs of Electrical Overload

Recognizing the indicators of electrical overload is key to ensuring your home’s electrical system operates safely. Electrical overloads occur when the demand for electricity exceeds the capacity of the electrical system, potentially leading to overheating, fires, and other hazards.
Symptoms of Overloaded Circuits
Several signs can indicate that your electrical circuit is overloaded. These include:
- Frequently tripped circuit breakers or blown fuses
- Warm or discolored outlets and switches
- Flickering or dimming lights, especially when using multiple appliances
- A burning smell from outlets, switches, or electrical devices
Table: Common Symptoms and Solutions for Electrical Overload
| Symptom | Possible Cause | Solution |
|---|---|---|
| Frequent breaker tripping | Overloaded circuit | Distribute appliances across different circuits |
| Flickering lights | Loose or corroded connections | Tighten connections or replace wiring |
| Warm outlets | Excessive current draw | Reduce load or upgrade outlet |
Preventative Measures
To prevent electrical overloads, homeowners can take several proactive steps:
- Assess your electrical needs: Understand the capacity of your electrical system and avoid overloading it.
- Distribute the load: Spread out the use of high-power appliances across different circuits.
- Upgrade your electrical panel if it’s outdated or too small for your needs.
- Regularly inspect your wiring and electrical devices for signs of wear or damage.
By being aware of the signs of electrical overload and taking preventative measures, homeowners can significantly reduce the risk of electrical hazards, ensuring a safer home environment.
Maintaining Your Home’s Electrical System
A well-maintained electrical system is essential for the overall safety of your home. Regular maintenance not only ensures the longevity of your electrical components but also prevents potential hazards. By following a few simple steps, you can keep your home’s electrical system in top condition.
Regular Inspection Tips
Regular inspections are crucial for identifying potential issues before they become major problems. Here are some tips to help you inspect your home’s electrical system:
- Check for signs of wear and tear on electrical cords and outlets.
- Ensure all electrical panels and circuit breakers are easily accessible.
- Test your GFCI outlets monthly to ensure they are functioning correctly.
- Look for any signs of electrical overload, such as flickering lights or warm outlets.
For more detailed guidance on inspecting and maintaining your home’s electrical system, you can refer to resources like this step-by-step guide on easy home electrical fixes.
| Inspection Task | Frequency | Importance Level |
|---|---|---|
| Check electrical cords for damage | Monthly | High |
| Test GFCI outlets | Monthly | High |
| Inspect circuit breakers | Quarterly | Medium |
| Check for signs of electrical overload | Quarterly | High |
Knowing When to Call a Professional
While many electrical maintenance tasks can be performed by homeowners, there are times when it’s necessary to call a professional. If you’re unsure about any aspect of your electrical system or if you notice any of the following signs, it’s time to seek expert help:
- Frequent tripping of circuit breakers.
- Flickering or dimming lights.
- Burning smells or sparks from electrical outlets.
- Any signs of electrical shock or sparking.
By knowing when to call a professional, you can ensure that your home’s electrical system is repaired correctly and safely, following a step-by-step electrical repair guide if needed.
Common Electrical Myths Debunked

Understanding the truth behind common electrical myths can save lives. Many homeowners unknowingly follow misinformation that can lead to hazardous situations. In this section, we will explore some of the most prevalent myths surrounding electrical repairs and safety practices.
Misconception About DIY Repairs
One common myth is that DIY electrical repairs are always safe if you follow online tutorials. While beginner-friendly electrical projects can be a great learning experience, they can also be dangerous if not approached correctly.
It’s crucial to understand your limitations and know when to call a professional. Electrical repair tutorials for beginners can provide a good foundation, but they cannot replace hands-on experience and professional training.
Truth About Electrical Safety Practices
Another myth revolves around the idea that electrical safety practices are overly cautious and unnecessary for minor repairs. However, safety protocols are in place to prevent accidents, and ignoring them can have serious consequences.
- Always turn off the power before starting any electrical work.
- Use appropriate safety gear, including gloves and safety glasses.
- Never work on electrical systems when tired or distracted.
By following these practices, homeowners can significantly reduce the risk of electrical accidents. It’s also important to stay informed about the latest safety guidelines and best practices for DIY electrical repairs.
Being aware of the truth behind common electrical myths not only enhances your safety but also ensures that your home’s electrical system is maintained properly. For more information on electrical safety and repair, consider consulting resources from reputable organizations.
Resources for Further Learning
To continue improving your DIY electrical repair skills, it’s essential to have access to reliable resources. Whether you’re a beginner looking for quick and easy electrical repairs at home with clear instructions or an experienced homeowner, there are numerous tools available to help you master DIY electrical repairs.
Recommended Reading Materials
Several books and guides provide comprehensive information on electrical repairs and safety. For instance, “The Homeowner’s Guide to Electrical Repairs” is a valuable resource that covers a wide range of topics, from basic electrical safety to complex repair jobs.
Online Tutorials and Courses
In addition to printed materials, online tutorials and courses can offer hands-on experience and in-depth knowledge. Websites like Udemy and YouTube channels dedicated to DIY electrical work provide step-by-step instructions and video tutorials to help you understand complex concepts.
By leveraging these resources, you can enhance your understanding of electrical systems and improve your ability to perform DIY electrical repairs safely and effectively.