Learning to tackle simple plumbing repairs can save homeowners a significant amount of money. Many common issues, such as clogged drains or leaky faucets, can be resolved with basic DIY skills and tools. For instance, according to experts, 95 percent of toilet flush problems can be solved with a simple four-step strategy, and 80 percent of clogged tub drains can be fixed by removing the stopper and fishing out hair and gunk.
By taking on these tasks, beginners can gain confidence in their ability to perform DIY plumbing solutions. Simple repairs like fixing a leaky faucet or removing a stuck cleanout plug can be done with minimal expertise. For more detailed guides and tutorials, resources like Family Handyman offer comprehensive instructions.
Key Takeaways
- Simple plumbing repairs can save homeowners money.
- Basic DIY skills and tools are sufficient for many common plumbing issues.
- 95 percent of toilet flush problems can be solved with a simple strategy.
- 80 percent of clogged tub drains can be fixed by removing the stopper.
- DIY plumbing solutions can be learned through beginner plumbing tutorials.
Understanding Basic Plumbing Concepts
Grasping the fundamentals of plumbing can empower homeowners to tackle minor repairs with confidence. Dealing with plumbing issues can seem daunting, but having a basic understanding of plumbing concepts can make a significant difference.
The Importance of Plumbing Knowledge
Having a basic understanding of plumbing techniques is crucial for homeowners. It not only helps in performing simple repairs but also in identifying potential issues before they become major problems. Knowledge of plumbing basics can save time and money by reducing the need for professional interventions for minor issues.
Some key benefits of having plumbing knowledge include:
- Ability to perform minor repairs and maintenance tasks.
- Early detection of potential plumbing issues.
- Cost savings by avoiding unnecessary professional help.
For those looking to dive deeper, resources like Understanding the Basics of Plumbing provide comprehensive guides and tips.
Common Plumbing Terms to Know
Familiarizing oneself with common plumbing terminology is a step towards becoming proficient in plumbing repair tips. Here are some essential terms:
- Pipe fittings: Used to connect pipes.
- Shut-off valves: Control the water supply to specific areas.
- Drain cleaners: Tools or chemicals used to unclog drains.
Understanding these terms and concepts is fundamental to undertaking simple plumbing projects. It enables homeowners to communicate effectively with professionals when needed and to feel more in control of their home’s plumbing system.
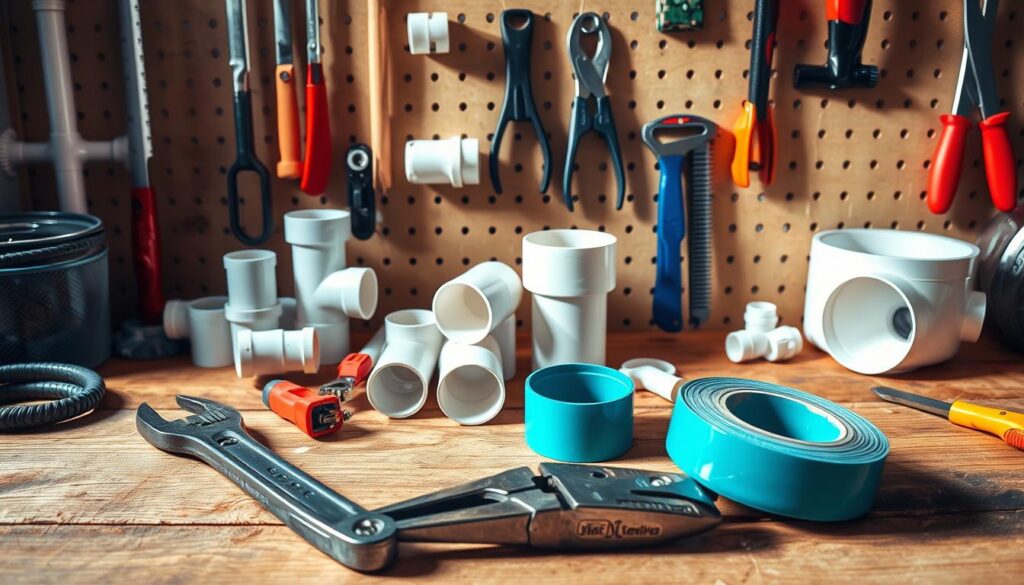
Essential Plumbing Tools for Beginners

As a beginner, having the essential plumbing tools is the first step towards successful DIY plumbing solutions. Before tackling any plumbing project, it’s essential to be equipped with the right tools to ensure the job is done efficiently and effectively.
“A good plumber is always prepared with the right tools,” says a seasoned plumbing expert. This quote emphasizes the importance of having the right equipment for any plumbing task.
Recommended Tools for Home Repairs
For home repairs, several tools are considered must-haves. These include:
- Adjustable wrenches for tightening and loosening various pipe sizes
- Thread sealant tape (like Hercules Megatape) for creating watertight connections
- Pipe cutters for cutting through pipes cleanly
- Plunger for unclogging drains
For more information on top plumbing tools and pipes for DIY projects, you can visit this resource for a comprehensive guide.
Tool Maintenance Tips
Maintaining your plumbing tools is crucial for their longevity and performance. Here are some tips:
- Regularly clean your tools to prevent rust and corrosion
- Store tools in a dry place, away from moisture
- Check tools periodically for signs of wear and tear, replacing them as needed
By following these easy plumbing maintenance tips, you can ensure your tools remain in good condition, ready for the next plumbing task.
How to Fix a Leaky Faucet
Repairing a leaky faucet is easier than you think and can be done with basic tools. A leaky faucet not only wastes water but also increases your utility bills. By following a few simple steps, you can fix the issue and save money.
Identifying the Source of the Leak
The first step in fixing a leaky faucet is to identify the source of the leak. Common areas where leaks occur include the faucet’s handle, spout, or drain. To diagnose the issue, turn on the faucet and observe where the water is coming from.
- Check the faucet’s handle for signs of moisture or dripping.
- Inspect the spout and aerator for any blockages or mineral buildup.
- Examine the drain and connections for leaks.
Step-by-Step Repair Instructions
Once you’ve identified the source of the leak, you can begin the repair. Here’s a step-by-step guide:
- Turn off the water supply: Locate the shut-off valves under the sink and turn them clockwise.
- Disassemble the faucet: Remove the handle or knob to access the internal parts.
- Replace worn-out parts: Identify and replace the faulty O-ring, gasket, or cartridge.
- Reassemble the faucet: Put everything back together in the reverse order that you took it apart.
- Turn on the water supply: Check for leaks and ensure the faucet is working properly.
By following these steps, you can fix a leaky faucet and enjoy the benefits of a well-functioning plumbing system.
Unclogging a Drain: Simple Techniques

Simple plumbing projects, like unclogging a drain, can be managed with basic DIY skills. Before calling a professional plumber, there are several techniques you can try to clear the clog.
Using a Plunger Effectively
A plunger is one of the most effective tools for unclogging drains. To use it effectively, ensure the plunger is properly seated over the drain, then push down slowly and steadily until you feel resistance, and pull up sharply to create suction. Repeat this process several times to help dislodge the clog.
Tip: For sinks, you may need to block the overflow drain with a wet cloth to ensure the plunger works effectively.
Chemical vs. Natural Solutions
When it comes to clearing clogs, you have the option of using either chemical or natural solutions. Chemical drain cleaners can be effective but can also damage your pipes and harm the environment.
On the other hand, natural solutions like baking soda and vinegar are safer and can be just as effective. Pouring 1/2 cup of baking soda down the drain, followed by 1/2 cup of vinegar, can help break down the clog. Let the mixture sit for a few hours or overnight before rinsing with hot water.
| Method | Effectiveness | Safety |
|---|---|---|
| Chemical Drain Cleaners | High | Low |
| Baking Soda and Vinegar | Medium | High |
| Plunger | High | High |
For more stubborn clogs, you may need to use a drain snake or auger. These tools can help break up or retrieve the clog, restoring your drain to proper function.
Fixing Running Toilets with Ease
One of the most common plumbing issues homeowners face is a running toilet, which can be easily fixed with the right knowledge. A running toilet not only wastes water but also increases your utility bills. Understanding the causes and applying the appropriate fixes can save you money and reduce your environmental footprint.
Common Causes of Running Toilets
A running toilet is often caused by issues related to the float valve or the stop valve. The float valve, which is part of the fill valve assembly, controls the water level in the tank. If it’s not adjusted correctly or is faulty, water will continue to flow into the overflow tube, causing the toilet to run constantly.
- A faulty or misaligned float valve
- A clogged or dirty fill valve
- An improperly adjusted or damaged stop valve
For more complex issues or if you’re unsure about how to proceed, consider consulting a professional. You can find trusted solutions at 24/7 Construction & Repair.
Quick Fixes to Stop the Running
To fix a running toilet, you can start by checking and adjusting the float arm to ensure it’s not stuck or tangled. Sometimes, the issue can be resolved by simply adjusting the float arm to the correct water level.
- Inspect the fill valve and float for any signs of wear or misalignment.
- Clean or replace the fill valve if it’s clogged or dirty.
- Check the stop valve (flapper) for any signs of damage or misalignment and replace it if necessary.
Replacing the entire toilet tank float valve assembly is often the best approach if you’re dealing with a faulty floater valve or stop valve. This can seem like a daunting task, but with the right plumbing repair tips, it’s a manageable DIY project. For quick plumbing troubleshooting, start by identifying the source of the problem, and then apply the appropriate fix.
By following these beginner plumbing tutorials, you can fix a running toilet and improve your plumbing skills. Regular maintenance and prompt repairs can help prevent more significant issues down the line.
Repairing a Dripping Showerhead

One of the easiest DIY plumbing projects you can tackle is repairing a dripping showerhead, and it’s a great place to start for beginners. A leaky showerhead not only wastes water but can also lead to increased utility bills. Fortunately, with a few simple tools and some basic knowledge, you can fix the issue in no time.
Tools Needed for the Repair
Before you start, make sure you have the necessary tools. For this repair, you’ll need:
- An adjustable wrench or basin wrench
- Thread sealant tape (also known as Teflon tape)
- A cloth or paper towel for cleaning
Having these tools on hand will make the process smoother and ensure a successful repair.
Simple Steps for a Quick Fix
Swapping out a showerhead or fixing a leak is a straightforward process. Here’s how to do it:
- Turn off the water supply to your shower. This is usually done at the main shut-off valve.
- Remove the showerhead. Use an adjustable wrench if it’s stuck.
- Inspect the threads on both the shower arm and the showerhead for any debris or mineral buildup. Clean them with a cloth or paper towel.
- Wrap thread sealant tape around the threads of the shower arm in a clockwise direction. This will help prevent future leaks.
- Reattach the showerhead or replace it with a new one, ensuring it’s securely tightened.
- Turn on the water supply and check for leaks.
Tip: Regularly checking your showerhead for leaks and mineral buildup can help prevent more significant issues down the line.
Addressing Low Water Pressure Problems
Low water pressure can be a frustrating issue for homeowners, often indicating a problem within the plumbing system. It can affect the overall comfort and functionality of your home, making everyday tasks like showering or washing dishes more challenging.
Causes of Low Water Pressure
Several factors can contribute to low water pressure. Mineral buildup and clogged aerators are common culprits. Mineral buildup occurs when minerals from hard water accumulate inside pipes, reducing water flow. Similarly, aerators can become clogged with debris, restricting water pressure.
Other causes include leaks in the plumbing system, faulty pressure regulators, and blockages in the pipes. Understanding these causes is crucial for effective troubleshooting.
Quick Troubleshooting Steps
To address low water pressure, start by checking the aerators on your faucets. Cleaning or replacing clogged aerators can often resolve the issue. For more complex problems, inspecting your plumbing system for leaks or blockages is necessary.
For detailed guidance on diagnosing low water pressure, you can refer to resources like Mr. Rooter’s blog on the topic. This can provide valuable plumbing repair tips and quick plumbing troubleshooting advice.
Applying basic plumbing techniques can also help. For instance, checking the shut-off valves to ensure they are fully open can sometimes resolve low water pressure issues.
- Inspect aerators and clean or replace them as needed.
- Check for leaks in the plumbing system.
- Ensure shut-off valves are fully open.
By following these steps, you can often identify and fix the problem, restoring your home’s water pressure to normal levels.
How to Replace a Toilet Seat

Replacing a toilet seat is a simple DIY task that can be completed with basic tools. This task is a great way to start with DIY plumbing solutions for beginners, requiring minimal plumbing knowledge.
Tools Required for Replacement
Before you start, ensure you have the necessary tools. Typically, you’ll need a screwdriver, usually a Phillips head, and possibly an adjustable wrench if the nuts are particularly stubborn. Having these tools on hand will make the process smoother.
Easy Steps to Follow
To replace a toilet seat, follow these steps:
- Turn off the water supply to the toilet. Although this isn’t always necessary for replacing a toilet seat, it’s a good practice.
- Remove the old seat by unscrewing the nuts that hold it in place. You may need to use an adjustable wrench for this.
- Take the old seat off and prepare the new one. Ensure it’s the correct size and type for your toilet.
- Place the new seat onto the toilet bowl, aligning it with the bolts.
- Tighten the nuts by hand, then use your tools to secure them firmly.
For more detailed guides and tutorials, you can visit The DIY Playbook for additional resources on DIY plumbing projects.
Simple Steps to Fixing Pipe Leaks
Understanding how to fix pipe leaks is essential for homeowners to prevent water damage. Pipe leaks can occur due to various reasons, including corrosion, loose connections, or physical damage. Identifying the type of leak is crucial for determining the appropriate fix.
Identifying Different Types of Pipe Leaks
Pipe leaks can be categorized into several types based on their location and cause. The most common types include:
- Leaks at the joints or connections
- Corrosion-based leaks
- Leaks due to physical damage
For instance, a leak at a joint might require tightening or replacing the gasket, while a corrosion-based leak may need a section of the pipe to be replaced.
Temporary vs. Permanent Fixes
When it comes to fixing pipe leaks, homeowners often debate between temporary and permanent fixes. Temporary solutions, such as using epoxy or pipe clamps, can be effective in the short term. However, for a long-term solution, replacing the damaged section of the pipe is usually the best approach.
For a step-by-step plumbing guide, consider the following table that outlines the basic steps for a permanent fix:
| Step | Description | Tools Needed |
|---|---|---|
| 1 | Turn off the water supply | Wrench or shut-off valve key |
| 2 | Drain the pipe | Bucket, pliers |
| 3 | Identify and mark the leak | Marker, inspection light |
| 4 | Apply a temporary fix if necessary | Epoxy, pipe clamp |
| 5 | Replace the damaged section | Pipe cutter, new pipe section, soldering kit |
For more detailed plumbing repair tips, you can refer to our comprehensive guide on water leak repair. This resource provides additional quick plumbing troubleshooting tips to help you address common issues.
By following these steps and understanding the type of pipe leak you’re dealing with, you can effectively fix the issue and prevent further damage.
Tips for Maintaining Your Plumbing System

Regular maintenance is key to avoiding costly plumbing repairs and ensuring your system runs efficiently. By staying on top of maintenance, you can prevent many common plumbing issues.
Regular Maintenance Checklist
To keep your plumbing system in good condition, follow this simple checklist:
- Check for leaks under sinks and around toilets.
- Clear debris from drains to prevent clogs.
- Inspect your water heater for signs of wear.
- Test your shut-off valves to ensure they’re working properly.
Regular inspections can help identify potential issues before they become major problems. It’s also a good idea to keep an eye on your water bill; a sudden increase can indicate a hidden leak.
| Maintenance Task | Frequency | Benefits |
|---|---|---|
| Check for Leaks | Monthly | Prevents Water Damage |
| Clear Drain Debris | Quarterly | Reduces Clog Risk |
| Inspect Water Heater | Bi-Annually | Extends Heater Life |
Signs You Need to Call a Professional
While regular maintenance can prevent many issues, some problems require professional attention. Look out for these signs:
- Persistent leaks or water damage.
- Low water pressure or strange noises from pipes.
- Frozen or burst pipes during cold weather.
If you’re unsure about how to handle a plumbing issue or if you’ve noticed any of these signs, it’s time to call a professional plumber. They can diagnose the problem and provide a solution to get your plumbing system back in working order.
Understanding Your Home’s Water Supply
Knowing how your home’s water supply works can help you identify potential issues before they become major problems. Your home’s water supply is a complex system that involves the distribution of clean water throughout your house and the removal of wastewater.
For a deeper understanding of how your plumbing system works, it’s essential to familiarize yourself with the basic components and their functions. As explained in a beginner’s guide to home plumbing systems on Jeff the Plumber’s blog, the water supply lines are responsible for bringing clean water into your home, while the drainage system removes wastewater.
How Your Plumbing System Works
Your home’s plumbing system operates by using a network of pipes to distribute water throughout the house. The system is typically divided into two main parts: the water supply system and the drainage system. The water supply system brings clean water into your home, while the drainage system removes wastewater.
The key components of your plumbing system include:
- Water meter: Measures the amount of water used in your home.
- Shut-off valves: Control the water supply to your home and individual fixtures.
- Pipes: Distribute water throughout your home and remove wastewater.
- Fixtures: Sinks, toilets, showers, and other appliances that use water.
Importance of Water Quality
Maintaining good water quality is crucial for the health and safety of your household. Poor water quality can lead to a range of issues, including the presence of contaminants, unpleasant tastes and odors, and even health risks. As “clean water is essential for human health”, it’s vital to ensure that your home’s water supply is properly maintained.
“The quality of your drinking water can have a significant impact on your overall health and wellbeing.” –
To maintain good water quality, it’s essential to regularly inspect your plumbing system for signs of damage or wear, and to address any issues promptly. This includes checking for leaks, corrosion, and mineral buildup, and taking steps to mitigate any problems you find.
Common Plumbing Myths Debunked

When it comes to plumbing, there’s a lot of misinformation out there that can cause more problems than it solves. Many homeowners rely on tips and tricks they’ve heard or read about, but not all of these are accurate or helpful. In this section, we’ll tackle some common plumbing myths and provide you with the facts you need to make informed decisions about your plumbing system.
Myth: Duct Tape Can Fix Everything
One of the most pervasive myths in plumbing is that duct tape can fix just about any issue. While duct tape is incredibly versatile and can temporarily patch up some problems, it’s not a reliable solution for plumbing repairs. Using duct tape on leaks or damaged pipes can lead to further damage and more costly repairs down the line. Instead, it’s better to use proper plumbing materials and techniques to ensure a lasting fix.
Why Duct Tape Fails in Plumbing:
- Duct tape is not designed to withstand water pressure.
- It can deteriorate over time, especially when exposed to moisture.
- It’s not a suitable substitute for proper plumbing materials.
Myth: You Don’t Need to Worry About Your Pipes
Another common myth is that pipes don’t require maintenance unless there’s an obvious issue. However, neglecting your pipes can lead to serious problems, including leaks, bursts, and water damage. Regular maintenance is key to extending the life of your plumbing system and preventing costly repairs.
Tips for Maintaining Your Pipes:
| Maintenance Task | Frequency | Benefits |
|---|---|---|
| Inspect pipes for signs of wear | Every 6 months | Early detection of potential issues |
| Check water pressure | Annually | Prevents damage from excessive pressure |
| Clear clogs and debris | As needed | Prevents backups and overflows |
By understanding the facts behind common plumbing myths, you can better care for your plumbing system and avoid unnecessary repairs. For more DIY plumbing solutions and beginner plumbing tutorials, continue reading the next sections of this guide.
When to Call a Professional Plumber
DIY plumbing repairs can be cost-effective, but knowing when to seek professional help is crucial for avoiding further damage.
While many plumbing issues can be resolved with simple fixes, there are instances where the expertise of a professional plumber is necessary. Recognizing these signs can save you time, money, and stress in the long run.
Signs You Should Seek Professional Help
Certain plumbing issues are indicative of more complex problems that require professional attention. Some of these signs include:
- Persistent Leaks: Leaks that continue despite your best efforts to fix them may indicate a deeper issue within your plumbing system.
- Complex Issues: Problems such as burst pipes, significant water damage, or complex fixture installations are best handled by professionals.
- Unusual Noises: Clanging, banging, or gurgling noises from your pipes can signal issues that need professional diagnosis.
- Water Quality Issues: If you notice changes in your water quality, such as discoloration or unpleasant tastes and odors, it’s time to call a professional.
How to Choose the Right Plumber
When you’ve determined that you need professional help, the next step is to choose the right plumber for the job. Here are some tips:
- Check Licenses and Insurance: Ensure that the plumber is licensed and insured to protect yourself and your property.
- Read Reviews and Ask for Referrals: Look up online reviews and ask friends or family for recommendations to find a reliable plumber.
- Get Multiple Quotes: Obtain quotes from several plumbers to compare prices and services.
- Assess Their Experience: Consider the plumber’s experience with issues similar to yours.
By knowing when to call a professional plumber and how to choose the right one, you can ensure that your plumbing issues are resolved efficiently and effectively.
Conclusion: Your Plumbing DIY Journey
Embarking on DIY plumbing projects can be a rewarding experience, helping you build confidence and skills in maintaining your home’s plumbing system. By following the beginner plumbing tutorials and DIY plumbing solutions outlined in this article, you’re well on your way to becoming proficient in handling common plumbing issues.
Practical Tips for Continued Learning
To further enhance your skills, explore additional plumbing hacks for beginners, such as regular maintenance checks and learning to identify potential issues before they become major problems. Visiting resources like Team Enoch’s plumbing basics can provide valuable insights and tips for your DIY plumbing journey.
Resources for Further Learning
Continuing education is key to mastering DIY plumbing. Look for online tutorials, workshops, or local classes that can help you deepen your understanding of plumbing systems and improve your repair skills. With persistence and practice, you’ll be able to tackle more complex projects, enhancing your home’s plumbing and potentially saving on costly repairs.