As a homeowner, you’ve likely experienced the frustration of a leaky faucet or a clogged drain. While it’s tempting to call a professional plumber for every minor issue, having some DIY plumbing knowledge can save you time and money.
By learning a few simple plumbing techniques, you can tackle common tasks like unclogging drains, fixing leaky faucets, and even installing new fixtures. Not only will this empower you to handle minor emergencies, but it will also give you the confidence to take on more significant projects.
Key Takeaways
- Learn simple DIY plumbing techniques to tackle common tasks
- Save time and money by handling minor plumbing issues
- Gain confidence to take on more significant plumbing projects
- Understand when to call a professional plumber
- Improve your home’s maintenance and repair
Understanding Basic Plumbing Concepts
A solid grasp of plumbing basics empowers homeowners to handle simple repairs and maintenance. Understanding the fundamental concepts of plumbing is crucial for anyone looking to dive into DIY plumbing projects.
What is Plumbing?
Plumbing refers to the system of pipes, fixtures, and appliances that are installed in a home or building for the distribution of water, gas, and waste removal. It encompasses a wide range of components, including pipes, fittings, valves, and fixtures such as sinks, toilets, and faucets. Essentially, plumbing is the infrastructure that allows for the safe and efficient use of water and gas within a home.
Importance of Plumbing Systems
The plumbing system is vital for the health, safety, and comfort of a household. Properly functioning plumbing ensures that clean water is available for drinking, cooking, and hygiene, while also removing waste and preventing the spread of diseases. Moreover, a well-maintained plumbing system can help prevent costly repairs and reduce water consumption.
Common Plumbing Terms
Understanding common plumbing terms is essential for effective communication with professional plumbers and for tackling DIY plumbing projects. Some key terms include:
- Fixture: A device that uses water, such as a sink or toilet.
- Pipe: A tube used to convey water, gas, or waste.
- Valve: A device that controls the flow of water or gas.
- Fitting: A part used to connect, adjust, or control pipes.
Familiarizing yourself with these terms can make a significant difference in your ability to understand and work on your home’s plumbing system.
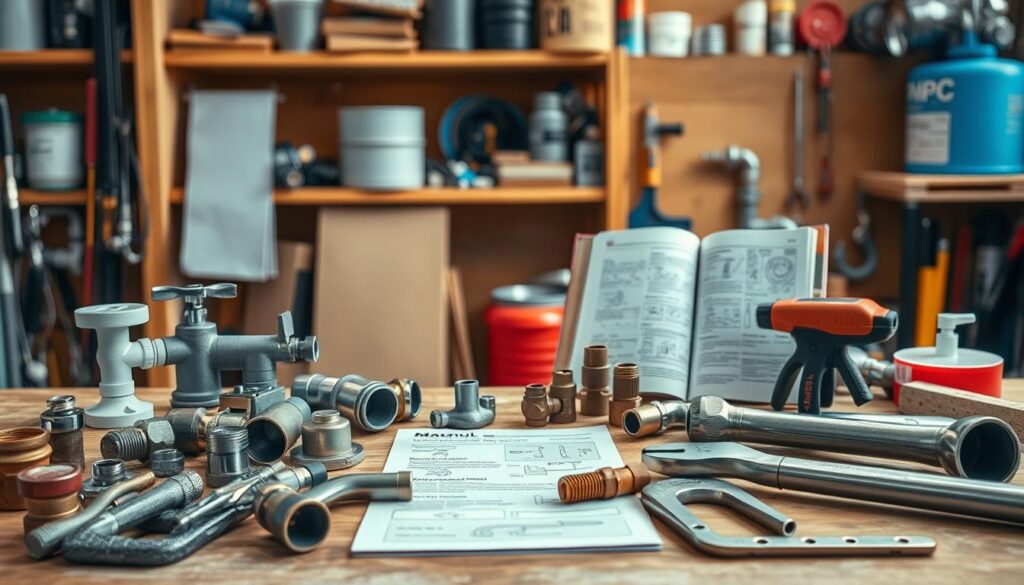
Tools Every DIY Plumber Should Have

DIY plumbing requires a specific set of tools to ensure tasks are completed efficiently and safely. Having the right equipment is vital for homeowners looking to undertake simple plumbing projects.
Essential Hand Tools
Hand tools are the backbone of any DIY plumbing project. Essential hand tools include adjustable wrenches, basin wrenches, and pipe wrenches, which are used for gripping and twisting pipes and fittings. Other necessary hand tools are channel-type pliers for gripping small objects, needle-nose pliers for reaching into tight spaces, and Teflon tape for creating watertight seals on threaded pipe connections.
Power Tools for Plumbing
While hand tools are indispensable, power tools can significantly ease the workload in DIY plumbing projects. A cordless drill is handy for driving screws and mixing materials like tile adhesive. For more complex tasks, a pipe cutter or a tubing cutter can be used to cut through pipes cleanly and efficiently. Additionally, a power auger can help clear clogs in drains and pipes.
Safety Gear for Plumbing Projects
Safety should never be compromised when working on DIY plumbing projects. Essential safety gear includes safety glasses to protect eyes from debris, work gloves to prevent cuts and abrasions, and a first aid kit on hand for any minor injuries. It’s also advisable to have a fire extinguisher nearby, especially when working with power tools or soldering.
By equipping yourself with the right tools and safety gear, you’ll be well-prepared to tackle a variety of DIY plumbing tasks, from simple fixes to more complex projects.
Water Supply Systems Explained
Water supply systems are complex networks that require a basic understanding to maintain and repair effectively. These systems are responsible for delivering clean water to various parts of your home, making them a crucial component of your household’s plumbing.
Types of Water Supply Systems
There are primarily two types of water supply systems: municipal and private. Municipal water supply systems are connected to the city’s water network, providing treated water directly to homes. Private water supply systems, on the other hand, rely on wells or other local water sources.
For a more detailed understanding, let’s look at the characteristics of each system:
| System Type | Water Source | Typical Use |
|---|---|---|
| Municipal | City water network | Urban and suburban areas |
| Private | Wells or local sources | Rural areas or off-grid homes |
Pressure Regulation in Plumbing
Pressure regulation is critical in plumbing systems to prevent damage from excessive pressure. Pressure regulators are devices that help maintain a consistent water pressure throughout your home.
To understand the importance of pressure regulation, consider that too high pressure can lead to leaks and pipe damage, while too low pressure can result in inadequate water supply to fixtures and appliances.
Understanding Fixtures and Fittings
Fixtures and fittings are essential components of your water supply system. Fixtures refer to devices that use water, such as sinks and toilets, while fittings are the parts that connect pipes together, like elbows and tees.
For homeowners looking to understand their plumbing system better, familiarizing yourself with these components can help in identifying and fixing issues more efficiently.
By grasping the basics of your water supply system, including the types of systems, pressure regulation, and the role of fixtures and fittings, you can take the first step towards becoming proficient in basic plumbing skills for DIYers.
Drainage System Fundamentals

Understanding the fundamentals of drainage systems is crucial for every homeowner to prevent common plumbing issues. A drainage system is designed to remove wastewater and sewage from your home, directing it to a sewer or septic system.
How Drainage Systems Work
Drainage systems work by using gravity to pull wastewater down through the pipes and out of your home. The system is designed with a network of pipes that slope downward to facilitate this flow. Vent pipes allow air into the system to prevent siphoning and ensure smooth drainage.
Common Drain Blockages
Clogged drains are a common issue that homeowners face. Hair, soap scum, grease, and food particles are typical culprits that can cause blockages. To avoid clogs, it’s essential to be mindful of what goes down your drains. For instance, using a drain screen can catch hair and other debris before they enter the pipes.
Some common signs of a drain blockage include slow draining, gurgling sounds, and unpleasant odors. If you notice any of these signs, it’s crucial to address the issue promptly to prevent further damage.
Appropriate Use of Drain Cleaners
Drain cleaners can be effective for clearing clogs, but they should be used with caution. Chemical drain cleaners can damage pipes and harm the environment. For a more eco-friendly approach, consider using a plunger or a drain snake to clear blockages. For more stubborn clogs, consider using a natural drain cleaner or a product that is specifically designed to be safe for your pipes.
For more DIY plumbing tips and to learn about plumbing basics, homeowners can refer to resources that provide detailed guides and tutorials. By understanding how drainage systems work and taking proactive steps, you can maintain a healthy and functional plumbing system.
Basic Pipe Types and Their Uses
For homeowners looking to tackle DIY plumbing projects, knowing the basics of pipe types is essential. Different types of pipes are used for various plumbing applications, and understanding their characteristics is crucial for a successful project.
PVC vs. Copper Pipes
PVC (Polyvinyl Chloride) pipes are widely used due to their corrosion resistance and affordability. Copper pipes, on the other hand, are valued for their durability and ability to withstand high temperatures. When deciding between PVC and copper, consider the specific needs of your project.
For instance, PVC is often used for drainage systems because it is resistant to chemicals and easy to install. Copper is typically used for water supply lines due to its excellent conductivity and resistance to bacteria growth.
“The choice between PVC and copper pipes depends on the specific application, budget, and personal preference.”
Galvanized Steel Pipes Overview
Galvanized steel pipes are coated with a layer of zinc to protect against rust. They are strong and can withstand high water pressure, making them suitable for main water supply lines. However, they can corrode over time, especially when used with certain water chemistries.
PEX Piping Benefits
PEX (Cross-linked Polyethylene) piping has gained popularity for its flexibility, resistance to freezing, and ease of installation. PEX is suitable for both hot and cold water supply lines and is less likely to scale or corrode compared to traditional metal pipes.
| Pipe Type | Common Uses | Benefits |
|---|---|---|
| PVC | Drainage systems, sewage | Corrosion-resistant, affordable |
| Copper | Water supply lines | Durable, antimicrobial |
| Galvanized Steel | Main water supply lines | Strong, high pressure resistance |
| PEX | Hot and cold water supply | Flexible, resistant to freezing |
For more information on plumbing tools and pipes for DIY projects, visit Top Plumbing Tools and Pipes for DIY. Understanding the different pipe types and their uses is a fundamental aspect of any plumbing guide for DIYers, enabling homeowners to make informed decisions for their simple plumbing projects.
Essential Plumbing Techniques for DIYers

Mastering essential plumbing techniques is crucial for DIYers to tackle home projects effectively. Understanding the basics can save time and money, and empower homeowners to handle common plumbing tasks with confidence.
How to Cut and Join Pipes
Cutting and joining pipes are fundamental skills in DIY plumbing. To cut pipes, you’ll need a pipe cutter or a hacksaw. For PVC pipes, a simple pipe cutter will suffice, while copper pipes may require a more specialized tool. When joining pipes, ensure that the ends are clean and free of debris. Use appropriate fittings and adhesives or soldering techniques based on the pipe material.
For instance, PVC pipes are joined using solvent cement, which creates a strong and watertight seal. On the other hand, copper pipes are typically soldered together using a torch and solder. It’s essential to follow safety guidelines when working with these materials and tools.
| Pipe Material | Cutting Tool | Joining Method |
|---|---|---|
| PVC | Pipe Cutter | Solvent Cement |
| Copper | Hacksaw or Pipe Cutter | Soldering |
| PEX | PEX Cutter | Crimping or Clamping |
Soldering Basics for Copper Pipes
Soldering copper pipes requires some practice to master, but it’s a valuable skill for any DIY plumber. Start by cleaning the pipe ends and fittings with a wire brush or sandpaper. Apply flux to the cleaned areas and assemble the joint. Heat the joint with a propane torch until it’s hot enough to melt the solder. Then, apply solder around the joint, allowing it to flow into the gap between the pipe and fitting.
For more detailed guidance on soldering copper pipes, you can refer to resources like essential plumbing skills for home projects.
Tips for Installing New Fixtures
Installing new fixtures can greatly enhance the functionality and appearance of your home. When replacing a faucet or toilet, start by shutting off the water supply. Follow the manufacturer’s instructions for disassembling the old fixture and assembling the new one. Ensure all connections are secure and test the fixture to check for leaks.
- Use Teflon tape on threaded connections to prevent leaks.
- Check the fixture’s compatibility with your existing plumbing setup.
- Test the fixture thoroughly after installation to ensure proper function.
By mastering these essential plumbing techniques, DIYers can confidently tackle a variety of home projects, from simple repairs to more complex installations. Whether you’re a beginner or looking to refine your skills, understanding the basics of plumbing is key to successful DIY plumbing projects.
Fixing Common Plumbing Issues
Common plumbing problems like leaky faucets, running toilets, and slow drains can be a nuisance, but there are simple fixes you can try at home. Understanding the causes and knowing how to address them can save you from unnecessary expenses and hassles.
Leaky Faucets: Causes and Solutions
A leaky faucet is not just annoying; it can also waste a significant amount of water. The most common cause of a leaky faucet is a worn-out or damaged O-ring or washer. To fix it, you’ll need to turn off the water supply, disassemble the faucet, and replace the worn-out parts. For beginner plumbing tips, start by ensuring you have the right tools, such as an adjustable wrench and a screwdriver.
Running Toilets: Diagnosis and Repair
A running toilet can be a significant waste of water and increase your utility bills. The issue is often related to the flapper valve not sealing properly or the float being set too high. To diagnose, check the flapper for any signs of wear or misalignment and adjust or replace it as needed. Adjusting the float arm to ensure it shuts off the water at the correct level can also resolve the issue. These are considered simple plumbing projects that can make a big difference.
Slow Drains: Simple Fixes
Slow drains are a common issue in many households. They can be caused by a buildup of hair, soap, and other debris. For a simple fix, try using a drain snake to remove any blockages. Baking soda and vinegar can also be effective; pour half a cup of baking soda down the drain, followed by half a cup of vinegar. Let it sit for a few hours before rinsing with hot water. These plumbing tips for homeowners can help you avoid more serious problems.
By addressing these common plumbing issues, homeowners can avoid more significant problems down the line. Regular maintenance and knowing how to fix simple issues can extend the life of your plumbing system.
Installing a Faucet: Step-by-Step Guide

With the right tools and a bit of patience, DIYers can successfully install a new faucet. This guide will walk you through the process, from preparation to completion, ensuring that you can replace your faucet with confidence.
Preparing for Installation
Before starting the installation, it’s crucial to prepare your workspace and understand the requirements. First, turn off the water supply to the faucet you’re replacing. This is typically done by locating the shut-off valves under the sink and turning them clockwise. Once the water supply is off, drain the remaining water from the pipes by opening the faucet.
Clear the area under the sink of any items that could obstruct your work. Having a bucket or container handy to catch any spills is also a good idea. Familiarize yourself with the manufacturer’s instructions for the new faucet, as different models may have specific installation requirements.
Tools Needed for Faucet Installation
Having the right tools is essential for a smooth installation process. You’ll typically need:
- An adjustable wrench or basin wrench
- Channel-type pliers (for removing old faucet mounts)
- Needle-nose pliers (for reaching small areas)
- Teflon tape
- A screwdriver (flathead or Phillips, depending on the faucet)
Check the manufacturer’s instructions for any specific tools required for your new faucet. Ensuring you have everything before starting can save time and frustration.
Finalizing the Installation Process
Once you’ve installed the new faucet according to the manufacturer’s instructions, it’s time to finalize the installation. Turn on the water supply and check for leaks around the faucet’s connections. Tighten any loose fittings as needed.
Test the faucet by running both hot and cold water through it. This will help you identify any issues with the installation, such as leaks or improper water flow. Make any necessary adjustments to ensure the faucet operates smoothly.
By following these steps and using the right tools, you can successfully install a new faucet, enhancing your sink’s functionality and your DIY plumbing skills.
Toilet Repairs and Maintenance
Understanding how to diagnose and fix toilet problems can significantly reduce water waste and lower utility bills. Toilet issues are common and can often be resolved with DIY repairs. By mastering a few simple techniques, homeowners can save money on plumbing costs and avoid the inconvenience of having a malfunctioning toilet.
Diagnosing a Clogged Toilet
A clogged toilet is one of the most frustrating plumbing issues homeowners face. The first step in resolving this issue is to diagnose the cause of the clog. Check if the clog is due to excessive toilet paper or a foreign object. Using a plunger is usually the first line of defense. Ensure the plunger is properly seated over the drain hole, then push down slowly and lift up quickly to create suction. If the clog persists, consider using a toilet auger to remove the blockage.
For more stubborn clogs, or if you’re not comfortable using a plunger or auger, it might be worth consulting resources like The Family Handyman for additional DIY plumbing tips.
| Tool | Use | Tip |
|---|---|---|
| Plunger | Creates suction to remove clogs | Ensure proper seating over the drain hole |
| Toilet Auger | Removes blockages further down the drain | Feed the cable carefully to avoid scratching the toilet |
Replacing a Flapper Valve
The flapper valve is a crucial component of the toilet tank, controlling the flow of water into the bowl. A faulty flapper can lead to continuous running water, wasting water and increasing utility bills. To replace the flapper, first turn off the water supply to the toilet, then drain the tank. Remove the old flapper and replace it with a new one, ensuring it’s properly seated and connected to the flush handle.
“A well-maintained toilet not only saves water but also reduces the need for costly repairs down the line.” – Plumbing Expert
Toilet Tank Troubleshooting
Issues with the toilet tank can lead to a variety of problems, including continuous running water or failure to flush properly. Common issues include a misaligned or faulty flapper, improper water level, or a clogged overflow tube. Check each component systematically to identify and fix the problem. Adjusting the water level or cleaning the overflow tube can often resolve these issues.
For complex issues or if you’re unsure about how to proceed, consider consulting plumbing experts who can provide professional guidance and service.
Understanding Plumbing Codes and Regulations

Understanding plumbing codes and regulations is crucial for homeowners to ensure their DIY projects are safe and compliant with local laws. Plumbing codes are in place to safeguard public health and safety by establishing standards for plumbing systems.
Importance of Local Plumbing Codes
Local plumbing codes are essential because they dictate the minimum requirements for plumbing systems within a specific jurisdiction. These codes cover aspects such as pipe sizing, material specifications, and installation practices. Compliance with these codes is not just about avoiding legal issues; it’s fundamentally about ensuring the safety and integrity of your plumbing system. For instance, using the correct materials and techniques as per local codes can prevent leaks, contamination, and other hazards.
Moreover, local plumbing codes are regularly updated to reflect new technologies and best practices. Staying informed about these updates is crucial for homeowners who wish to undertake DIY plumbing projects. This knowledge not only helps in avoiding costly rework due to non-compliance but also ensures that the plumbing system is efficient and safe.
How to Find the Right Codes for Your Area
Finding the applicable plumbing codes for your area can seem daunting, but there are several resources available to help. The first step is to visit your local government’s website or contact your local building department. Many municipalities provide access to their plumbing codes online, either through their official websites or through a dedicated building codes portal.
Additionally, professional plumbing associations and organizations often provide resources and guides to help navigate local plumbing codes. For example, the International Association of Plumbing and Mechanical Officials (IAPMO) offers a range of resources, including code books and online databases, that can be invaluable for understanding local regulations. Homeowners can also consult with licensed plumbers who are familiar with local codes and practices.
Permits and Inspections
Before commencing any plumbing work, it’s essential to determine if a permit is required. Permits are typically necessary for significant plumbing projects, such as installing a new water heater or reconfiguring the plumbing layout. The permitting process involves submitting plans and specifications to your local building department for review and approval.
Once the work is completed, an inspection is usually required to verify that the plumbing work complies with local codes and regulations. Inspections can be conducted by local building officials or certified inspectors. For complex projects, it’s advisable to schedule inspections at various stages to ensure compliance and avoid potential rework. Homeowners can find more information on the permitting and inspection process through their local government’s website or by contacting local building authorities. For emergency plumbing services, consider reaching out to emergency contractor services for professional assistance.
Water Heater Basics for Homeowners
As a homeowner, knowing the basics of your water heater can save you from unexpected expenses and enhance your home’s comfort. Water heaters are a vital part of daily life, providing hot water for various household needs.
Types of Water Heaters
There are several types of water heaters available, each with its unique features and benefits. The most common types include:
- Conventional Storage Tank Water Heaters: These are the most common type, storing and heating water in a tank.
- Tankless Water Heaters: Providing hot water on demand without a storage tank.
- Heat Pump Water Heaters: Using electricity to move heat from the air or ground to heat water.
Common Problems and Solutions
Water heaters can experience several issues, including leaks, inadequate hot water, and strange noises. Understanding these problems and their solutions can help homeowners troubleshoot and potentially fix issues without calling a professional.
- Leaks: Often caused by loose connections or faulty valves. Checking and tightening connections can resolve the issue.
- Inadequate Hot Water: Could be due to a malfunctioning heating element or thermostat. Replacing these parts can restore functionality.
Maintenance Tips for Longevity
Regular maintenance is key to extending the lifespan of your water heater. Simple tasks such as checking the temperature and pressure relief valve, inspecting for leaks, and flushing the tank annually can significantly improve its efficiency and longevity.
By understanding the basics of your water heater, including its type, potential issues, and maintenance needs, homeowners can ensure their water heater operates efficiently and effectively, providing comfort and convenience for years to come.
When to Call a Professional Plumber

DIY plumbing has its limits, and knowing when to call in a professional can save time and money. While many plumbing tasks can be handled by homeowners, certain situations require the expertise of a licensed plumber.
Signs You Need Expert Help
There are several indicators that suggest it’s time to call a professional plumber. These include:
- Persistent leaks that won’t stop
- Low water pressure throughout the house
- Complex pipe issues, such as frozen or burst pipes
- Sewage backups or overflows
If you’re experiencing any of these issues, it’s crucial to seek professional help to prevent further damage to your plumbing system.
DIY Limitations in Plumbing
While DIY plumbing can be cost-effective for simple tasks, it’s essential to recognize its limitations. Complex plumbing jobs often require specialized tools and knowledge, making them more suitable for professionals. For instance, tasks like installing a new water heater or dealing with intricate pipe networks are best handled by experienced plumbers.
For more information on the pros and cons of DIY plumbing versus hiring a, you can refer to detailed guides and resources available online.
Cost vs. Benefit of Professional Services
Hiring a professional plumber may seem expensive upfront, but it can save you money in the long run by preventing costly repairs and ensuring that the job is done correctly. Here’s a comparison of the costs associated with DIY plumbing versus hiring a professional:
| Task | DIY Cost | Professional Cost |
|---|---|---|
| Fixing a Leaky Faucet | $20-$50 | $100-$300 |
| Installing a New Water Heater | $500-$800 (parts only) | $1,000-$2,000 (including labor) |
| Unclogging a Drain | $10-$30 (DIY tools) | $100-$500 (depending on complexity) |
While DIY plumbing is a viable option for simple tasks, understanding when to call a professional plumber is crucial for more complex issues. By recognizing the signs that indicate the need for expert help and weighing the costs and benefits, homeowners can make informed decisions about their plumbing needs.
Maintaining Your Plumbing System
Regular maintenance is key to extending the life of your plumbing system. By performing routine checks and addressing issues promptly, homeowners can prevent costly repairs and ensure their system operates efficiently.
Regular Checks
Homeowners should regularly inspect their plumbing system for signs of wear and tear. This includes checking for leaks under sinks, around toilets, and near water heaters. Basic plumbing skills for diyers, such as knowing how to inspect and maintain pipes, can help identify potential issues early.
Signs of Failure
Being aware of the signs of plumbing system failure can help homeowners take proactive measures. Look out for unusual noises, water discoloration, and decreased water pressure. For more plumbing tips for homeowners, consider visiting resources that offer guidance on simple plumbing projects.
Long-Term Care
To ensure long-term care of your plumbing system, consider implementing simple plumbing projects, such as installing water filters or checking the condition of your pipes. Regular maintenance and inspections can help prevent major issues and extend the life of your plumbing system.